I have shown bits and pieces of this album before, but today I'm showing you every page. Warning: this post is photo heavy!
I found this old Weekly Reader book at the thrift store and fell in love with this image. I cut the front and back covers off the book, and used a small ball chain to bind it.
For the title, I used a "Hello, my name is" label.
I covered the inside of the front and back covers with colorful pattern papers.
I added a tag at the lower left corner that says, "Summer Fun 2011."
I overlapped the tag with a flower and used tickets for leaves.
My introduction says, "This is a story of how one family spent one summer having fun together."
Then I used something different for every page- the one on the right is a paint chip.
Home Depot has paint chips that are the perfect size to use as pages in mini albums.
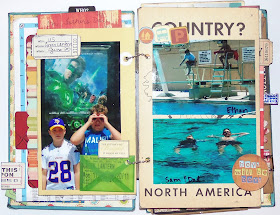
I used pattern paper to cover the back of the paint chip (on the left) and on the right is a journaling card.
The page on the right is part of a map.
You can see that almost every page has some sort of tab. This makes it easy to turn the pages.
I used all sorts of things for pages. On the right is a small paper bag.
Gas stations have the cutest paper bags right at the check out. I have been known to ask if I can have one or two, and I've never been told no.:)
I think these make great pages in a mini album, too.
The page on the right is part of a baseball card holder trimmed to fit.
The page on the right is an envelope.
Envelopes of any size work great in an album like this- they give you room to store
extra photos and mementos.
The page on the right is an old flashcard.
I find lots of my stuff at thrift stores, but if you look around, you may find lots of items like this- in your office, in your kids' school papers,at work. . .
I always try to add a bit of journaling to each photo.
In the moment, I'll remember what was going on in the picture, but five years down the road,
I may not.
Plus, it is nice for other people to know what's going on when they look through my albums.
The page on the right is two pieces of graph paper sewn together (to make it thicker).
I used another paint chip here.
Random albums like these also give me a chance to use up different embellishments
that I have in my stash.
The page on the right is ledger paper trimmed to fit.
The page on the right is an envelope that came in the mail. I just reused it.
The page on the right is just a page out of an old book.
Notice how my pages are all different sizes.
For my journaling on the left, I used a blank Guest Check from a restaurant.
The page on the right is a pamphlet from one of the places we stopped. I added a photo to it.
Pamphlets always add a cute element to scrapbooking.
The page on the left is just ledger paper adhered to the back of a photo.
Here is the back of another pamphlet.
You can see that I lined the back cover with the same pattern paper that I used on the front cover.
Here's the back of the album- I didn't do anything special here.
I know that summer has already started, but you could make one of these to document what you do in the months of July or August. You could also do a book like this to document the month of December which tends to be busy.
Since my month by month scrapbook has become so detailed over the years, I no longer do a summer album like this because they become just duplicates of one another.
Although, looking at this makes my fingers itch to do one. . .
Thanks for stopping by and God bless.
In God is my salvation and my glory; the rock of my strength, and my refuge, is in God.
Psalm 62:7


That is SO impressive! You are so talented!
ReplyDeleteLove the series of mini albums. you did a very good job
ReplyDeleteI think i would love to do this too with all my photos