My friend's son had an awesome year in senior band- he went to state and
was selected for several elite bands.
My friend had kept photos, programs, name tags, and all sorts of stuff from these experiences,
and she was hoping to have them organized in some sort of manner.
There's where I came in.
She asked if I could figure out a way to display/store them.
Here's what I did. . .
I made a brag box with a mini album.
I started with a decorative box that I found at Michaels.
I chose this one because I felt all the sayings on the cover were very fitting:
do what you love,
inspire others to greatness,
create your own happiness,
live life to the fullest.
I placed his name in the lower right corner
using of one of the name tags from the stack of mementos.
The box opens to show the mini album.
(You'll see photos of this in a moment.)
Under the album is where I put the mementos.
My friend kept her son's ID tag and some visitor badges.
She also kept a local magazine that featured a photo of her son.
I placed this at the bottom of the box.
I added a page tab to the specific magazine page to make it easy to find the photo.
Here's the mini album.
I used two different size page protectors: 8 1/2"x 11" and 4"x 6".
For the cover, I used another tag from the stash of keepsakes.
I placed it on a piece of music themed scrapbook paper.
When my friend originally gave me the folder of stuff,
I asked her to sort it and place the photos with the correct papers.
That way I could put them all in the right order.
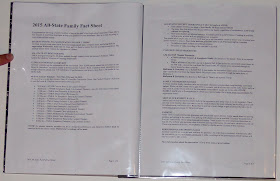
I used the smaller page protectors for the photos, and the larger ones for the documents.
Here the small page protector flips over to show another photo on the left
and an acceptance letter on the right.
To make the page protectors stick together,
I used double sided tape and lined them up all at the seams.
Then I trimmed a piece of thick pattern paper to fold around the edge and act as the binding.
You can go here to see a specific tutorial on turning page protectors into a mini album.
The page on the left wasn't a whole sheet, so I adhered it to a piece of scrapbook paper.
There's another photo in the center, then I placed a newspaper article on the right.
This event had several photos, so I stacked two small page protectors.
I really like the different size pages.
I decided to place the photos on the left on their own page.
Two of them pictures of the actual band schedule.
I only had one photo to place in the small page protector here, so I backed it with a piece of paper.
This section had several photos, so I placed these two small page protectors,
with a third one behind them.
If my friend would like to add any stories or anecdotes,
I have labels for her to adhere to the pages.
With everything in order, the reader can actually follow his performances in the order they occurred.
I haven't shown this to my friend yet, but I sure hope she'll like it.
If you've got a stack of mementos that you don't know what to do with, try this project.
It's a very manageable project and can be used for any subject matter.
Thanks for stopping by and God bless.
Every good gift and every perfect gift is from above
James 1:17
This post is linked to Plucky's Second Thought, Embracing Change,
Tatertots and Jello, and Tip Junkie.
Tatertots and Jello, and Tip Junkie.


Wow what a great way to keep everything neat & organized. Thanks for sharing at Cooking & Crafting with J&J!
ReplyDeleteAww! This is such a great idea!
ReplyDeleteThanks for joining Cooking and Crafting with J & J!