Thursday, February 28, 2013

Thrifty Thursday #57

     Today's Thrifty Thursday would be better titled "Freebie Friday," because I didn't pay one cent for these items!

 
This is an old slide projector that a friend from church gave me. He has a job picking up dumpsters- except for the heavy labor, this would be a perfect job for me. I would love first crack at the stuff people are throwing away!  
 
I'm excited to have this because I've picked up two sets of slides while thrifting.
Now I can have a slide show!:)

 
How cool is this old record player? I haven't plugged it in yet to see if it works, but I'm hoping!
The same friend also gave it to me. He knows that I like old stuff and was happy to share these items with me, although he did mention that he hoped my hubby wouldn't be mad at him for adding to my collection.:)

 
Look at all these cabinet doors. . . aren't they lovely?
I found them laying at my next door neighbors curb.
They are in excellent shape and did not warrant being thrown away.
I didn't even wait for it to get dark before I brought these home. I made three trips to get all 21 of them.

 
Don't they look like frames? I'm thinking chalkboards, framed quotes. . . all sorts of things!
 
Be alert while you're driving in your neighborhood. You can find some amazing things while curb shopping!
 
Thanks for stopping by and God bless.
 
May He grant you according to your heart's desire,
and fulfill all your purpose.
Psalm 20:4
 
This post is linked to Junkin' Joe and Apron Thrift Girl.
 

Wednesday, February 27, 2013

Layout of the Week #44- Creating a Flip Page for Extra Photos

     Sometimes when I sit down to scrap photos, I try to fit several on the page, but I'm not always able to. Today we are going to create a flip page on our layout to allow extra room for photos.

 
Here's the layout we'll be creating.
The part with the photos flips up and has room underneath to add more pictures.

 
To make it, you'll need:
three pieces of coordinating pattern paper- one 12"x12" piece and two 8 1/2" x 11" pieces
letter stickers for the title
journaling card (I used two index cards)
embellishments to go with your theme
adhesive
 paper trimmer
 
 
Take your first 8 1/2"x11" piece of paper (vertically) and fold the top two inches down which will make a two inch flap. Fill the rest of the paper with photos.


Place adhesive on the flap and center the smaller page onto the larger page.

 
Then take your second 8 1/2" x 11" paper and trim two inches off the end. Adhere it directly behind the top mat. This will act as a mat for more photos and will cover up the flap from the top page.
It should look like this.


Trim your photos to make them fit.

 
Add your title to the lower right corner of the flip-up mat.
I also used a ticket to act as a tab for flipping the page up. If you don't have a ticket, cut a small rectangle of paper and it will work.

 
To finish it off, add embellishments to the top right corner and the bottom left corner of the layout.

 
Here is what it looks like with the page flipped up. I attached my journaling cards to the backside of the flip up. If you have more photos, you could place them there as well.
 
I hope this encourages you to sit down with a bunch of photos and get them scrapped!
 
Thanks for stopping by God bless.
 
 
The Lord looks down from heaven upon the children of men,
to see if there are any who understand, who seek God.
Psalm 14:2
 
 
 This post is linked to Tater Tots and Jello and My Repurposed Life


Tuesday, February 26, 2013

Recipe of the Week #56- Burrito Casserole

Burrito Casserole
8 small flour tortillas
2 cups refried beans
2 tbsp canola oil
1/2 small red onion, diced
1-1 1/2 lbs beef
1 1/2 cups salsa
1 1/2 cups cheddar cheese
jalapeno peppers

Preheat oven to 350 degrees. Cut five tortillas into strips. Set aside.
Line 13"x9" casserole dish with remaining tortillas. Spread beans over the tortillas.

Heat the oil in a large skillet. Add the onion and beef and saute for five minutes. Drain the grease, then add the salsa. Pour mixture over beans. Cut jalapeno peppers and sprinkle over meat mixture. Top with tortilla strips and cheese. Bake until cheese melts. Top with sour cream and tomatoes.

My hubby loves this dish. Every so often I'll make a pan of it then cut it into serving sizes for him to take for work lunches.

I am a big fan of casseroles. They're easy to make, good to eat. . .is that old-fashioned of me? :)

Thanks for stopping by and God bless.


He who walks with integrity walks securely.
Proverbs 10:9

This post is linked to Five Days Five Ways and Happy Hour Projects.

Monday, February 25, 2013

Old Brooch or Necklace?!

     If you've read this blog for any amount of time, I'm sure you've noticed how much I love secondhand shopping. So many times when I find an item, I know just what I'm going to do with it. . . it just might take me a while to do it.


     This is one of those projects.
 
 
I found this awesome brooch at my favorite thrift store- at least a year ago- for fifty cents.
I knew that I wanted it to be a pendant on a necklace.
 
 
I pried the pin off the back with a pair of needle nose pliers. It wasn't too hard.
Then I glued one of these bails to the back (found these at Michaels).

Fast forward to two weeks ago when I took the pendant with me to Hobby Lobby to find some matching beads. I picked up three sets of pearls- black, pink, and green.


Then today, I sat down and strung them onto some wire.
 
Once I finished, I had enough beads to make a matching bracelet.
 
And some matching earrings.

     If you're a jewelry maker, don't forget to think outside the box when it comes to what kinds of pieces you use. Whether you're secondhand shopping or going through your grandma's old jewelry, keep your eye out for cute pieces like this that you can modify. You'll be glad you did!

     Thanks for stopping by and God bless.


The Lord is my light and my salvation; Whom shall I fear?
The Lord is the strength of my life; Of whom shall I be afraid?
Psalm 27:1

This post is linked to Today's Creative Blog, Tip Junkie, Craft-O-Maniac, Making the World Cuter, Between Naps on the Porch, and Skip to My Lou.

Friday, February 22, 2013

Scrabble Word Decor

     I often find old Scrabble games while I'm thrifting, and they're never more than a dollar, so I always pick them up. Needless to say, I now have several sets of Scrabble tiles.
     If you happen to have an old Scrabble board game, take a look at this cute and easy project. If you don't have one, take a look anyway. It may make you want to find one!

 
I spelled out a word, glued it to the letter holder, and placed it on a shelf.
These days, you can't find home decor any cheaper than this:)

 
You can spell out any word that you'd like.

 
All you need to make this is:
Scrabble tiles
Scrabble tile holder
E-6000 glue
 
 
I even made a set for a friend who is getting married.
I didn't know when I made these, but Scrabble happens to be their favorite game!

 
You could make these as gifts- think how cute "Teach" would be for a teacher!
They would also be cute for any type of shower- baby, wedding, housewarming. . .
 
If you're wondering what I did with the boards that came with the games, go here to see.
 
Thanks for stopping by and God bless.
 
He restores my soul;
He leads me in the path of righteousness
for His name's sake.
Psalm 23:3


Thursday, February 21, 2013

Thrifty Thursday #56

     Lately, I've been fitting a thrift store run into my weekly grocery shopping trip. Not because the thrift stores are near where I grocery shop, because they really aren't. Just because when I have a little time out and about, I take advantage of it and try to do a little something fun.
     I got a few goodies on this week's run. . .

 
I found this darling Pyrex mixing bowl that was marked $2. I thought that was a little high as it was a small bowl, so I asked the gentleman working the cash register if I could give him $1 for it. He thought long and hard, then agreed. Score! 
I have a friend who asked me to be on the lookout for glass mixing bowls for her. I love to have a mission when I'm secondhand shopping, so I gladly agreed to keep an eye out for these.

 
This cute little cup and saucer was only fifty cents. I have another friend who has me watching for teacups for her. It's so nice to be able to pick up cute things that I don't have to find a place for when I get home!

 
I don't usually buy clothes secondhand, but I spotted this summer dress that looks brand new for only $3 and couldn't pass it up. I love the style, and I love the color. Even if I just wear it around the house, it was indeed a bargain.

 
I got this set of four records for $1. When I see a good deal on records, I am always tempted to buy them. If you're wondering why, take a look here and here and you'll see some projects in which I've used vinyl records.
 
I hope you all have good luck in your thrift store shopping and yard sale-ing this week!
Thanks for stopping by and God bless.
 
Show me your ways, O Lord;
Teach me Your paths.
Psalm 25:4


Tuesday, February 19, 2013

Recipe of the Week #55- M&M Sugar Cookies


M and M Sugar Cookies
2 1/4 cups flour
1 tsp baking powder
1/2 tsp baking soda
1/2 tsp salt
1 1/2 cups sugar, plus 1/3 cup for rolling
2 oz cream cheese, cut into 8 pieces
6 tbsp butter, melted and still warm
1/3 cup vegetable or canola oil
1 large egg
1 tablespoon milk
2 teaspoons vanilla 
1-1 1/4 cups M and Ms

Preheat oven to 350 degrees.

In a medium bowl, whisk together the flour, baking powder, baking soda, and salt. Set aside.

Put 1/3 cup sugar in a pie plate and set aside.

Combine 1 1/2 cups of sugar and cream cheese in a large bowl. Pour in the warm butter and whisk to combine. Whisk in the oil, then the egg, milk, and vanilla and mix until smooth.

Fold the dry ingredients into the wet. While mixing them together, add the M and Ms to the dough. Continue mixing until a soft dough comes together. Do not overstir. Refrigerate 2-3 hours.

Roll the dough into a balls and roll in the sugar.
Flatten the dough balls. Bake the cookies for about 10-12 minutes. Do not overbake- these should be soft, chewy cookies.

These cookies are fantastic! I've made M and M cookies before, but I think the cream cheese in this recipe is what puts these over the top! These did not last long at our house!

I found this recipe here.

Thanks for stopping by and God bless.

Charm is deceitful and beauty is passing,
but a woman who fears the Lord,
she shall be praised.
Proverbs 31:30


This post is linked to Embracing Change, I Heart Naptime, and 52 Mantles.

Monday, February 18, 2013

Tray Turned Chalkboard

     Sometime ago I got this tray at a thrift store (you can see the post here). I knew from the get-go that it was destined to be a chalkboard.
Now, thanks to a little spray paint, it is!


I'm pretty pleased with the results.

To make it, I covered the edges with painter's tape. Then I applied two coats of Martha Stewart's Metal Primer Paint (got it at Michael's).
Once that dried, my hubby applied two coats of chalkboard spray paint.
I gave it 24 hours to dry, then I conditioned it by covering the entire chalkboard surface with chalk and erasing it. 

     You can cover pretty much anything with chalkboard paint. Pinterest is full of ideas. I'd love to tape off a rectangle on the pantry door and turn it into a chalkboard.

     When you're out and about- especially at thrift stores and/or yard sales, take a good look. You don't have to use items for their intended purpose. After all, this tray won't be used for carrying drinks anymore!

     Thanks for stopping by and God bless.

The earth is the Lord's, and all its fullness,
the world and those who dwell within.
Psalm 24:1

This post is linked to Sassy Little Lady,  Craft-O-Maniac, Between Naps on the Porch, Making the World Cuter, and Skip to My Lou.

Friday, February 15, 2013

For the Record. . .

     Take a look at this quirky cake stand. . .

 
made from a record!

 
All I did was glue a candlestick to the bottom of a vinyl record.

 
Isn't this cute?
All you need to make it is
vinyl record
candlestick
E-6000 glue
 
Glue the candlestick to the bottom of the record. Give it 24 hours to dry. For the record, I think this is one of the easiest projects I've ever made!
 
Thanks for stopping by and God bless.
 
 The Lord is my strength and my song; he has become my salvation.
He is my God, and I will praise him, my father's God, and I will exalt him.
Exodus 15:2
 

Thursday, February 14, 2013

Thrifty Thursday #55

     Happy Valentine's Day!

     I'm back with part two of my estate sale treasures. Last week I showed you what I got on my first visit. Today I'll show you what I got when I went back the next day- which was the third day of the sale- everything was half off, Baby! I think by now, you all know that I love secondhand shopping- but when I get to do it at half off, I am walking on sunshine!


     I picked up some more vintage hankies for only $1.25.


I got this beautiful hand-stitched piece for $.75.
I have two more of these from a previous yard sale. I need to figure out something really cute to do with them.
 

These old Viewmaster reels were only $5. They are really old. I'm thinking of selling them on Ebay. Anybody ever tried that?


I got this earring and broach set for $2 (only one earring is in the photo, but it came with two). I've seen lots of vintage jewelry repurposed on Pinterest. Can't wait to do something with these.
 
 
Look at all these old stamps! I got all these for less than $2. The ones that aren't in a bag are from Brazil!
 
 
I had seen this big bag full of stamps on my first visit, but I didn't want to pay $15 for them. At fifty percent off, they became something I needed!
Keep watching for projects using these:)
 

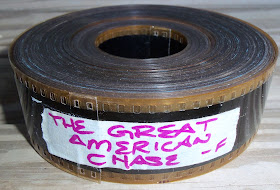
While I was waiting in line to pay (which was a long, slow line, I tell you!), I found this film. It's not on a reel. I need to do a little research and see if it's worth anything. If not, I'll be cutting that fella up for projects!

     The next time you drive by a sign advertising an estate sale, give it a whirl! You never know what you'll find.
     Thanks for stopping by and God bless.


Preserve me, O God, for in You I put my trust.
Psalm 16:1

This post is linked to Apron Thrift Girl, My Girlish Whims, and My Repurposed Life.

Tuesday, February 12, 2013

Recipe of the Week #54- Philly Cheesesteak Sloppy Joes

 
Philly Cheesesteak Sloppy Joes
1 tbsp olive oil
1 lb ground beef
1 medium onion, sliced
1 green pepper, sliced
2 tbsp steak sauce
1 cup beef stock
salt and pepper to taste
1 tbsp butter
4 hamburger rolls
4 slices provolone or American cheese

Pre-heat oil in a large skillet over medium high heat until shimmering. Add ground beef and brown 5 minutes, breaking into chunks. Add the onions and pepper and saute for 3 to 4 minutes. Slowly add the beef stock and steak sauce. Simmer about 5-10 minutes until the sauce is reduced by half.

In another medium skillet, melt 1 tbsp butter over medium heat. Toast rolls.
Serve mixture over rolls with a slice of cheese melting on top.
 
Oh. My. Word. This meal was so good! I don't know if it was the flavor of the beef or the toasted buns- or the mixture of both, but I totally loved this! It was indeed a hit with my family- except for my younger goofball son who isn't overly fond of loose meat sandwiches. He said it would be ok for us to have again in three months. Much to his dismay and the rest of our delight, we'll be having it much sooner than that!
 
I found this recipe here.
 
O my soul, you have said to the Lord,
"You are my Lord, my goodness is nothing apart from You."
Psalm 16:2
 
 This post is linked to 52 Mantles, Too Much Time On My Hands, and Tip Junkie.
 

Monday, February 11, 2013

Valentine Crafts and Teacher Gift Ideas

    Here are a few Valentine's crafts.  .  .

 
This is a set of old spools that are full of love. If you'd like to see how I made them, you can go here.
 
 
I made this Valentine's bunting out of old playing cards. It was a super easy project. If you have twine, playing cards, and a set of letter stickers, you can make this. You can go here to see how.
 

I made two strands of this heart garland- one out of old book pages and this one out of an old comic book. You can see the tutorial here.
 
These first three projects were made for Valentine's Day, but I liked them so much, I kept them up all year!
 
 
Here is an idea for a teacher gift. Send her favorite soda with a little chocolate. This project is super easy, but perfect for sending to school on Valentine's Day. After all, who doesn't like a little treat? You can go here to see more.
 
 
This is one of my favorite discoveries of all time- chocolate covered gummy bears. Heavens to Betsy- they are sooooooo good! Whip up a batch of these, then put them in a snack size Ziplock bag with a paper doily stapled over the top. What a delightful gift! You could give a bag of these to your co-workers, grandparents, or your child's teacher. You can see how to make these here.
 
 
Thanks for stopping by and God bless.


To God our Savior, who alone is wise,
be glory and majesty, dominion and power,
both now and forever. Amen.
Jude 1:25

This post is linked to Tip Junkie, Too Much Time On My Hands, Craft-O-Maniac, Making the World Cuter, Between Naps on the Porch, and Skip to My Lou.

Friday, February 8, 2013

Message Tile Gift Idea

     Sometime ago, I found a bunch of tiles sitting curbside (that's my subtle way of saying that I found them in somebody's trash).  I, of course, brought them home thinking that I could use them for something.
      Here's a quick and easy gift idea using one of these tiles- after all, Valentine's Day is coming.

 
My tile is 4 1/4" square.
I used rub-ons place the quote, "I love you because. . ." 


The dry erase marker easily wipes off so you can personalize the message every day.

 
You could make one for your whole family to use or one for each member of the family.
It would even make a good gift for grandparents. My boys are going to give one to my mom. I think she'll enjoy having this to exchange messages with the boys. Who knows what they'll write!
You could even give one as a teacher gift if you used a quote like, " You make me. . ." or "I like how you. . .".
 
Once you apply the letters, I suggest that you either glue magnets to the back or place it on a plate stand for display.
 
If you want to make one, all you need is
a tile (any size will do)
a set of rub-ons
dry erase marker
plate stand or magnets
 
What do you think? I think we could all use a little love note here and there!:)
 
If you like this project, go here and here to see other projects I've used with tiles.
 
Thanks for stopping by and God bless. Hope you all have a fantastic weekend!
 
For You will light my lamp;
The Lord my God will enlighten my darkness.
Psalm 18;28  


Thursday, February 7, 2013

Thrifty Thursday #54

     I went to an estate sale that was in our neighborhood. It was a three day sale and I went on the second day, so everything was 25% off the marked price.
     Estate sales are so fun because you get to walk through the entire house- kitchen, bathrooms, bedrooms,the backyard, and even the garage. Although, they're also a little bittersweet because somebody's life is laid out before you- all with price tags.


     I got this set of three vintage handkerchiefs for $2.25.

 
Aren't they pretty?


I've seen lots of cute projects using old hankies. Once I get enough of these, I'd like to sew them into a cute cafe curtain for my kitchen.
 
 
     I also picked up this set of gray pearls for $1.50. I'll use them to make bracelets.
 
 
     And I got this very old pattern for fifty cents. I cannot pass up one of these!

     Come back next Thursday to see what I picked up when I went back for the final day of the sale.

     I hope you all have good luck with your yard sale-ing adventures this week! Thanks for stopping by and God bless.
    

For where two or three are gathered together in My name,
I am there in the midst of them.
Mat. 18:20
This post is linked to Five Days Five Ways, Apron Thrift Girl, and Tatertots and Jello.