Showing posts with label painting. Show all posts

Friday, February 6, 2015

Silver Tray Turned Chalkboard Tray

A couple of weeks ago, I came across a silver tray at the thrift store.
It wasn't in the best condition and wasn't the fanciest of trays, 
so I thought that I would do something different with it.


I decided to make it a chalkboard tray.


This is what it looked like originally.


 I used this metal primer that I found this at Michaels


and gave it a solid coat.
 Per the bottle instructions, I gave it 24 hours to dry.


Then I used this this Multi-Surface Chalkboard paint in the color oxblood.

I gave it three separate coats allowing more than an hour drying time between each coat.
 

I think it turned out pretty cute!

Come back on Monday and see what else I plan to do with this tray. . .
Thanks so much for stopping by and God bless.

Arise, shine; for your light has come!
Isaiah 60:1

 This post is linked to My Repurposed Life, Funky Junk, I Heart Naptime,
 and My Salvaged Treasures.

Friday, October 3, 2014

Testing Out Wood Stains. . .

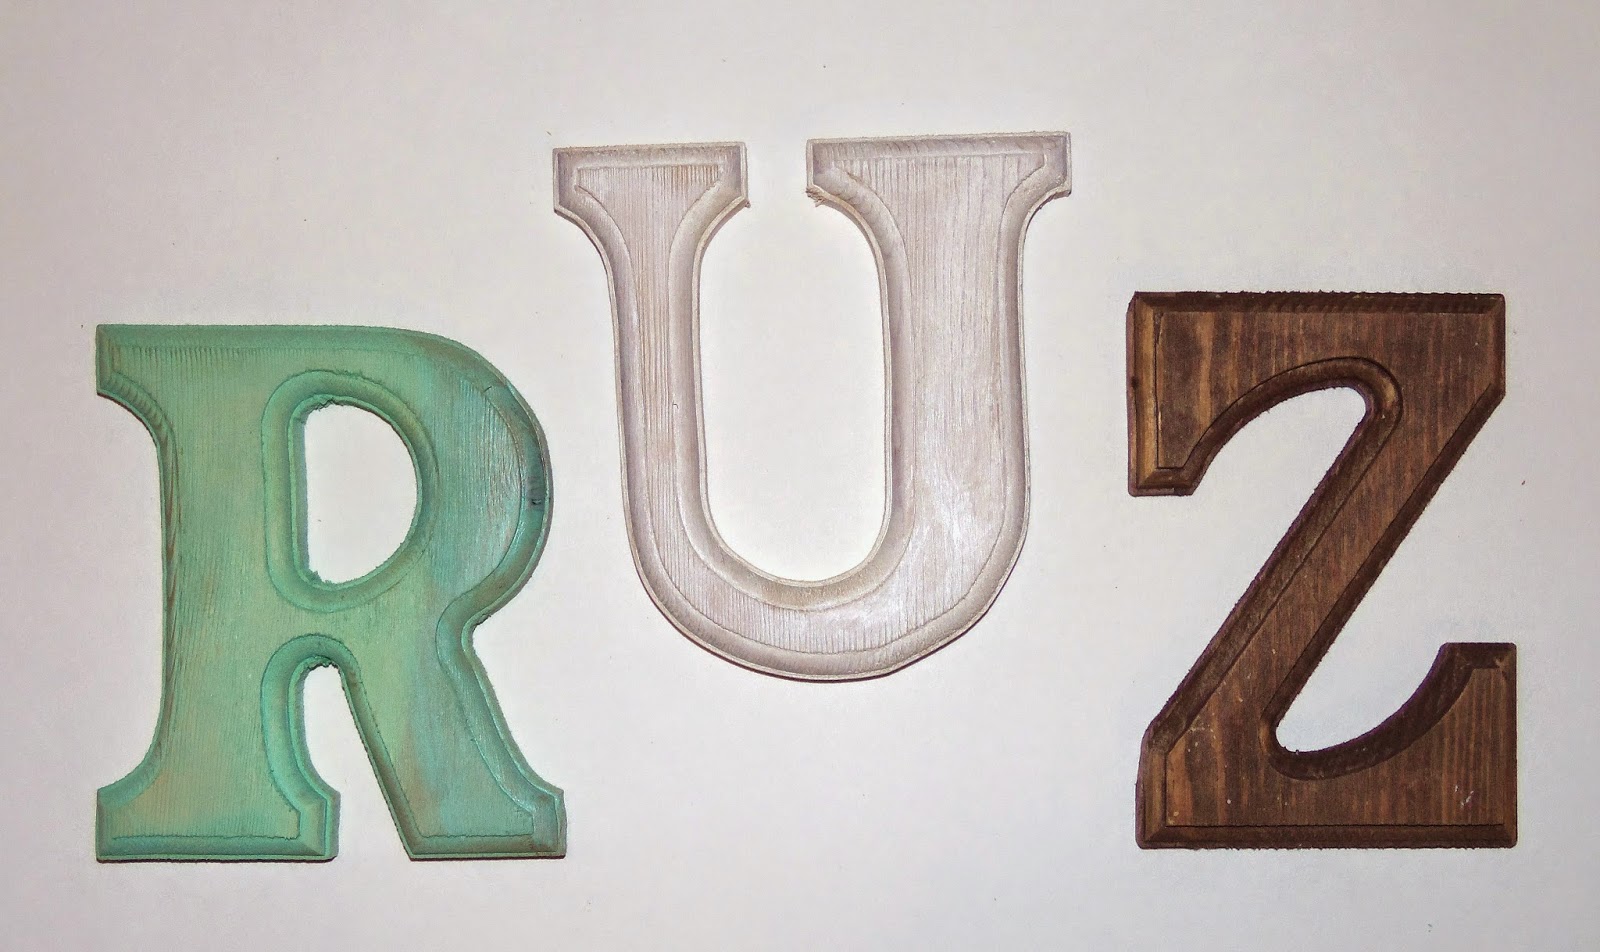
On my last trip to Michael's, I picked up three different color wood stains.
 I decided to try them on a small project, before using them on bigger pieces.
 
Let me start off by saying, I am not affiliated with this company.
I'm just trying out a new product that piqued my interest.
 
 
Here's what I ended up with.
 
Let's rewind, and I'll show you what I started with.

 
I used Martha Stewart's wood stain in three different colors:
wedding cake
beach glass
chestnut

 
I also used three wood letters.
 
I just painted on the stain, let it sit for a moment, then wiped it off with a rag.
 
I started off using a rag to apply the stain,
but I found that the paintbrush was more effective at spreading it.
 
 
This is the beach glass color.
I did two coats of the stain allowing for a little dry time between each coat.

 
This is the wedding cake color.
This one, too, has two coats.

 
And lastly, here's the chestnut color.
It went on so smooth and dark, that it only needed one coat.

 
I liked this wood stain. I'm not for sure which color is my favorite.
I'm actually glad that I have all three- I'll use them all on different projects.
 
If you're wondering about the randomness of my letters,
I'm collecting letters for an alphabet wall. These are three letters that needed some color.
 
What do you think?
Do you prefer one color over another?
 
Thanks so much for stopping by and God bless.
 
I will say to the Lord, "He is my refuge and my fortress;
my God, in Him I will trust."
Psalm 91:2
 

Monday, September 8, 2014

Old, Chippy, Chalkboard Door

Well, I didn't get as many projects done over the summer as I had hoped,
but there is one big thing that I tackled.
I sanded and painted this old door.
 
 
I just love old solid wood doors.
 
I have three in a display in my livingroom,
one in my kitchen,
and one as my headboard in the bedroom.
That's a lot of old doors!
 
 
Here's what it looked like.
I got this from my neighbor's driveway.
It had a sign on it that said, "For free."
The sign may as well have just said, "Laura, come get me!"

 
I started by painting the center panels with three coats of chalkboard paint.
Then I painted the rest of it with one coat of a lemon-y yellow.
It already had an awesome old, chippy look. There was one small area that looked like it had tape over it when it was painted with the white, so I hoped the yellow would cover that area.
It did- well enough anyway!

 
Once that dried, I sanded it, and applied a brown antiquing wax to give it this aged look.
I also conditioned the chalkboard sections.

 
What do you think?
Pretty cute, huh?
I'm thinking it would look good hung lengthwise in my kitchen as a message center.
 
Thanks for stopping by and God bless.
 
For the Lord your God is gracious and merciful,
and will not turn His face from you if you return to Him.
2 Chron. 30:9


Monday, April 28, 2014

Thrift Store Trunk Makeover!

A few months ago, I was delighted to find an old trunk at my favorite thrift store.
Believe it or not, but I was needing a coffee table and I was actually hoping to find an old trunk.
What kind of luck is that?
To make it even better, I got the trunk for $3.
I was walking on a cloud when I walked out with my purchase that day!
 

I'm going to start by showing you my "after" photo.
This is how it turned out.
 
 
And this is how it started out.
You can go here to see the post when I bought this bad boy.
  
 
My hubby helped me immensely with this project. (That's cause he rocks!)
First, we cleaned it up and used Oops to get rid of some sticky areas.
Then he covered it with two coats of primer.
Next, he used silver spray paint on the entire thing focusing on the trim.
Once that dried, I applied painter's tape along all the shiny silver edges, so he could cover the rest with chalkboard paint.
We finished it off by lining the inside bottom with 2x 4 strips to which we attached the casters.

 
I think it looks pretty great in front of my door couch.

 
I topped it with a silver tray that holds three vintage books and a wire rack filled with old croquet balls- all of which were bought at the thrift store, except for the croquet balls. They were found while curbside shopping!
 
 
Total cost:
trunk- $3
spray paint and primer- $21
2 x4- $4
casters- $30
Grand total- $58
 
I am loving how my secondhand decor is looking in my living room!
 
Thanks so much for stopping by and God bless.
 
Love the stranger.
Deut. 10:19


Friday, April 18, 2014

Distressed Paper Mache Letter

Recently I was at the Junk Hippy show and one of the booths had large distressed letters. They were $12 apiece and I really liked them, but I figured that I could make some.
Especially once I remembered that Hobby Lobby has paper mache letters.
 
 
Here's my finished product. Not quite as big as the one I saw at the show, but it will work!
(Have you seen pics of alphabet walls on Pinterest? I can't wait until I get all my letters,
so I can get my alphabet hung.)


I started with this plain little letter.

 
Then I painted the entire thing in blue.
 
 
Once it was dry, I finished it off by sanding around the edges.
Now I've got a distressed paper mache letter for less than $3!
 
Thanks for stopping by and God bless.
 
Trust in the Lord, and do good
Psalm 37:3
 

Monday, March 31, 2014

A Chippy Little Bench

Sometime ago I bought a little wooden bench for my front entry.
It was made of old barn wood. I'd been wanting one for awhile and when I saw this at a yard sale,
 I was tickled pink. it was just what I was hoping for.

I left it in its natural color for awhile, but then decided that I'd like it to be a brighter color.


I used a dry brush technique with Minty Green color paint.
Then I added a wood stain over the top of that.
I wanted it to look like I'd found it out in an old barn.

Here's the finished product.
 It'll look pretty cute in my yellow front entry, dontcha think?
Thanks for stopping by and God bless.

And you shall love the Lord your God with all your heart,
with all your soul, with all your mind, and with all your strength.
This is the first commandment.
Mark 12:30

This post is linked to Tip Junkie, Funky Junk, I Heart NaptimeCraft-O-Maniac,  Miss Mustard Seed,
and Between Naps on the Porch.

Friday, January 17, 2014

Painted Candlestick Holder

This is a project that's been a longtime coming.
I have wanted to paint this candlestick holder since I bought it over a year ago. It's just been sitting on my kitchen counter looking longingly at me (or maybe I've been looking longingly at it).

 
So I finally sat down and painted it.
Pretty, huh? How about that color?
 
 
This is how it started out. It only cost me a dollar at a yard sale.
 
I started by giving it two coats of metal primer.


Then I painted it in eggshell (the tip is what it looked like before the glaze).
I gave it two coats,
 

 then I covered it with a glaze which I made by watering down brown paint.
 
 
I painted a small area, then wiped off the extra glaze with a paper towel.

 
I think it brings out the detail.

 
I'm super happy with how it turned out.
 
Thanks so much for stopping by and God bless.

Freely you have received, freely give.
Mat. 10:8


This post is linked to Funky Junk, My Repurposed Life, Be Different Act Normal, Too Much Time On My Hands, and I Heart Naptime.

Monday, July 29, 2013

Let Your Memory Be Your Travel Bag. . . Unless You've Got One This Cute!

      On Friday, I showed you how I followed this tutorial and used fabric to cover a vintage suitcase. Today I'm going to show you how I took that same suitcase and jazzed it up a bit.

 
I started by hot gluing some trim around the edges.
 
 
Here's a closer view.
I just love it when I get to use pink trim on projects- there's not much demand for that in our testosterone filled house:)

 
Well, I had the outside was looking pretty cute, but this is what the inside looked like.
I pulled out the nasty liner, but then I was left with this.
Pretty ugly.
I couldn't very well leave it that way.
 
 
So I wracked my brain trying to figure out what to do with it. Not fabric because it wouldn't hold up well. Not contact paper or scrapbook paper for the same reason.
I decided on paint. Not just any paint, but paint the same shade as blue as the blue flowers on the fabric. Of course I didn't have paint in that shade of blue.
So I got out my acrylic paint and mixed some up. (I didn't know for sure if I could make this work, but luckily it did work!)

 
Pretty close if I say so myself.

 
I painted the whole inside blue.
But still I felt something was missing.
It was definitely better than the original, but wasn't cute enough.

 
So I got out some pink paint and this handy spouncer and just used a little bit of paint to add some pink all over the blue.

 
This is how it turned out.
It certainly has character. And it matches the fabric on the outside.
Plus I think it will withstand use.
 
 
So that's the story of my jazzed up suitcase.
 
Thanks for stopping by and God bless.
 
Do not sorrow, for the joy of the Lord is your strength.
Nehemiah 8:10
 

Monday, March 18, 2013

Check Out This Suitcase!

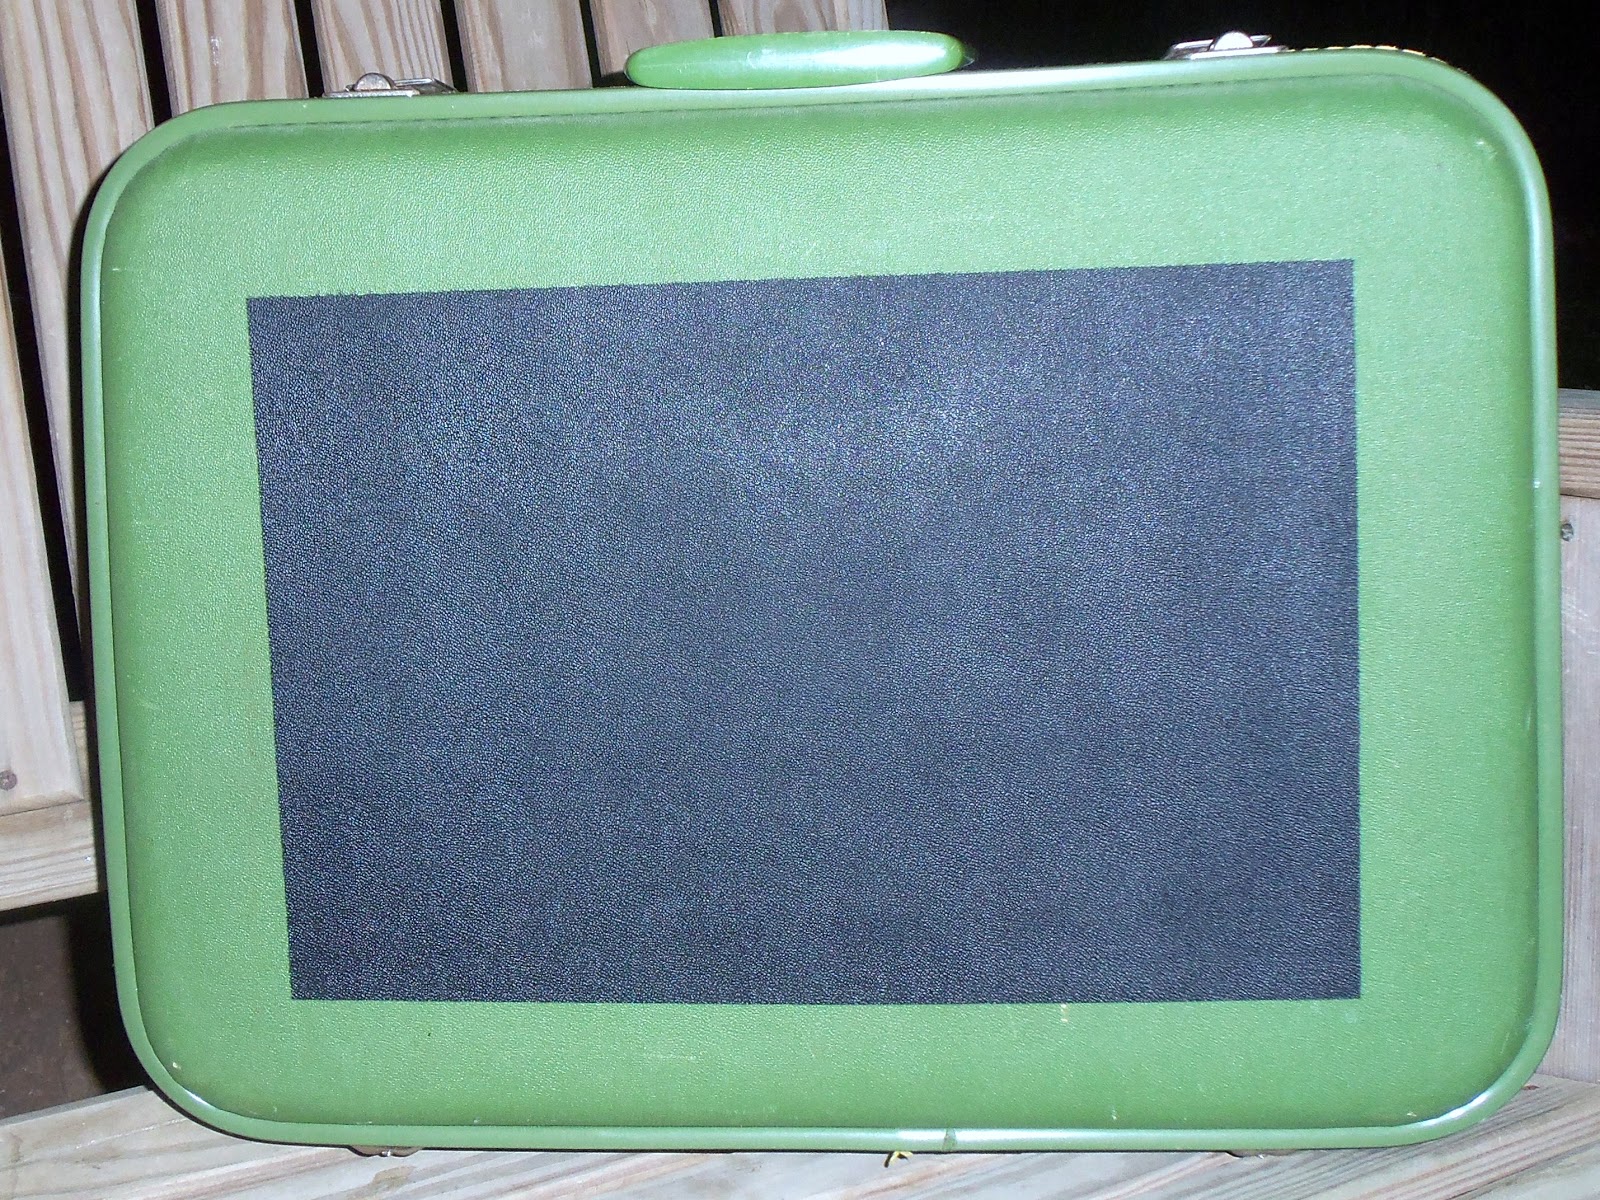
     How cute is this?

A suitcase with a chalkboard.
Wouldn't this be delightful in a front entry greeting everyone who comes in?
If you'd like to make one, all you need is:
an old suitcase
chalk spray paint
painter's tape
newspaper
First, using the painter's tape, tape off a rectangle with on one side of the suitcase. Then tape newspaper along the edge of the rectangle so you won't get any over spray on the rest of the suitcase. Spray paint three coats. Allow 24 hours to dry. Voila!

I just love chalkboard paint. And I love my hubby who always does all my painting for me.
Thanks for stopping by and God bless.
Oh, taste and see that the Lord is good;
Blessed is the man who trusts in Him!
Psalm 34:8