Showing posts with label trash to treasure. Show all posts

Monday, August 8, 2016

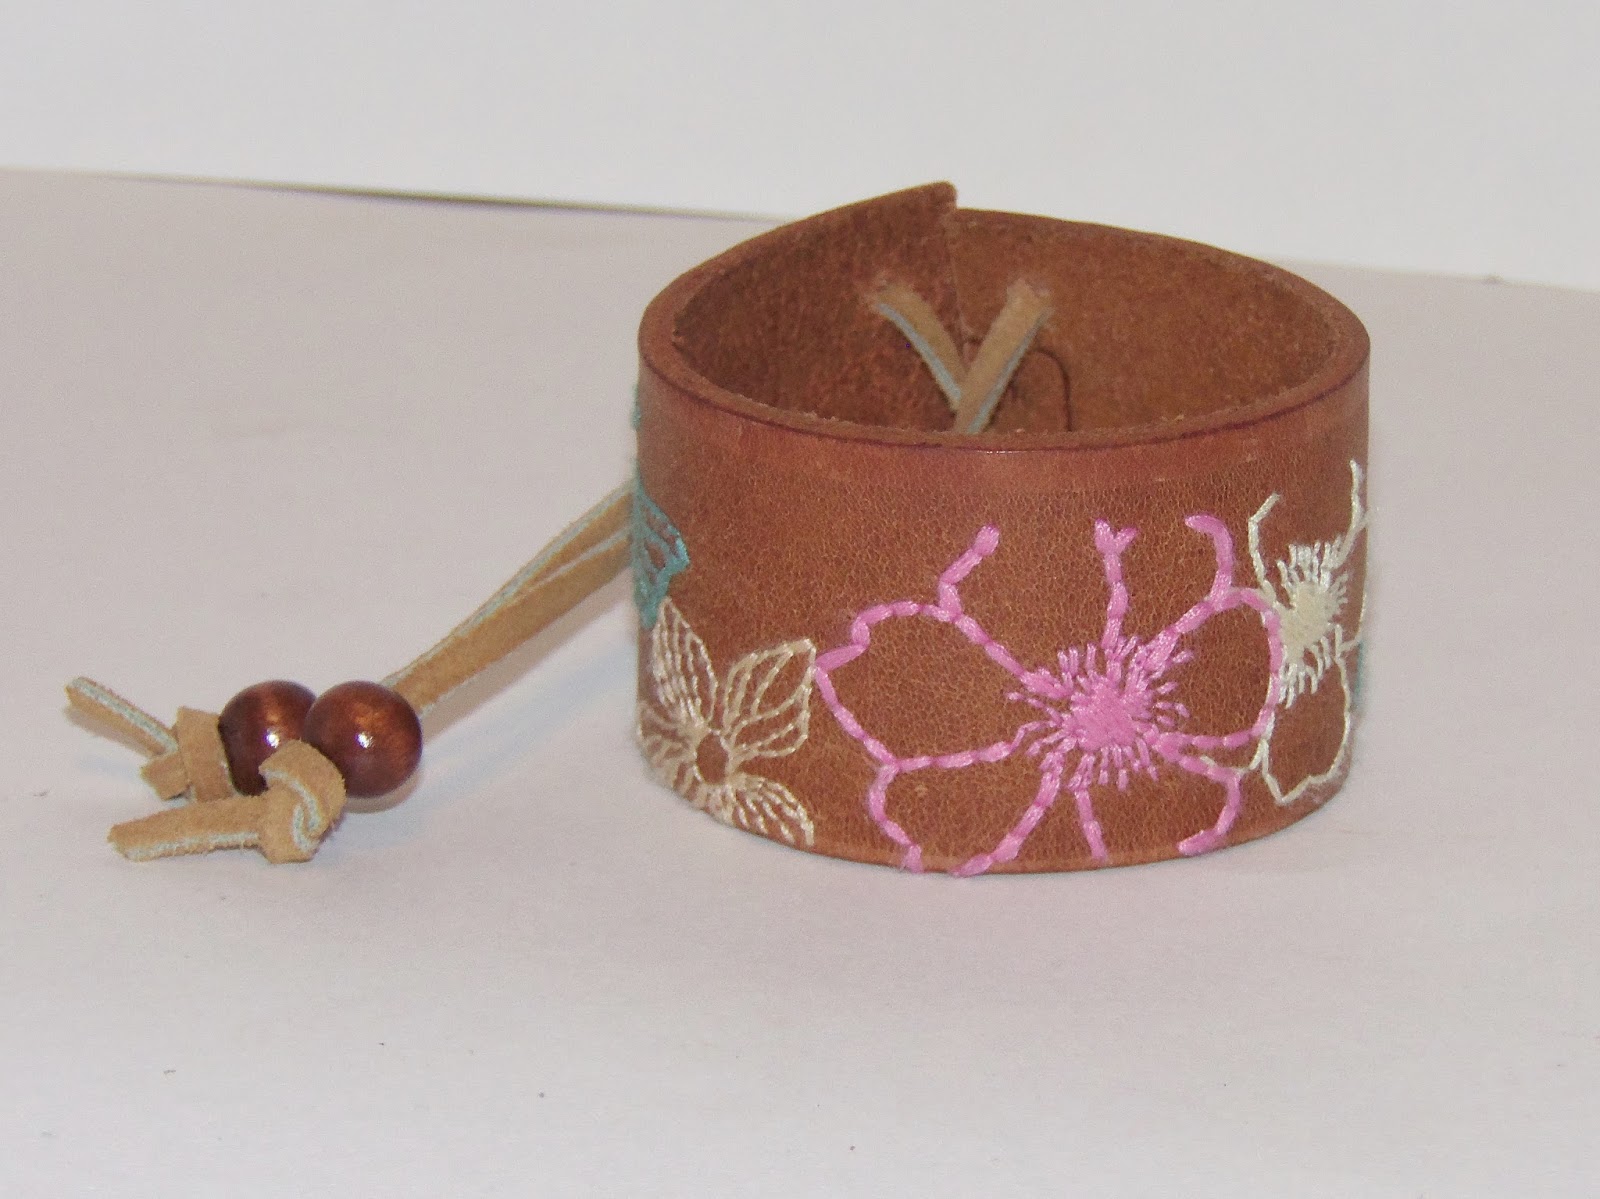
Repurposed Bracelets: Belts to Cuffs

I've had this project in mind for awhile.
I've been collecting leather belts to turn them into bracelet cuffs.

It's actually been on my to-do list for about three months.
Do you ever have something that you want to do, 
but you're just afraid to start it because you don't know if you can do it? 
That was this project for me.

Then I finally told myself, "Just cut the belt. What's the worst that can happen?"
 I'd just mess up a yard sale belt.

 Crazily enough, that first cut was super easy.:)


Once I got started, I couldn't stop.


I cut off between 6 1/2" and 7" for each cuff.


Then I punched two small holes on each end.
I used my Crop-A-Dile to make the holes, but there are special leather tools made for doing this too.


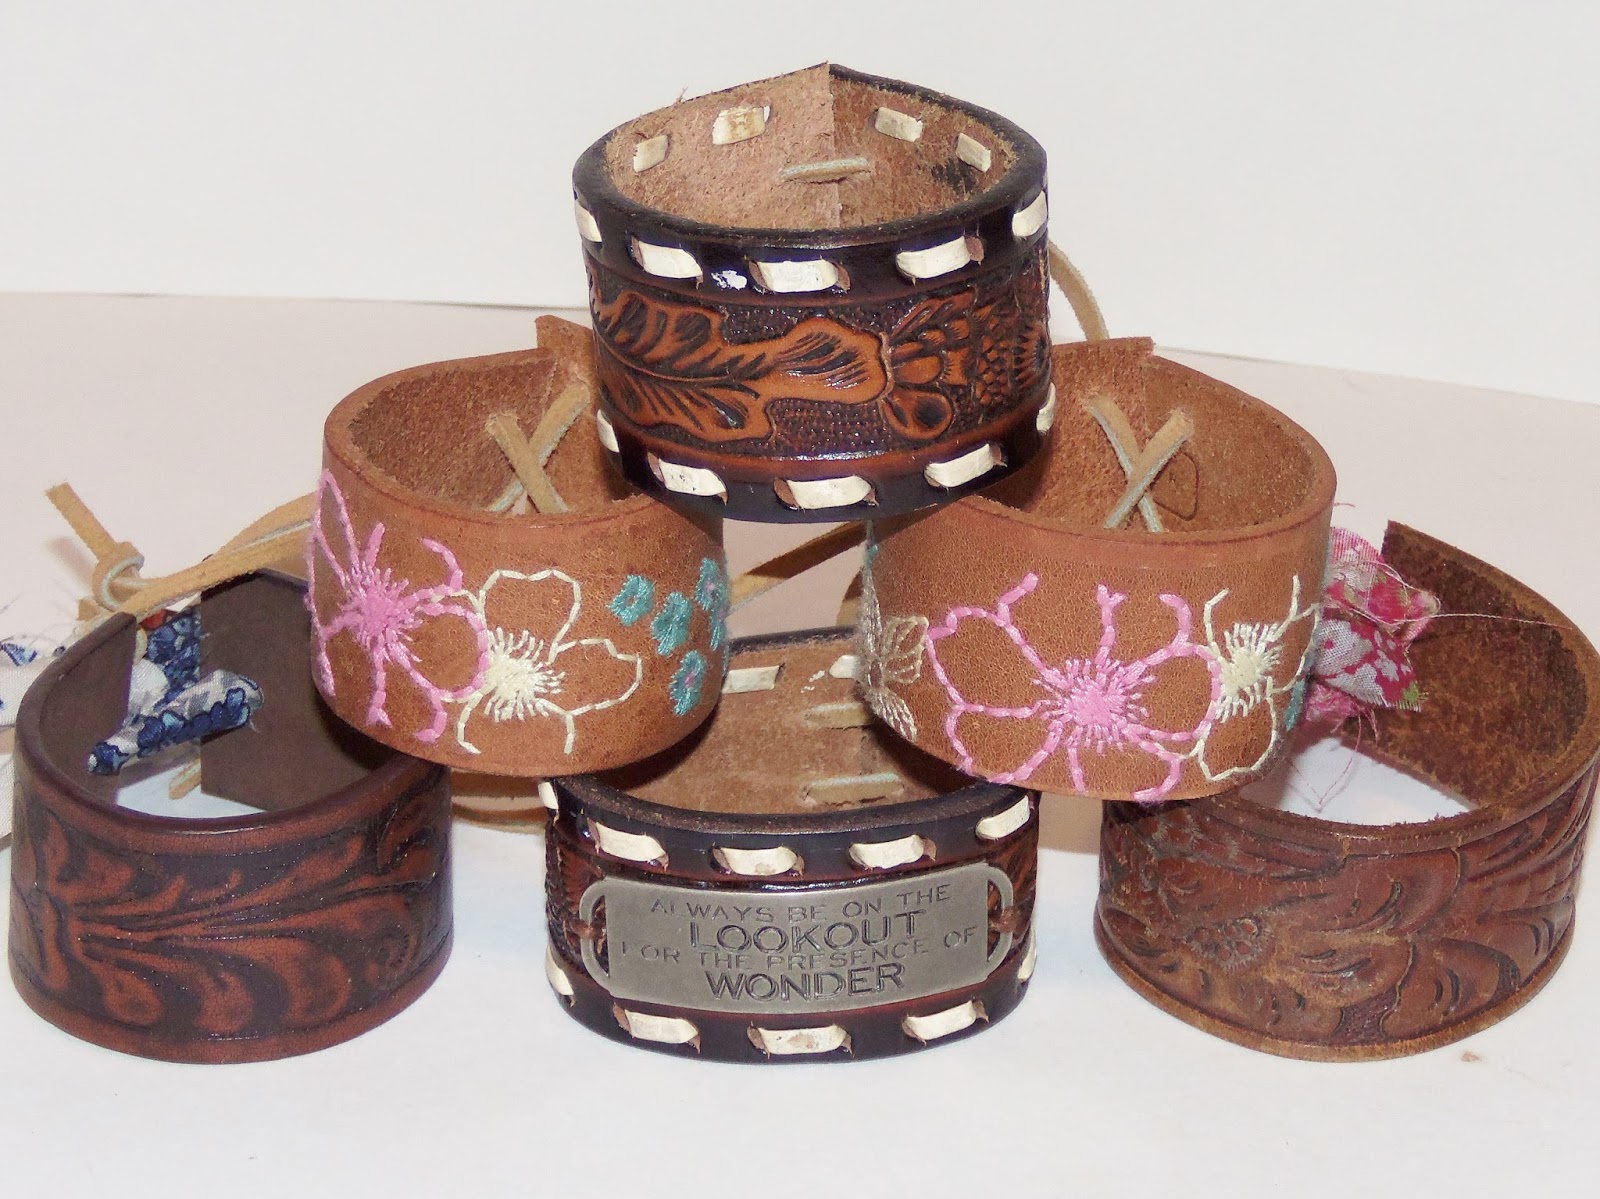
 Finally I threaded narrow leather string through the holes.
I added wooden beads at the end of each strap just above the knots.


On this cuff, I added a metal quote band.


For these, I used some fabric as ties.
 

I got all these belts at yard sales and/or thrift stores.
I still have quite a bit of the belts left. I think I'm going to have to make some more. 
One belt even has the words rodeo queen engraved on it. Won't that make a cute bracelet?

If you are dealing with something in your life right now that you're not sure how to handle,
just take that first step. Stop dreading it. "Just cut the belt." 
You'll find that it wasn't worth the worry that you put into it.

Thanks for stopping by and God bless.

Rejoice always,
 pray without ceasing, 
in everything give thanks; 
for this is the will of God in Christ Jesus for you.
1 Thes. 5: 16-18

Friday, August 5, 2016

Not Your Usual Cork Boards

I've mentioned before that I have a big bin of corks that I bought at an estate sale.
I used up quite a few for today's project: shaped cork boards.


This is a Texas shaped one.
 

I started with a thin piece of wood cut into the shape of Texas.
Then I glued corks to it.


I'm a big fan of ampersands, so when I found a wooden one,
I thought it would work great for this project.


Here's a side view. I glued the corks end up.
I like the different looks of the corks- especially the ones with the dates printed on them.

I went through almost my whole cork supply.
Hopefully I'll come across some more soon in my secondhand shopping.

I think these would look cute hanging over a desk with notes pinned to them.
What do you think?

Thanks for stopping by and God bless.

Blessed are You, O Lord!
Teach me Your statutes.
Psalm 119:12

 This post is linked to The Cottage Market, Tatertots and Jello, Craft-O-Maniac,
and Life With Lorelai.

Friday, July 15, 2016

Trash to Treasure Notebooks

Today I have a project where I used what some may consider trash
and turned it into something useful.
I turned tea box covers into notebooks.

Here's how they turned out.


For the front covers, I cut off the tops of two different boxes of tea.
For the back covers, I cut two pieces of chipboard to the same size as the box lids.
I used a pad of graph paper and cut pieces to fit in between the covers. I had 30 pages for each book.
I like the look of graph paper in notebooks:)


I bound the books using my Bind-It-All.
It's made by Zutter.
Heidi Swapp and Tim Holtz also have machines that will bind like this.
If you don't have one of these machines, you could bind your books using two office rings.

 I made these notebooks for a friend for her birthday.
She's a huge fan of tea.
I wrapped the notebooks with the tea infuser dude.
These notebooks are so simple to make.
You could use any type of packaging like Mac and Cheese boxes, movie theater candy boxes,
or even a soda box.
Thanks for stopping by and God bless.
And let the peace of God rule in your hearts,
to which also you were called in one body;
 and be thankful.
Col 3:15

Wednesday, July 13, 2016

Layout of the Week #135

I hope you're all having an awesome week.
For this week's Layout of the Week,
I decided to take a look back at a layout I did featuring my hubby's gardening.
I used actual seed packets on it.


Go here to see a step-by-step tutorial on how to make this layout.

Thanks for stopping by and God bless.

But above all these things put on love, 
which is the bond of perfection.
Col. 3:14

Monday, June 13, 2016

Revamped Secondhand Frames

I had two large empty frames that I got at a thrift store a few months ago.
They've been leaning up against my desk just waiting for me to do something with them.
 
The other day, my hubby happened to bring home some chicken wire for a project he's doing, 
so I used a little bit of it to make this project.


The frames are 20"x 15".


 I trimmed chicken wire to fit the back of each frame and attached it using a staple gun.
I was thinking I'd just whip through this project, but it took me longer than I thought.
Chicken wire isn't that easy to work with. I have little cuts on my hands and forearms.:)


These kinds of frames are such a fun way to display photos, vintage postcards, or anything you want!
Have you ever made one?

Thanks for stopping by and God bless.

Blessed be the name of the Lord
from this time forth and forever more!
Psalm 113:2

Friday, May 27, 2016

Flashback Friday: DIY's Using Old Books

It's the last Friday of the month, so we're going to flashback to some previous DIY's.
This time we're looking at five projects using old books.
I love vintage books, so I'm always up for projects using them.


I love how this vase cover turned out.
It's two book covers fastened with twine.
Go here to find out how to make it.


After cutting the covers off the books for the above project, 
here's something you can make using the leftover pages. 
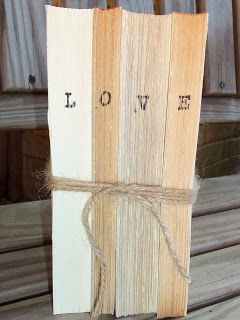
I used twine to tie four books together and stamped the word love onto the pages.


A little chalkboard paint made this book into more than just a . . . book.
You can read more about it here.


I love using covers from old books and turning them into Junk Journals.
This baby girl themed one is one of my favorites.


This is a table runner made from book covers.
How cool is that?

What do you think?
Are you feeling like running out to a thrift store to find some cool old books?
Swing by my house. I can give you a few.:)

Thanks for stopping by and God bless.

This is the message you heard since the beginning: 
We should love one another.
1 John 3:11

Monday, May 23, 2016

I Heart Junk Shows!

I love old stuff.
So I get pretty excited when a junk show comes to town.
There are three coming to our local fairgrounds over the next few months.
The first, Junk Utopia, was here this past weekend.
My hubby and I got there right when it opened.


This was the first booth we saw when we walked in.
So inviting, huh?


Some of the booths were full of old, beautiful stuff.


Some had funky jewelry made from old, beautiful stuff.


This end table was one of the coolest things I saw.
It's made from an old piano!


There was lots to see.


Here's what I got.
This lovely typewriter key necklace.
I got it at the TAB Typewriter Key Jewelry booth.
I had the best time talking with the owner Andrea.

It was an awesome way to spend a Saturday morning:)
If a junk show sets up near you, go to it.
You'll love it.

Thanks for stopping by and God bless.

Fear not, for I am with you;
be not dismayed, for I am your God.
I will strengthen you,
yes, I will help you,
I will uphold you with my righteous right hand.
Isaiah  41:10

Friday, May 20, 2016

Vintage Postcard Garland DIY

I just love paper paraphernalia- especially if it's vintage.
In my secondhand shopping, I've come across several good postcard finds.
I hate to just let these beauties sit in a stack.
So I decided to display them. . .


as a garland.


I chose ten postcards to display.
Half have the pictures showing and half have the message showing.


Then I attached them to twine using mini clothespins and mini bull clips.

So pretty and vintage, don't you think?

Thanks for stopping by and God bless.

Little children, let us stop just saying we love people; 
let us really love them, and show it by our actions. 
1 John 3:18

This post is linked to Craft-O-Maniac, A Morning Cup of Joe, That DIY Party,
and Tatertots and Jello.

Friday, May 13, 2016

Chalkboard Made From a Cabinet Door

I have a stash of old cabinet doors that I've gotten while curbside shopping.
They look like they are large frames, so I've had a good time using them in projects.
For today's project, I turned one into a chalkboard.

I sanded around the edges, then painted the center with chalkboard paint.


Then I added a drawer pull at the bottom to hold chalk.
 
If you happen to see a stack of cabinet doors out at the trash pile, pick them up.
You can do so much with them.
Go here and see how I turned one into a clipboard
and here to see how I turned one into a chalkboard tray.
Thanks for stopping by and God bless.
Trust in the Lord forever
Isaiah 26:4
 This post is linked to Lil' Luna, That DIY Party, The Crafty Blog Stalker, and Too Much Time

Monday, May 9, 2016

Mini Album Monday #74- Vintage School Album

With the school year rushing to an end,
I thought it would be fun to take a look at a vintage school themed mini album.

I used a new, but retro looking Crayola crayon box for the cover.
To give it extra stability, I added a wooden ruler to the binding.
The title block consits of a piece of notebook paper,
topped with a library card,
 topped with a piece of cork paper, 
topped with a mini file folder. 

Once I fill this album with photos and memories, I'll add the name to the front of the mini file folder.


This is what it looks like when you open it up.
I used two office rings to bind this album.
That gives me the opportunity to switch around pages or add more pages if needed.


Here's the backside of the crayon box.  
I added a strip of pattern paper along with 
this awesome book "sign out box" (not sure what it's really called).

When my boys were learning to read in elementary school, they came home with small paper books that had these on the first page. After they were done with them, I cut them out to use for projects.

I also turned vintage Dick and Jane images into buttons and added one here.
To do that, I just adhered the image to a piece of chipboard, then used a circle punch to make the button.  I finished them off by adding two small "buttonholes."


In keeping with the school theme, I used a lot of office/school items throughout this album.
This page is a file folder that I trimmed down to size.
On the background, I added a piece of handwriting paper that I had crumpled and inked.
The "My Name Is" sticker is only adhered in the bottom outer corner 
so that a photo can be added behind it.


On the back of the file folder, I just added a strip of paper from an old dictionary.
Notice the clip at the top: it was a plain black office clip 
that I covered with a small piece of vintage book text.


I love how this page turned out.
It's actually an old flashcard attached to a page out of a children's picture dictionary.
I taped the two together, then covered up the tape with a strip of old map.


Here's the backside.
I used a bit of pattern paper to cover where the pages joined.


This next page is actually extra long with a flap folded at the right edge.
I added two stacked floweres that I punched from an old map. 
A brass brad holds the two together.


The page opens to allow room for more photos
and shows a strip from another children's dictionary.


I left the backside of it blank.


This page is actually two office envelopes fastened together to make a page.
I placed a bit of adhesive on the back of the smaller envelope and overlapped it on the large.
Then I added the strip of pattern paper to reinforce the page itself.
This flower is punched from a piece of old ledger paper and attached with a brass brad.
I remember using those old brads when I was in elementary school.


Here's the back of that page. 
I added an image from an old reading textbook which is cute, 
but it also adds stability to the page itself.


The next page is very simple.
It's just part of an old handwriting page with numbers stamped along the outer edge.


I used part of a page from a children's encyclopedia here.
I added a bit of ribbon to the bottom.


Here's the back.
I think these old images add a lot to the vintage feel of the album.


Here I used yet another file folder.
I covered it with a strip of paper from a Dick and Jane book.
In the lower left corner is a pair of star stickers.
I remember getting those in elementary school, too.


For this file folder, I left it the full length, then folded a bit of it to make it two pages.


I left the second page shorter that the first for a little variety.


I used a tiny paper sack for this page.
I got this sack from a gas station. You know how they keep the small ones that hold just one can?
Whenever I go into a gas station, I always ask if I can take one with me:)


This page incorporates some of the pattern papers that I've used on the previous pages.
Notice the silk flower: I used Staz On ink and stamped letters onto it.


The backside is pretty simple with just a strip of pattern paper across the top.


The last page/back cover is part of a manilla envelope cut to size.
I used a random letter stamp along the edge to try to keep it in the school theme.


I happened across this awesome vintage stamp in my collection.
I thought it was the perfect end to this album!

It's been awhile since I put this book together, 
but it was so much fun going through it again looking at all the details.
I think I'll use it to document some of my mom's memories- either from her school years 
or from when she was a teacher.

Thanks for stopping by and God bless.


Therefore, my beloved brethren, 
be steadfast, immovable, 
always abounding in the work of the Lord, 
knowing that your labor is not in vain in the Lord.
1 Cor. 15:58