Showing posts with label maps. Show all posts

Thursday, June 2, 2016

Thrifty Thursday #218

My hubby and I traveled to a small nearby town to check out this estate sale.
We were there on the last day, so everything was half off.
Sometimes when we go on the last day of a sale, everything is pretty picked over.
But it's usually 40-50% off, so it's still worth going.


Imagine my surprise when I spotted this huge wall map!
I got it for $5.
My hubby asked where I was going to put it.
I actually don't know, but I wasn't about to pass it up:)
In the picture, my son who's over six feet tall is holding it and stretching it over his head.
It's huge!

This old jar was $10. Isn't it lovely?


I love this metal standing clipboard.
It was only $1.
I'm going to turn it into something cool- maybe a photo display.


I adore old books.
I got this old edition of Heidi for a dollar.


I think the cover of this Bobbsey Twins novel is beautiful.
It was a dollar too.


I'm not sure how old this scale is, but I thought it was cute.
I only paid $2 for it.

What do you think?
Certainly worth the trip down the road!

Thanks for stopping by and God bless.

But the fruit of the Spirit is love, joy, peace,
 longsuffering, kindness, goodness, 
faithfulness, gentleness, self-control.
Gal. 5:22
This post is linked to My Girlish Whims, Blue Willow House, The Crafted Sparrow,
The Cottage Market, and Sugarbee Crafts.

Wednesday, March 30, 2016

Lovelies That I Love

I just love anything having to do with maps and globes.
Now, if you knew how geographically challenged I am, you may find that ironic.
Nevertheless, I am a huge fan of maps.


How awesome is this map pillow?

I love it.


Look at this yellow globe.
It is so unique- I think I need it!


Pull down maps like this one are so cool!
I actually have one hanging in my bedroom as my window shade.


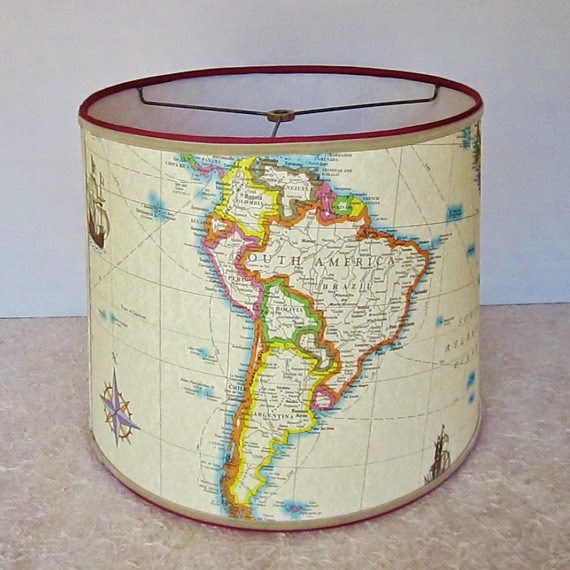
Isn't this globe lamp shade great?
Imagine how cool it would look with light shining through it.


This one takes the cake- it's a lunar globe--- a globe of the moon!
Now, that's out of this world :)

I currently have four different globes positioned around my living room.
Every time I bring one home, my boys let me know that we already have plenty of globes.
But I don't know if we'll ever have enough!

Thanks for stopping by and God bless.

I will sing of the mercies of the Lord forever
Psalm 89:1

This post is linked to My Girlish WhimsBetween Naps on the Porch, Embracing Change,
Lil' Luna, and Plucky's Second Thought

Friday, December 11, 2015

Let's Wrap It Up! Fun Gift Wrapping Ideas

I've been so inspired by different gift wrapping that I've seen lately.
I just had to give some of those ideas a try. 


I bought a roll of masking paper in the paint section at Walmart.
It's a bit lighter than kraft paper and worked great as wrapping paper.
I just added some twine and a candy cane to this gift.

I always think tickets make cute tags.


This one is wrapped in a map (that I picked up at a thrift store).
I used a little twine and a cute green price tag (picked a box of those up at the thrift store, too).
I stamped some festive words on regular clothespins to add some charm.


This one has a wide band of holiday ribbon which I taped at the back.
Then I used a short piece of red twine to tie on a tag and a bell.
Looks cute and sounds cute.


I got a pack of snowflake decorations at the dollar store 
and placed one on this gift before tying it with Baker's twine.

Don't you just love Baker's twine?!?


Yep, that's newspaper on this one.
The ribbon really dresses it up.


Guess what these circles are. . .
Cupcake wrappers!
I used a regular size and a mini one.
I adhered them with double sided tape before tying the gift with Baker's twine.


This one was super simple.
Sheet music with a mini ornament and a ticket as a tag.


This one is one of my favorites.
I love doilies and thought one would look cute on the brown background.
I used a glue stick to adhere the doily.
Then I wrapped it with green twine.


This final idea is crazy easy.
It's a wrap for a glass bottle. Mine is a bottle of sparkling grape juice.
I cut off the sleeve of an old sweater so I ended up with a piece not quite as long as the bottle.
Then I slid the wrist to the bottom of the bottle.
I rolled a little bit of the top portion down and added a ribbon.
If you use a printed sweater, you could skip the ribbon.
Isn't that too cute?
Notice that all these ideas are not only simple, but very frugal too!
Doesn't this make you want to wrap your gifts?

Thanks for stopping by and God bless.

God is our refuge and strength, 
a very present help in trouble.
Psalm 46:1

Friday, December 4, 2015

Christmas Ornaments

I love all kinds of ornaments.
I could never go with just one theme on our Christmas tree 
because we have too many precious ornaments that we've collected over the years. 
We have some that my mother-in-law sewed, 
some that my boys made in preschool, 
and we even have one that my husband painted when he was in kindergarten!

I've made a few over the years that I thought we could take a look back at. . . 


For this one, I used a clear ornament and filled it with punched paper hearts.


You can have a little paradise on your tree with this one.
It's a glass ball filled with sand and tiny shells.


This one is covered with pieces of map.
I made several and stamped words on them like "peace," "love," and "joy."
You can go here to read more about them.

What kind of ornaments have you created over the years?

Thanks for stopping by and God bless.

Therefore be merciful, just as your Father also is merciful.
Luke 6:36

This post is linked to Too Much TimeLife With Lorelai, Funky Junk, and Lil' Luna.

Friday, April 17, 2015

Envelopes Made From Maps

Do you guys send out letters or cards anymore?
I 've made a goal to start sending out more cards to my loved ones.
I think it's lovely when I receive an actual card- they're just so special in this age of technology.

I thought that one way to make these cards even more special
would be to make cool envelopes for them.


I decided to use pages out of an old atlas to make some envelopes.


Here's how I made the envelope.
My card measures 5 1/2"x 8".
I set the card at an angle in the lower left corner of the page.


Next, I folded up the bottom making sure it reached just above the center of the card.


Then I folded in the left side.
 I trimmed it so that the top edge of that flap lined up with the left corner of the card.
Then I did the same thing with the right side.


At that point, I trimmed the excess paper off to create my top flap.


It ended up about 13 1/4"' from the top point to the bottom point
and 15 1/2" from the left point to the right point.


 My envelope fits tightly around the card, but that isn't necessary.
As long as your card is covered, I think it's ok if it turns out slightly larger than the card.


I folded in the two sides and the bottom and used tape to hold them together.


Then I used a glue stick to close the top flap being careful not to get any where the flap
 may come into contact with the card. 


Because it's a busy print, I placed a label on the front for the address.


I'd be pretty excited to get a map envelope in the mail!
Don't you think these things would even put a smile on the face of a postal worker? 

Thanks for stopping by and God bless.

The grace of our Lord Jesus Christ be with you.
1 Thes. 5:28

This post is linked to The Crafted Sparrow, My Repurposed Life, Funky Junk, and I Heart Naptime.

Monday, March 2, 2015

Vintage Map Bunting

Today's project blends two of my favorite things:
 buntings and vintage maps.
 
 It's a vintage map garland.


I started with several pieces of map trimmed to 5"x 8 1/2".


Then I cut out a wide notch on the bottom of one 
and used it as a guide to cut out the rest.


My final step was attaching the map pieces to twine using my hot glue gun.


Very simple and very cute


I found my vintage atlas at a thrift store.
 If you're looking, you can find them at yard sales, Ebay, and maybe even in your grandma's closet:)

Thanks for stopping by and God bless.

Let nothing be done through selfish ambition or conceit,
 but in lowliness of mind let each esteem others better than himself.
Phil. 2:3


Friday, January 30, 2015

Heart Garland Made with Vintage Maps

I love making garlands.
They're usually so easy to put together.
Today I am sharing one that I made using pages from a vintage atlas.

I followed the tutorial that I found here to turn the strips of atlas into this heart garland.


Here's a close up of the individual hearts.
They're all attached at the tops and bottoms.


Cute, huh?
This is one of those projects that you can do while watching TV with the kids.

I hope you all have an awesome weekend!

Thanks so much for stopping by and God bless.

If we live in the Spirit, let us also walk in the Spirit.
Gal. 5:25

This post is linked to My Salvaged Treasures, My Repurposed Life, Funky Junk,
Simple Nature Decor, Life with Lorelai, and Embracing Change.

Friday, January 9, 2015

Map Covered Monogram

I know I've said this before, but I just love maps.
I especially love using maps on things that you wouldn't ordinarily think that maps belong on.
When I spotted the giant paper mache letters at Hobby Lobby, I knew just what to do with one.

cover it with maps!
To make a map covered monogram, you need:
a paper mache letter (this one is about 15 1/2" tall)
large map
Mod Podge
foam brush
paper towel.
scissors
small piece of sandpaper.

I started by flipping my letter upside down on the map and drawing around the edges. I left about a two inch space between the letter and my hand-drawn lines.

Then I cut along my lines.
I covered the front of my letter with Mod Podge making sure I got all the way to the edges.
Then I pressed my map along the surface of the letter.
When using Mod Podge, I always run a paper towel all along the surface making sure that the paper adheres. The paper towel is there to wipe up any excess that seeps out of the edges.
After about 20 minutes, I used a small piece of sandpaper to sand the extra map off the edges.
This gives a nice smooth edge. 

Because the letter was about 1 1/2" thick, I felt that it needed some map along the edges.
I trimmed 1 1/4" strips and adhered them to the edges using the same method as above.

Ta-da! How cute is that?
Thanks for stopping by and God bless.
Sing to the Lord a new song,
and His praise from the ends of the earth
Isaiah 41:10

Monday, October 20, 2014

Decoupaged Pumpkins

Living in southern Texas, I don't get to enjoy the pretty colors of fall or even much fall weather,
but that hasn't stopped me from having all sorts of fall-ish crafty ideas bouncing through my head. . .

I couldn't wait to cover a pumpkin in sheet music.


Ever since I'd seen one like this on Pinterest, I knew I had to try it.
I tore strips of sheet music and adhered them to the pumpkin using Mod Podge.
I used a white pumpkin as my base so there wouldn't be any orange peeking through.


Then while I was in decoupaging mode, I thought that it might be fun
 to cover a pumpkin with an old map.


Because, quite frankly, if I'm given a blank canvas of any sort, at some point,
I'm going to want to try to cover it with map. :)
What do you think? Kind of different, but kind of cute too, huh?
Make sure to stop back because I've got lots more fall themed ideas up my sleeve!
Thanks so much for stopping by and God bless.
For "whoever calls on the name of the Lord shall be saved."
Romans 10:13