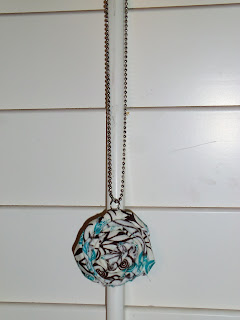
I love making fabric rosettes- when I first started making them, I rolled them too tight and didn't like how they looked. So I practiced and loosened my twists, and now I'm happier with the results.
Today I'm going to make one and attach it to a necklace.
 |
| This is the project I'm going to show you how to make. |
You'll need:
a strip of fabric 1"wide by 30" long
felt circle ( about the size of a silver dollar)
jump ring
necklace
fabric glue
glue gun
First you need to tie a knot at one end of the fabric.
Now tuck the tail under the knot and start loosely twisting the long tail. Apply fabric glue about every half inch to hold the fabric in place. I suggest you put the glue down low towards the back so it won't show once you're done.
Keep gluing and twisting. Once there's about an inch or less left, fold the tail underneath and glue it down with the fabric glue.
This is what the flower will look like.
Use the glue gun to attach the felt circle to the back of the flower. This will help keep the flower together and will keep the tail down.
Attach a jump ring perpendicular to the flower so it will lay flat on your chest.
Now place it on the necklace. Voila! Wasn't that easy?
Here's another look at it layered with a bead necklace. I just love brown and turquoise together!
Thanks for stopping by and God bless.
This post is linked to Happy Hour Projects, At the Picket Fence, and


This post is linked to Happy Hour Projects, At the Picket Fence, and


4 comments:
This is super, duper cute! Found it on Weekend Wrap up!
Found this on Tip Junkie!! Looks great and easy to do. Its on my very LONG to do list.!!
So lovely, I love this necklace!
Your necklace is so cute. I've never done a rosette... someday I will. :)
gail
Post a Comment