Friday, January 30, 2015

Heart Garland Made with Vintage Maps

I love making garlands.
They're usually so easy to put together.
Today I am sharing one that I made using pages from a vintage atlas.

I followed the tutorial that I found here to turn the strips of atlas into this heart garland.


Here's a close up of the individual hearts.
They're all attached at the tops and bottoms.


Cute, huh?
This is one of those projects that you can do while watching TV with the kids.

I hope you all have an awesome weekend!

Thanks so much for stopping by and God bless.

If we live in the Spirit, let us also walk in the Spirit.
Gal. 5:25

This post is linked to My Salvaged Treasures, My Repurposed Life, Funky Junk,
Simple Nature Decor, Life with Lorelai, and Embracing Change.

Thursday, January 29, 2015

Thrifty Thursday #151

It's Thursday. . . you know what that means!
A glimpse into my thrift store visit.

I got this beautiful scarf for fifty cents.
I love the purple and red flowers on it.
My sister had been wanting a scarf to tie on the strap of her purse, 
so I washed it up and gave it to her.
She loved it!


I don't buy many clothes secondhand and I really don't usually buy used shoes,
but these Sbicca wedges were only $2.
They're usually $60 and up.
You can go here and see some of their sandals. Swoon.


I also got this book for a quarter.
If you've never read a Harlan Coben novel, I recommend it.
I always enjoy his books.


I really scored with the vintage trim.
I got these three unopened packages---


plus these four.
The seam binding was a dime apiece and the white lace was a quarter.


That was all I could rustle up this week.
Stop back next Thursday for some more treasures.

Thanks for stopping by and God bless.

For all the law is fulfilled in one word, even in this:
 "You shall love your neighbor as yourself."
Gal. 5:14

This post is linked to Junkin' Joe, The Crafted Sparrow, Be Different, Act Normal,
and Ivy and Elephants

Wednesday, January 28, 2015

Layout of the Week #102

Break out your cardstock and embellishments, it's time to make a scrapbook page!
If you follow my easy instructions, you can complete this layout in less than an hour.

Today's layout features a lot of white space, but is by no means plain.

Here's the layout we'll be making.


To create it, you'll need:
one piece of 12"x 12" white cardstock (mine is hard to see in this photo, but it's there)
5 pieces of paper measuring 4" x 1.5" (I used graph paper and lined paper- you can use pattern paper as long as it's a muted pattern that you can write on)
pen- for journaling
letter stickers for the title
embellishments - I used 12 small ones
one horizontal 4"x 6" photo
paper trimmer
 adhesive


To begin, adhere your photo about 3 1/8" from the top of the page.


Stagger two of the journaling cards above the photos.
You can add journaling now or when you get all the cards attached.


Stagger two more journaling cards below the photo.


With the remaining journaling card, use your letter stickers to create the title.
Place this below the bottom two journaling cards.


Now place one embellishment to the left of the top journaling cards.
Place another in between the bottom two cards.


Now place one peeking out from behind the upper right corner of the fourth card.
See how I used a small playing card?

Also place one embellishment on the bottom left corner of the photo.
I used an old postage stamp.


Finally, you're going to add two groupings of three small embellishments:
one in the upper right corner of the layout
and one near the bottom left corner of the layout.

I used brads in the shapes of hearts, circles, and stars, and I also used one tiny flower.

If you haven't written your journaling yet, do so now.


That's it, folks!!
How good does it feel to get a layout done?!?
Feels super, if you ask me:)

If you enjoyed this, stop by every other Wednesday for a new layout tutorial.
Thanks for stopping by and God bless.

The Lord is gracious and full of compassion.
Psalm 111:4

This post is linked to It's Overflowing, The Dedicated House,
Today's Creative Blog, and Tip Junkie.

Tuesday, January 27, 2015

Recipe of the Week #154- Garlic and Herb Pork Tenderloin with Red Potatoes and Carrots

Garlic and Herb Pork Tenderloin w/ Red Potatoes and Carrots
1 2-3 lb pork tenderloin
1/2 cup chopped onion
1 packet Lipton Garlic and Herb soup mix
4-6 washed and quartered red potatoes
1 lb baby cut carrots
salt and pepper to taste
1/2 cup water

Place tenderloin in Crock Pot. Surround with carrots and potatoes. In a separate bowl, mix water with soup mix. Pour over meat and veggies. Sprinkle onions over the top and add salt and pepper. Cook 4-5 hours on low or 3 hours on high.

Note: I peeled my potatoes before putting them in. After they cooked, I pulled them out and mashed them. Mashed potatoes always go over better with my boys.

Oh. My. Word. This was sooooo good! The flavor was through the roof! I'm not usually a fan of cooked carrots, but they soaked up the garlic and herbs and tasted fantastic! I will be making this again- soon!

Thanks so much for stopping by and God bless.

So let each one give as he purposes in his heart,
not grudgingly or of necessity;
for God loves a cheerful giver.
2 Cor. 9:7

This post is linked to My Girlish Whims Plucky's Second Thought, 
Tatertots and Jello, and Between Naps on the Porch.

Monday, January 26, 2015

Cards Made From Paper Sacks

I get a kick out of repurposing items and using them for something other than
their original intended purpose.
Today's project does just that.

I used paper lunch sacks and turned them into cards.
In this day and age, sending cards in the mail is rarely done.
I love when I go out to the mail and get something other than junk mail or bills.
This is a great way to use up your paper scraps and make somebody's day all at once!


For this card, I used a white sack.
To make it, I just laid the sack facing me so that the flap was facing up and on the right side. Then I folded the two inner corners on the flap. I brought the open end of the sack to tuck under that flap then and folded it.
All that left was covering the front panels with some pattern paper
and adding your greeting.
For most of my greetings, I printed the sentiments out from my computer.
This one says, "For Our Anniversary"


The inside reads, "There are times we must ask ourselves how much do I love this person and my answer- words could not explain just how much."

I printed this on white cardstock, adhered it to the inside, then added two photo corners.
Easy-peasy.

Sometimes you can even find stickers or stamps that already have messages like this.


This card is a brown paper bag folded in half.
I added a piece of pattern paper,
then used a large stencil letter with different pattern paper behind it.
Then I added letter stickers to finish off the words, "Thank you."
The last thing I did was add a ribbon and tie it on the front.


To simplify it even futher, you could eliminate the stencil letter and just use stickers for the words.


On the inside, I used a stamp to add a message that says,
"Just wanted to thank you with all my heart."

The beauty of using the paper bag this way is the flap can be used as a gift card holder.
All you would need to do is place the message below the flap and tuck the card into the opening.


This is another trifold card folded the same way as the first.
I used a brown paper bag for this one.
The tag on the outside says, "True Friends."


On the inside, I placed a pre-prnted tag that says,
"True friendship is seen through the heart, not the eyes."


This card was made with the flap facing up on the left side.
I folded it at the edge of the flap, then brought the other side to meet the first side
which made a gate fold.
Then I placed a tag on the left side.
It overlaps the right side without attaching (that way the card will still open.)


The inside has pattern paper just on the middle panel with a message printed on white cardstock
that says, "I'm so lucky to have a friend like you."


For this card, the flap was facing up on the right side.
I folded it over, then folded the left side of the bag on top of that so it didn't quite go all the way to the right edge.
 I covered the front with a piece of pattern paper and added a Birthday Wishes sticker.


Then I covered the right flap with paper.


And printed a message on a pattern paper and adhered it to the center panel.
It says, "May all your dreams come true. Happy Birthday!"


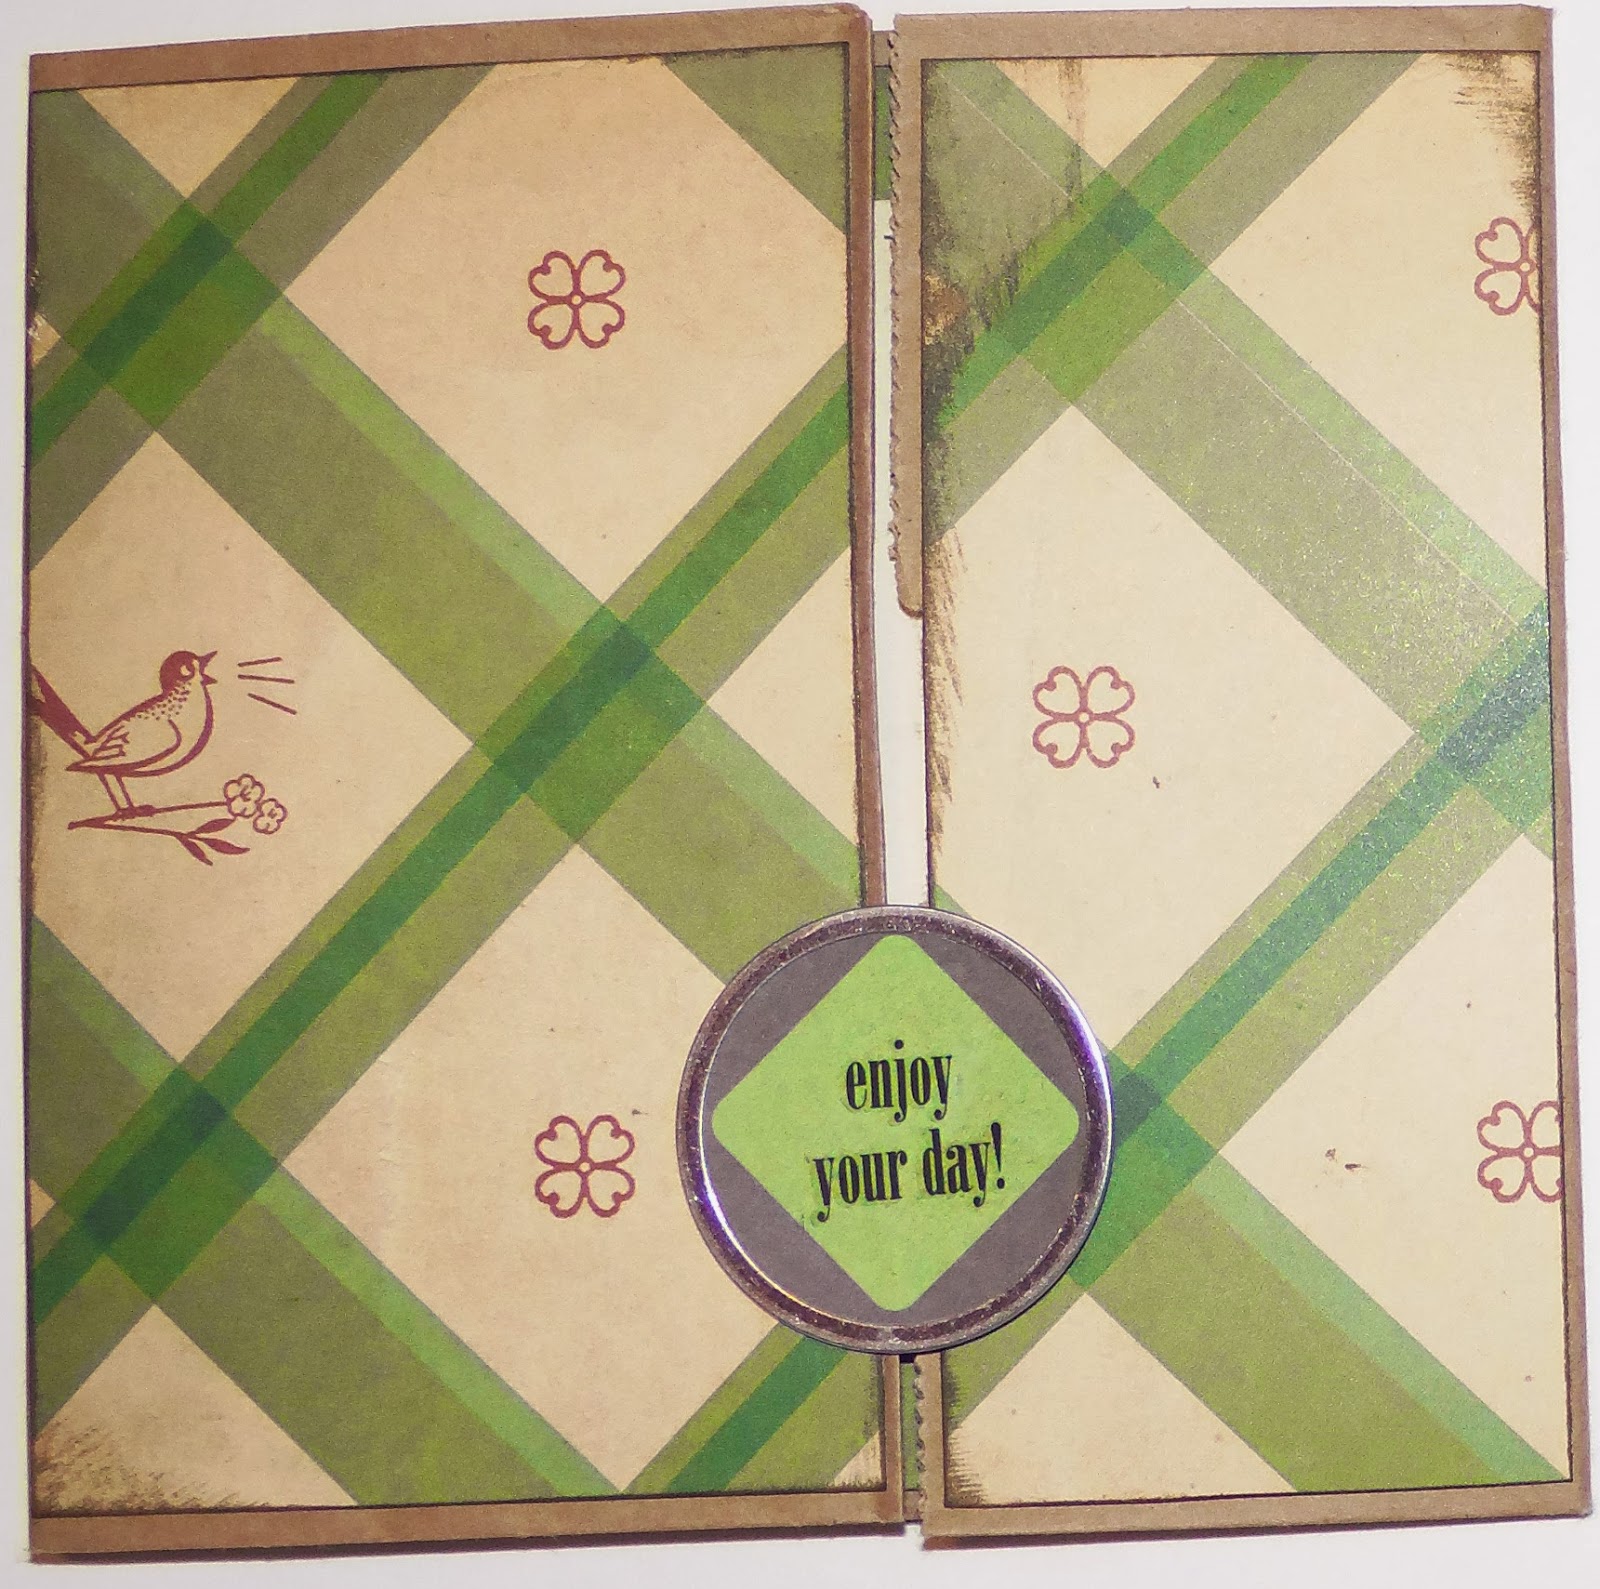
This one is folded like the previous pink and brown gate fold card.
The tag on this one says, "Enjoy your day!"


All I did was put a piece of plain cardstock on the middle panel,
then added a smaller piece of beige cardstock for a note to be written.


This card is a paper bag folded in half with pattern paper added to the front.


On the inside is another pre-printed tag taht says, "May you and your little darling be blessed always with love and joy in your hearts."

See how easily you can whip up a card like this?
Who doesn't have lunch sacks sitting around unused in their kitchen?


To store all of my paper bag cards, I used a slightly larger sack and trimmed off the bottom 4".
Then I covered each side with pattern paper and added a tag to the front that says, "Cards."

To make it sturdy enough, I trimmed cardstock to fit along the inner walls.
Then I added a strip of ribbon along the outside.


Ta-da!
So easy that you could keep a few on hand for card giving occasions.
Easy enough that you can whip one up in a few minutes when you need one.
Even easy enough, your kids could make them!

Thanks so much for stopping by and God bless.

He has made His wonderful works to be remembered
Psalm 111:4

 This post is linked to Too Much Time On My Hands, I Heart NaptimeSkip to My Lou
 and Daisy Cottage Designs.

Friday, January 23, 2015

Easy Sugar Scrub DIY

I love it when my hands are soft, but cold weather really does a number on my skin!
Especially with how often I wash my hands. 
I've found something easy that I can do to help keep my hands smooth. . . 


sugar scrubs!
 This one is a coconut lime sugar scrub.

This is so easy to make and would be a great gift idea.

To make some, you'll need:'
1/4 cup coconut oil
1 cup sugar
zest and juice from one lime
5 drops of coconut fragrance

Melt the coconut oil in the microwave.
Add sugar, lime juice, lime zest, and stir until blended.
Add coconut fragrance and mix well.
 Place in an airtight container and use within one month.

To use: scoop out a handful and rub on hands, arms, feet, and elbows.

If you decide to give this as a gift, just wrap a ribbon around the lid and place a label on it.

 This will make you smell and feel great!

Thanks for stopping by and God bless.

His work is honorable and glorious, 
and His righteousness endures forever.
Psalm 111:3
 

Thursday, January 22, 2015

Thrifty Thursday #150

I hope you all have been having a lovely week.
Mine has been pretty good because I have been getting nearly everything done
on my daily to-do list!
I don't know if that means I've been extra productive or
if it means that my list is just shorter than usual. . .

Anyhow, I was able to fit a trip into the thrift stores.
Here's what I bought. . .
I do so love silver trays. I spent $2 on this one because I like the heavy duty handles.
I can't decide if I'm going to leave it as it is or turn it into a chalkboard. . .

I found two brand new packages of these Aladdin lids that turn a mason jar into a travel mug.
How cool is that?
They were $1 per package.
I got two so I could give one pack to a friend.


This mess kit was $2.50. It had all its pieces and was in good shape, 
so I picked it up for my son.
He plans to put it into his "Bug Out" bag.
He has quite an interest in all things survival related.


This notebook was only a dime.
I love when I find this style of notebook 
because they have heavy duty covers that are just made for recovering:)


This one is in great shape.
I hadn't yet decided just how I'd change it up
when my hubby spotted it on the counter and claimed it for himself.

See, my thrifting does everybody some good!

Thanks so much for stopping by and God bless.

Fear not, for I am with you
Isaiah 43:5

  This post is linked to My Repurposed Life, Tatertots and JelloEmbracing Change.

Wednesday, January 21, 2015

Lovelies That I Love

Feel like shopping?
Want to see some cute stuff?
Take a look at these finds. . .

This is a ring and earring set made with fabric and embroidered flowers!
I think they're so pretty and unique!
You can find them here along with lots of other gorgeous jewelry pieces.


How beautiful is this necklace?
That's a real flower in there!
Love it!


I would love to have this basket for my bike.
I have a vintage style cruiser and my basket is getting a little rickety.
This one would look delightful as a replacement.


I TOTALLY LOVE this mug!
I love the image of a camera and I love the sentiment: Remember to stay positive.
I am not a coffee drinker, but if they ever come out with it in a travel mug,
 I will be the first to buy one!


This pillow is delightful.
It would look awesome in my living room.
The quote is great and it's printed on burlap.
In my opinion, you can't go wrong with burlap- unless it's burlap pants.
I can't imagine that would be comfortable. . .

Aren't these things precious?
Valentine's Day is coming. . . maybe you need to let your sweetie know about some of these items.

Thanks so much for stopping by and God bless.

P.S. I am not affiliated with any of these companies, I just like their stuff.

The works of the Lord are great
Psalm 111:2

This post is linked to My Girlish Whims, The Dedicated House, and Ivy and Elephants