Friday, February 27, 2015

Recycled Bracelets

Boy, do I have something fun to show you today. . . 

Check out these bracelets-
can you tell what they are?


Locker numbers!
What do you think?
I only wish I had the old lockers they came from!

Kind of fun, huh?
I hope you have a wonderful weekend!

Thanks for stopping by and God bless.

I love the Lord, 
because He has heard my voice and my supplications.
Psalm 116:1

Thursday, February 26, 2015

Thrifty Thursday #155

It was slim pickings in the secondhand shopping this week.
I actually had some time to myself and took the opportunity to browse.
I slowly walked through my three usual thrift stores.
Sadly, there wasn't much that interested me.

I only bought three different things. . . 


I got four of these for a quarter apiece.
I'm actually not sure what they are. . . 
They look like replicas of Spanish coins.
Anybody know what they are?
I plan to turn them into bracelets.


You know how I love old books.
This Webster's Secretarial Handbook was fifty cents.
It was printed in 1976.


It's in pristine condition!
I think it would make a great gift for an administrative assistant.
I've been thinking of opening an Etsy store for finds like this.


I also got this pack of photo album refills for fifty cents.
Sounds pretty lame, but I can either add these to my photo album (I keep one every year and print out the photos I take) or I could use them as pages in a scrapbook (which I've done before).
Either way, I wasn't going to pass up this buy.

That's all. Two bucks and one hour well spent.

Thanks for stopping by and God bless.

Do all things without complaining and disputing. 
Phil. 2:14

Tuesday, February 24, 2015

30 Days of Lists Blog Hop

Yesterday I mentioned that I'm participating in the March round of 30 Days of Lists.
Today that site issued a challenge: go here and create a list based on one of their older prompts.
Here's my list. . .


I chose to list my weekly rituals.

This is such a fun and easy way to journal.
Give it a try!

Thanks for stopping by and God bless.


May you be blessed by the Lord who made heaven and earth.
Psalm 115:15


Recipe of the Week #158- Ham and Honey Biscuits

Ham and Honey Biscuits
1 pkg Grands biscuits
1 pkg deli ham
honey

Open up each biscuit and place some ham with 1 tsp honey inside. Press the biscuits closed. Bake at 350 until biscuits are golden brown.

These are tasty little fellas! They're a great little snack or paired with veggies and dip make a nice light lunch! They went over very well with my family.

Thanks so much for stopping by and God bless.

Oh give thanks to the Lord, for He is good!
 For His mercy endures forever.
Psalm 106:1


This post is linked to Skip to My Lou, Plucky's Second Thought, and Ivy and Elephants.

Monday, February 23, 2015

Mini Album Monday #48- Simple Junk Journal

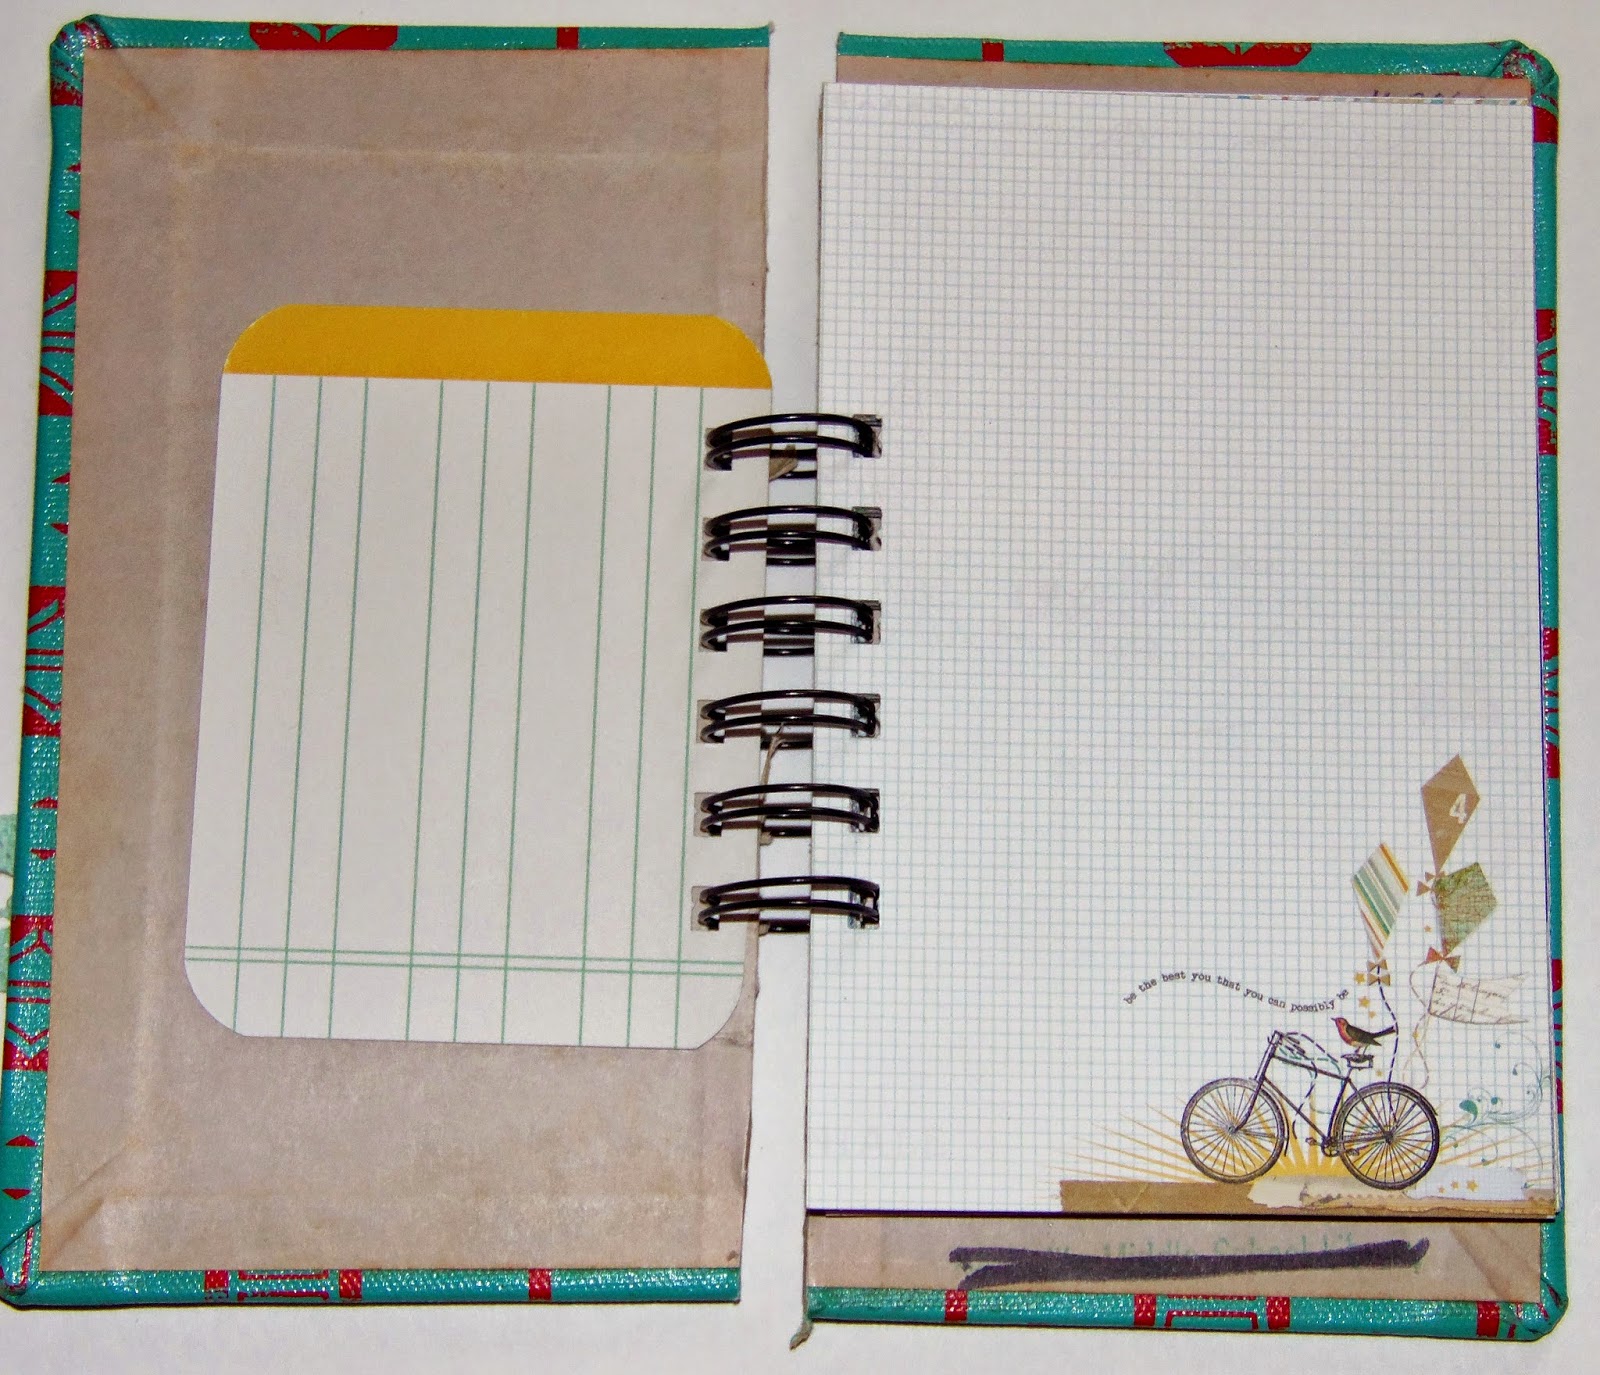
One of my favorite ways to make a mini album is to use an old book cover and fill it with pages.
I call them Junk Journals.
Today's album is made with a wee little cover that measures 4"x 7".
I'd been wanting to use it for an album, but wasn't for sure what I'd do with one so little.

Then I signed up for another round of 30 Days of Lists 
and I thought this little fella would work perfectly.
If you don't know what this challenge is, go here to read about it.

The last time I did this challenge, I made a more detailed album that took more work.
This time I wanted something cute and simple so that all I have to do is add my list every day.

You can go here if you want to register for the March round of 30 Days of Lists.


 Here's the cover.
I bound it with my Zutter Bind-It-All.
The book cover was pretty thick.
I had a heck of a time getting it into the machine to punch the holes!
But when I'm determined, no machine is going to stop me:)


I added a 3"x 4" journaling card at the beginning.
I plan to make this my intro page.
Nearly every album I make has a dedication page stating why I made it.


I used a total of 15 pages that I trimmed to 4"x 6".
 I plan to place a list on the front and the back of each page.


All my papers came from this 8"x 8" pack by My Mind's Eye.
I love the colors and the prints.


After every third page, I added a 3"x 4" journaling card that features a nice quote.


This style of album is simple if you'd like to make one.


Just choose an old book and carefully cut off the cover.


Then cut pages to fit.


If you don't have a binding machine, just punch holes and bind the book with office rings.


You could add photos, journaling, or even mementos.
This type of book would be great to feature Instagram photos!


Since my pages are small, I'm going to have just enough room for my journaling cards.


 I trimmed some old ledger paper to 3"x 4"


I can't decide if I'm going to decorate the inside covers or not.
I kind of like the "Discard" stamp showing that this is an old library book.

Come back at the end of March to see how my book turns out.

Thanks so much for stopping by and God bless.

Grace be with all those who love our Lord Jesus Christ in sincerity.
Eph. 6:24

This post is linked to The Dedicated House, Between Naps on the Porch,
I Heart Naptime, and It's Overflowing.

Friday, February 20, 2015

Chocolate Sugar Lip Scrub DIY

You've got to try this sugar scrub-
it's a lip scrub and it's chocolate flavored!

Chocolate Sugar Lip Scrub
3 Tbsp cocoa powder
1 1/2 cups light brown sugar
1 Tbsp vanilla
1/3 cup grape seed oil
 Just add the ingredients together and stir.
 To use: apply a small amount to your lips and gently rub in a circular motion for about a minute.
Wipe or lick off. Store in an airtight jar and use within a month.
I know that I get chapped lips- especially in cold weather. This scrub softened them right up!
  
If you put this in a cute jar and add a label, it would make a darling gift!
  
Thanks so much for stopping by and God bless.
I will mention the lovingkindnesses of the Lord
and the praises of the Lord
Isaiah 63:7

Thursday, February 19, 2015

Thrifty Thursday #154

After taking my boys to the dentist last Thursday, I happened across
 a yard sale on our way home. Of course, I had to stop.

A family was selling stuff from an older man's house, so there wasn't too much that interested me.

However, I spotted this bucket and hoped for a deal.
After a little bartering, I got this for $1!
I recently saw some of these for sale for thirty-some dollars at an antique store.


I got this casting net for $2. According to my hubby, this was quite a bargain!
It is still in great shape.


The final bargain I got was this large fishing net- also for $2.
My hubby was quite pleased with my purchases!
Isn't my model cute? My son isn't shy about striking a pose.

That's it for this week.  I'm hoping to stumble across some more sales this weekend.
Good luck to all of you with your second hand shopping this week.

Thanks for stopping by and God bless.

Therefore take up the whole armor of God, 
that you may be able to withstand in the evil day, 
and having done all, to stand.
Eph. 6:13


This post is linked to Life with Loralei, My Repurposed Life, Tatertots and Jello,
 and  Ivy and Elephants.

Wednesday, February 18, 2015

Lovelies That I Love

I always look forward to these Wednesday posts.
It's such fun finding cute and affordable products to share with you.
Want to know something ironic?
I'm not really a big shopper.
I can go shopping all day and not buy anything.
Or I can go for months without shopping- other than for groceries and at the thrift stores.

Here's this week's finds. . .

Oh, I think this is amazing.
You send a sample of handwriting, and they turn it into a bracelet!
What a great keepsake!
My Nana never signed her name on cards, but would write "Love you lots."
I'd love to have that on a bracelet:)

I love everything by ILoveItAll.
This is an album that you can use for the 30 Days of Lists Challenge.
It already comes bound and even comes with a pouch of extras.
Too cute!
Spoiler alert: come back Monday to see my album for the newest 30 Days Challenge.


These earrings are made from old movie film.
How darling are they?
I would never have thought to do such a thing.
Love them!


Check out this keyring.
I love that it looks like a small globe.


I tote-ally dig this tote :)
It's always nice to have a tote handy while running errands.

Aren't these items awesome?!?
If you like this virtual shopping post, stop by every other Wednesday to see new finds.

I'm not affiliated with these shops, I just like their stuff.

Thanks so much for stopping by and God bless.

 Finally, my brethren, be strong in the Lord 
and in the power of His might.
Eph. 6:10

Tuesday, February 17, 2015

Recipe of the Week #157- Double Decker Peanut Butter Fudge


Double Decker Peanut Butter Fudge
2 cups Reese's peanut butter chips
1/4 cup butter, melted
1/2 cup cocoa
1 tsp vanilla
4 1/2 cups sugar
1 7oz jar marshmallow cream
1 1/2 cups (12 oz) evaporated milk
1/4 cup butter

Line 13"x 9" pan with nonstick foil. Place 1 cup peanut butter chips in a bowl; set aside. In a second bowl, mix 1/4 cup butter, vanilla, cocoa until smooth. Add 1 cup peanut butter chips.
In a large pot, mix evaporated milk, marshmallow cream, 1/4 cup butter, and sugar. Bring to a rolling boil and boil for 5 minutes. Take off the heat. Add half to each bowl. Stir the bowl with peanut butter chips until chips are melted. Spread in pan. Stir cocoa mix until chips are melted. Spread this on top of the first layer.
Cool and remove from pan.

Note: I let the first layer sit for a few minutes before adding the second layer. When I add the chocolate layer, I start by pouring around the edges adding just a little at a time.

This fudge is so rich and dreamy. The best part is that you can substitute the peanut butter chips with butterscotch and have butterscotch chocolate fudge.

Thanks so much for stopping by and God bless.

Thanks be to God for his indescribable gift!
2 Cor. 9:15
This post is linked to Tip Junkie, It's Overflowing, and Plucky's Second Thought

Monday, February 16, 2015

Check This Out!

The spring issue of Vintage Style Magazine is out!


Run on out and get a copy.
I guarantee you'll be inspired:)

Thanks for stopping by and God bless.

Finally, my brethren,
 be strong in the Lord and in the power of His might.
Eph. 6:10


This post is linked to Life With Loralei and Skip to My Lou.

Friday, February 13, 2015

Cork Heart DIY

If you've got some corks and a glue gun,
 here's a quick project you can whip up for Valentine's Day.


This cork heart is cute and easy to make. 


Start with an 8 1/2"x 11" piece of paper and fold it in half.
Draw half a heart on it- just like we used to do in elementary school.


Then cut along the line and you'll have a heart.
This will be the template for our cork heart.


 Start by placing one cork at the top of the heart. Then, using a glue gun, glue along 
one edge of each cork and press it up against the previous cork.


Keep going while following along the edge of your template.


For the very last cork, I placed glue on two opposite sides and slid it in sideways in between the two on either side- so I wouldn't get glue along the tops of the corks.


 Your heart is done!
 I let mine sit for a few minutes until all the glue was set.


If you're wondering why I have so many corks, 
it's because I bought this huge container of them at an estate sale.


Now it's ready to set out on a shelf.

By the way, everything in this arrangement was a second hand purchase -
 the globe, the books, the basket- even the wooden spools in the basket!


I think it's cute enough that it can sit out not just for Valentine's Day, but all the time!

If you like this project, check out what else I used my stash of corks to make.
 You can go here to see a large cork heart and here to see a yardstick cork board.

I hope you all have a lovely Valentine's Day and your sweetie gets you something nice!

Thanks for stopping by and God bless.

 I will greatly rejoice in the Lord, 
my soul shall be joyful in my God
Isaiah 61:10


Thursday, February 12, 2015

Thrifty Thursday #153

Well, I didn't find anything good at the thrift stores this week,
and there haven't really been too many yard sales lately.
Luckily, we drove by one on our way to breakfast last Saturday.

I bought one bag of souvenir spoons for $5.
There were 19 spoons in the bag.
They're all so cute and unique.

(I wish the photos were better, but I tried four different times in different lighting with different backgrounds, and this was the best I could do)


The first one is from Victoria, B.C., the next one is from the 1984 Mardi Gras,
the third one is from New Mexico, and my favorite of this group is the last one.
 It's from Hawaii and has a hula girl engraved in the handle.


The next four all have dangly charms: the first one is from Fiesta, Tx in San Antonio. It has a picture of a carousel horse with a horse charm. 
The second one is from The Song of Norway, Royal Caribbean Cruise Line and has a ship charm. The third one is engraved on the bottom part of the spoon and says
 Mission Santa Barbara and has a bell charm. 
The fourth one is from Isabella Lake. It is engraved with a picture of the state of California. 
The charm is a bear.


These two have small buildings on the top and are engraved on the bell of the spoon.
The left one is from Washington D.C. and has the Capitol building at the top.
The second one has the state of Texas engraved on the bell and has the Alamo at the top.

These are from Big Bear Lake California, Washington, Kentucky, and Michigan.


The last five are all unique. 
I love the two outer ones that are shaped like shovels. 
The left one is from Maryland and the right one is from the Sun Viking Cruise Ship.
The second from the left is from Durban Mitchell Park, the next one is copper in color and is from the 1984 World's Fair. The second from the right has a scalloped bell and is from Colorado.

I was tickled pink as I pulled each spoon out of the bag they came in.
Somebody really was a big traveler. There were four more bags there for sale.
I was tempted, but I figured one bag was enough.

I'm not sure what I'm going to do with them. . . maybe make a wind chime.
Do you have any ideas of what I could do with them?

I wish you all happy treasure hunting this weekend! Hopefully you'll find more sales than I did:)

Thanks for stopping by and God bless.

Giving thanks always for all things to God the Father
 in the name of our Lord Jesus Christ
Eph. 5:20

Wednesday, February 11, 2015

Layout of the Week #103

Take a deep breath, push up your sleeves, and pour your favorite beverage (mine is Diet Coke:). . .
it's time to whip up a layout!


Here's the layout we'll be creating.
As usual, follow these few steps and you'll make this in no time.
Quick and easy:)

To make it, you'll need:
one piece of 12"x 12" cardstock
one piece of 8 1/2"x 11" cardstock
one piece of pattern paper measuring 3"x 7"
one journaling card measuring 3"x 4" (a note card will do)
small letter stickers for the title
5-6 embellishments (I used two types of decorative tape and three word stickers)
6-8 photos 
paper trimmer
adhesive


The first step is to place your photos on the 8 1/2"x 11" piece of cardstock.
You'll have to crop to make them fit.
I left a slight edge of cardstock showing around the edges of the photos.

As you can see, I got six photos on here, but then I was left with a small white space in the center.


So I trimmed one photo small enough to cover that space.


Once your photos are adhered, place that piece of cardstock onto the larger piece
not quite touching the left edge.


 Now place the pattern paper in the upper right edge of the layout
 and butt it up to the edge of the photos.


On your journaling card, use your letter stickers to write the title sideways down the right edge of the card. Then write your journaling.
Place the card in the lower right corner right along the bottom edge of the pattern paper.

My journaling card already had a title printed on it.


To finish it off, add some embellishments.
I placed two pieces of decorative tape at the upper left corner of the top photo
and one piece of tape at the lower right corner of the bottom right photo.
I placed my three word stickers among the photos.

That's it! 
Pretty quick, huh?

Do you feel a sense of accomplishment after finishing a layout?
I sure do:)

Thanks so much for stopping by and God bless.

Therefore do not be unwise, 
but understand what the will of the Lord is.
Eph. 5:17