It's that time again. . . time to break out your scrapbooking supplies and whip up a layout.
Today we'll be using lots of embellishments for a fun look.
Follow along these easy steps and you'll have a layout done in under an hour.
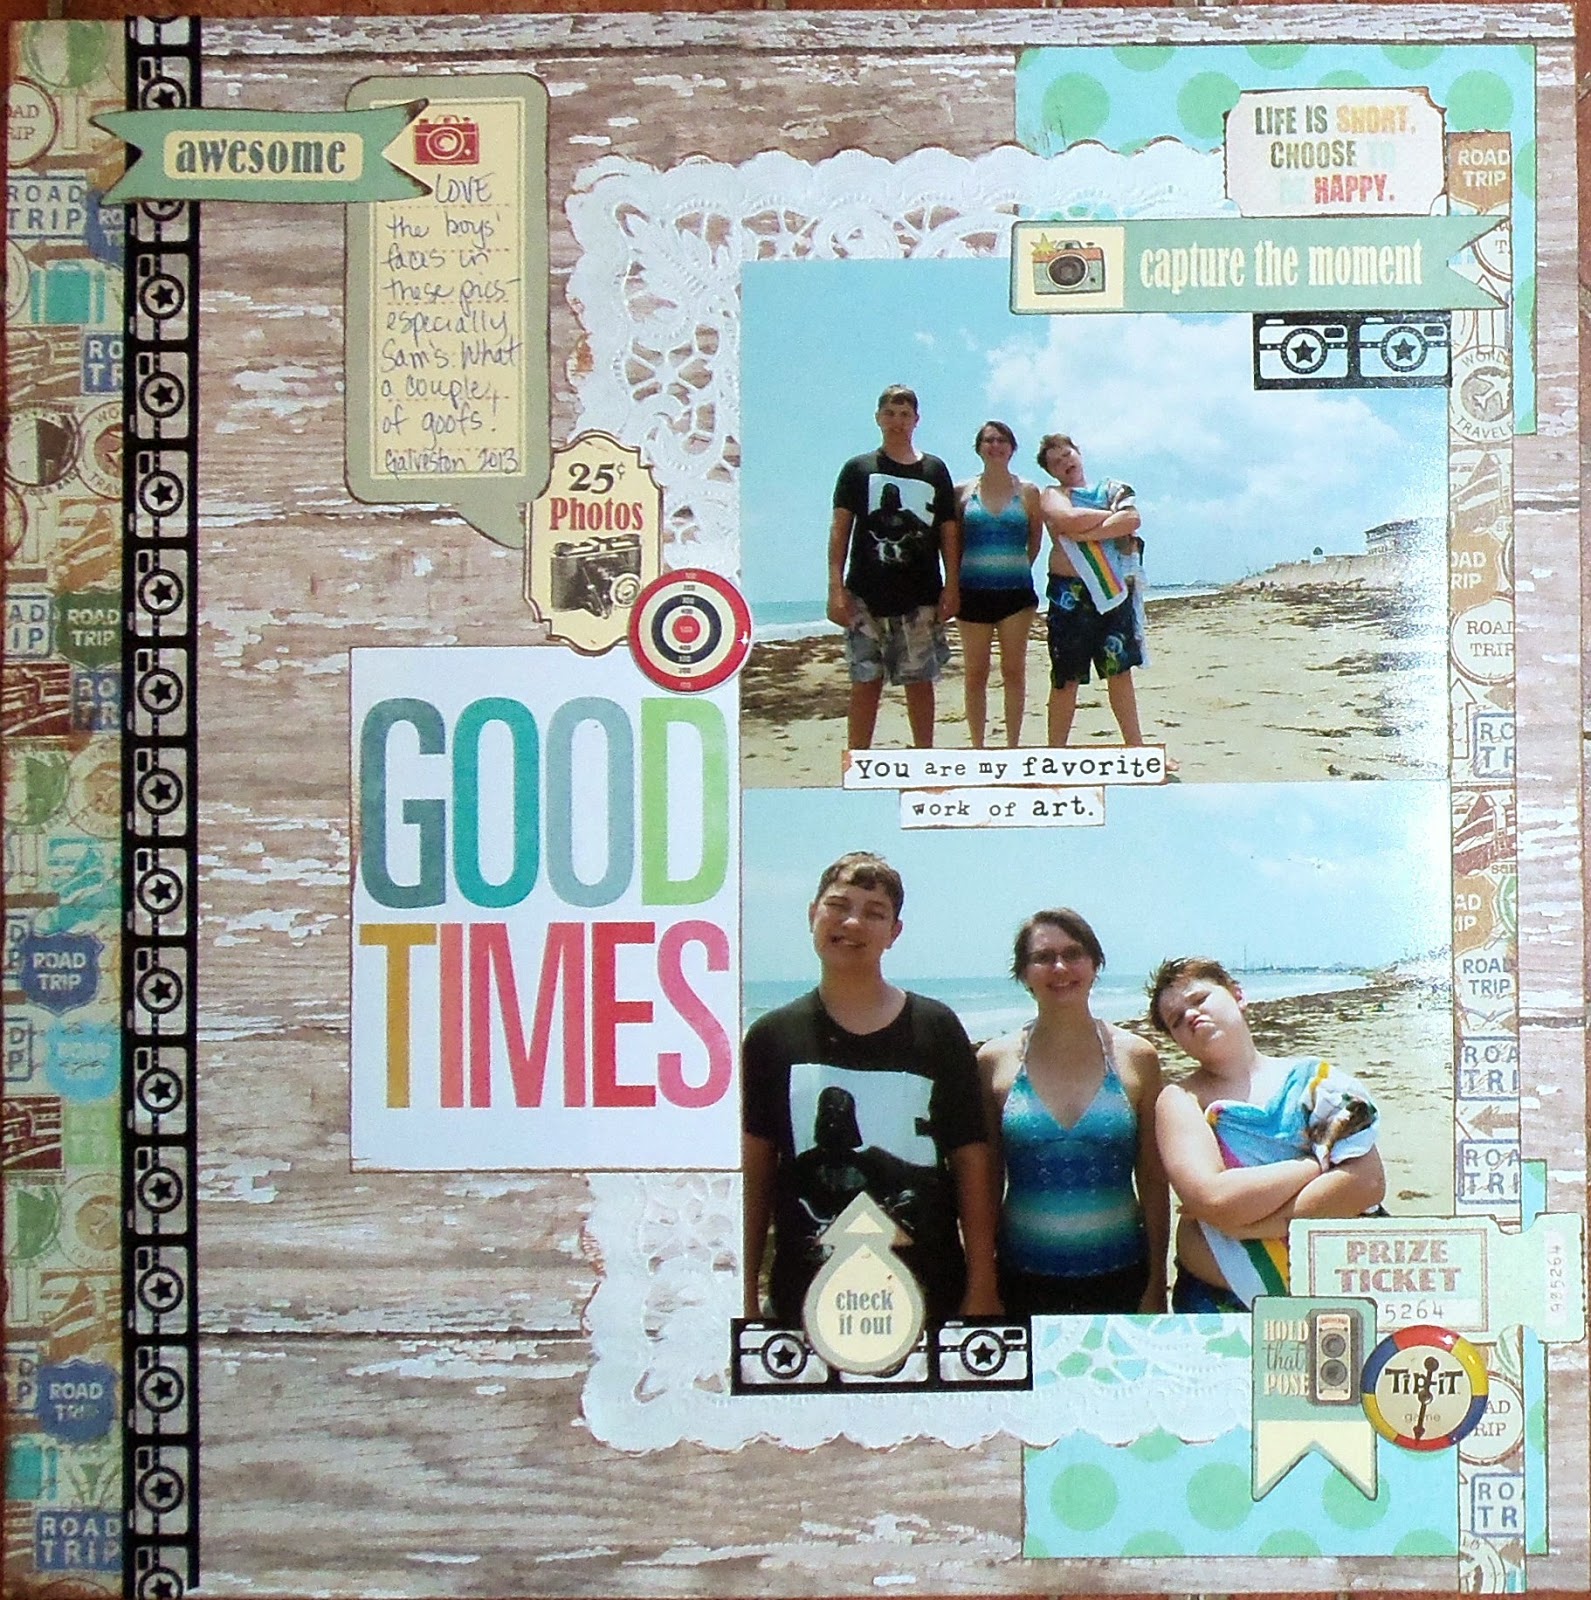
Here's the layout we'll be creating.
Yours will look similar, but not identical, as you'll be using your own products.

To make it you'll need:
one piece of 12"x 12" pattern paper
two pieces of pattern paper measuring 3"x 4" (I used the same paper for both pieces)
two strips of pattern paper measuring 1"x 12" and 1/2"x 11" (I used the same paper for both strips)
one piece of pattern paper measuring 6"x 10" (I used part of a paper doily place mat)
one roll of decorative tape
title block or letter stickers for the title
small journaling card
8-9 embellishments (I used several different types)
paper trimmer
adhesive
two horizontal 4"x 6" photos

Place the 1"x 12" strip along the left edge of the 12"x 12" pattern paper.

Next to that strip, place a strip of decorative tape.

Place the two pieces of pattern paper measuring 3"x 4" in the upper right and lower left corners.

Place your pattern paper measuring 6"x 10" overlapping the two smaller pieces of paper.
It should be about 1" from the right edge of the paper.

Place the strip of paper measuring 1/2"x 12" along the right edge of the large piece of pattern paper.
It should be about 1" from the top of the background and go to the bottom edge of the background.

Center your two photos on the large piece of pattern paper butting the edges up to the 1/2" strip.
My boys' expressions are just too much in these photos.

Now it's time to place some embellishments.
Place a short strip of decorative tape at the lower left corner of the bottom photo
and another short strip about 1" from the top right corner of the top photo.
Now place one embellishment overlapping the tape at the bottom.
Layer two more embellishments along the edge of the tape on the top photo.

At the bottom right corner of the bottom photo, arrange three embellishments in a triangular shape.

Now place your title just to the left of the photos.
I used a pre-printed title block, but you could also use letter stickers.

To finish it off, place your small journaling card and three more embellishments above the title
working your way up to the upper left corner of the layout.
What do you think?
Was it easy enough to follow along?
If you enjoyed this tutorial, stop by every other Wednesday for a new step-by-step layout.
Think how many you could complete by the end of the year!
Thanks for stopping by and God bless.
Give ear to my prayer, O God,
and do not hide Yourself from my supplication.
Psalm 55:1
This post is linked to I Heart Naptime, My Girlish Whims, Daisy Cottage Designs,
and Plucky's Second Thought.
and Plucky's Second Thought.
2 comments:
Just PERFECT! Love the square doily! Pinning this one!
This is so cute!
Thanks for joining the Link Up this week!
Post a Comment