
Here's the layout we're going to create.
Yours will look different because you'll use different supplies, but the "bones" will be the same.

To make it, you'll need:
one piece of 12"x 12" cardstock
two pieces of coordinating pattern papers
stickers to match the theme you're going with
notebook paper for the journaling
letter stickers for the title (I cut a word out of this paper that is covered with words)
five photos
photo shape template (I used Coluzzle)
paper trimmer
adhesive

Choose one of your pattern papers that you want to be the border. Trim four strips that measure
1/4" x 12" and adhere them around the edges of the cardstock.

Trim two photos into one large circle and one small circle, and trim three photos into different
size rectangles.
I used my old Coluzzle for this step. You could also use a circle punch. If you don't have any way to cut your photos into circles, just cut them into squares.
Adhere your first three photos like this. Don't put adhesive under the top left photo- you'll see why when we adhere our journaling.

Then place your last two photos like this.
The circles add a lot, don't they?

Now create your title block.
To make mine, I trimmed a word out of this pattern paper. Then I used a glitter border strip and cut it to fit around the edge of my title.
Letter stickers will work for this step, if you'd rather.

Here's the back of the title block. See how the border pieces are attached? I used regular Scotch tape.
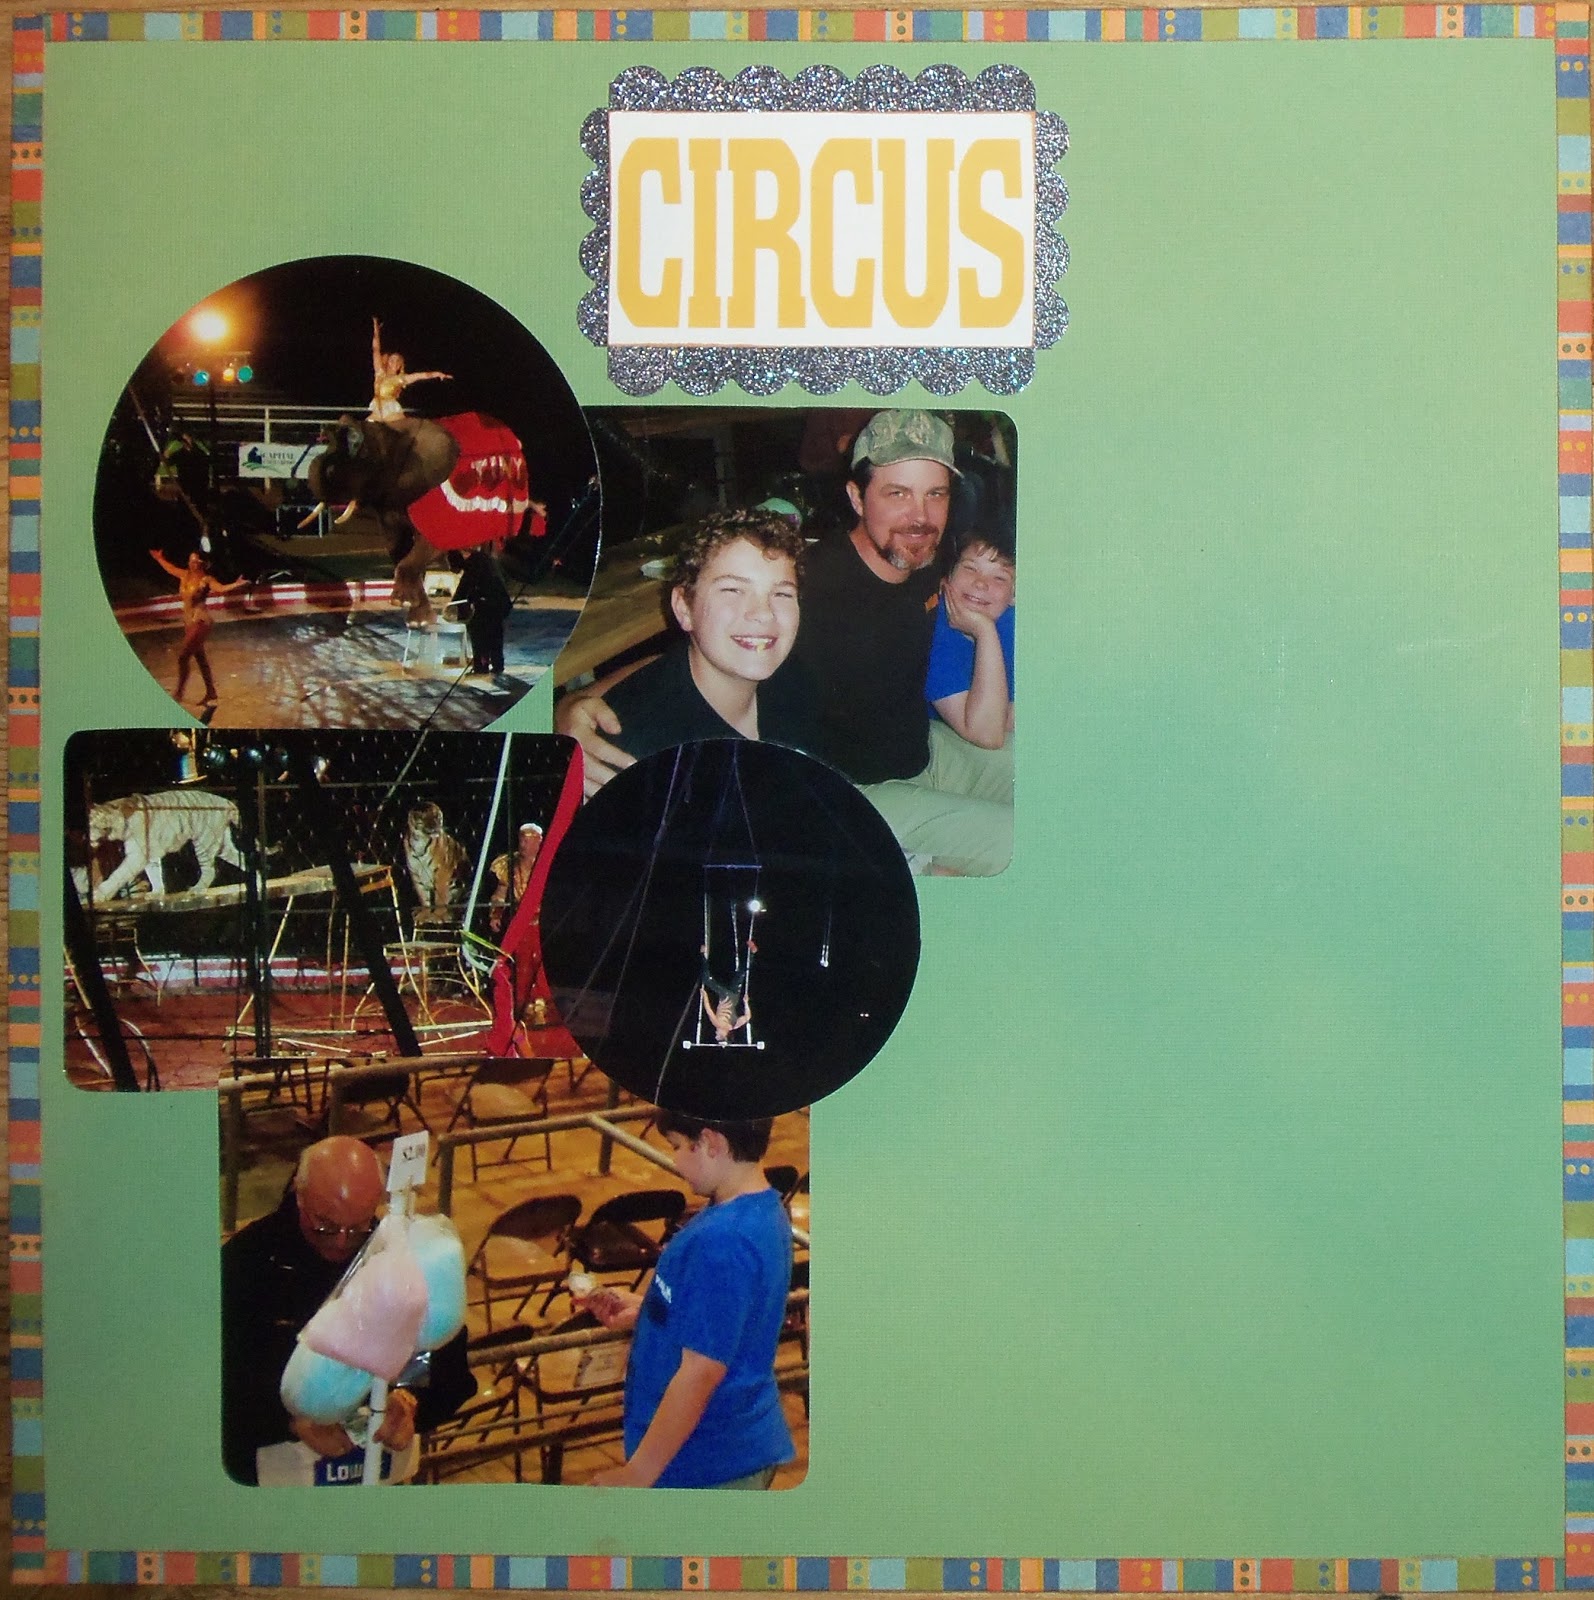
Adhere your title centered at the top.

Trim your notebook paper to 7 1/2" x 4 1/2". Add your journaling, then adhere the paper about two inches below the top right corner. Lift the top right photo and slide the notebook paper slightly behind it. Now you can place some adhesive under the right edge of the top photo.

Optional: add a subtitle or quote below the notebook paper. I trimmed this from the same paper I got my title.
Finally, add some embellishments. I placed some word stickers in the upper left corner of the cardstock and placed three stickers around the photos.
And, we're done!
I think we rocked the shaped photos, huh? :)
I hope you enjoyed this tutorial. I do a Layout of the Week every Wednesday. Feel free to stop by and give it a whirl! I intend for the layout to be simple and easy to follow. I also encourage you to use supplies you all ready have rather than having to go out and buy something new. If I'm using an item that you don't have, replace it with something else.
I intend for my tutorials to be generic enough that you can use them for any topic or theme. I'm hoping this feature helps you to get some of your photos scrapbooked and to use up supplies that you have.
If there is some topic that I haven't covered that you'd like to see, please leave me a comment letting me know. If I'm not explaining it well enough, please let me know.
Thanks so much for stopping by and God bless.
Oh, bless our God, you peoples!
And make the voice of His praise to be heard
Psalm 66:8
This post is linked to My Girlish Whims.
No comments:
Post a Comment