There are times that I don't have room to fit all that I want to on a layout. So I have to improvise. Today I'm sharing an easy way to give yourself a little bit more room to add mementos to your layout.
Here's the layout we'll be creating.
See the pocket above the left side of the photos?
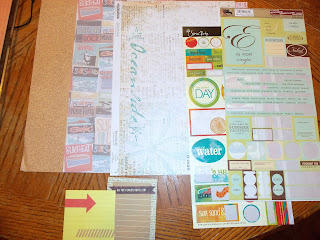
To make it, you'll need:
three pieces of 12"x 12" coordinating pattern paper
stickers in your theme
one or two journaling cards- notecards will do
letter stickers for the title
paper trimmer
adhesive
Trim your first piece of pattern paper to 6 1/2" x 11".
Cut your photos to fit. I was able to crop mine quite a bit.
You could also use three vertical 4"x 6" photos.
Make sure you leave about one inch at the bottom of the mat. Using your letter stickers, place your title in this space. My paper already had a word printed on it, so that's what I went with as my title.
Now trim your second piece of pattern paper to 6 3/4" x 11 1/2". This will act as a mat to your first piece of pattern paper. Don't adhere it yet.
When placing your adhesive, you need to adhere along the sides and the bottom. Along the top, you should leave a space without adhesive- this is where we'll slide in our journaling cards.
Place adhesive about halfway down where your cards will go so they don't fall down too far.
If you look closely, you can see that I circled my tape in pencil so you can see where it is.
Now place piece that onto your mat.
See how our journaling cards fit right inside that pocket?
I enclosed two journaling cards and two photos in mine.
Now adhere the large mat onto your background paper along the left edge and
about two inches from the bottom of the page.
Now it's time to add some stickers. Place 2-3 in the upper right corner of the background paper.
Place another 2-3 at the bottom right corner of the mat. Place one at the top left corner of the mat.
(After that, I felt mine was lacking, so I added a couple of tiny flowers to my stickers.)
Ta-da! That's it. Not too difficult, huh?
This pocket technique could be used on lots of layouts.
If you like the idea of adding pockets, you can go here and see another tutorial on this technique.
I hope this puts you in the scrapping mood:) I sat last night and went through some of my layouts that I've made. This is my seventy third tutorial which means I have that many layouts. Imagine if you decided to follow along every Wednesday- you could get quite a few layouts done before the end of this year!!
Thanks for stopping by and God bless.
And I will delight myself in Your commandments, which I love.
Psalm 119:47


No comments:
Post a Comment