Let me show you what it is. . .

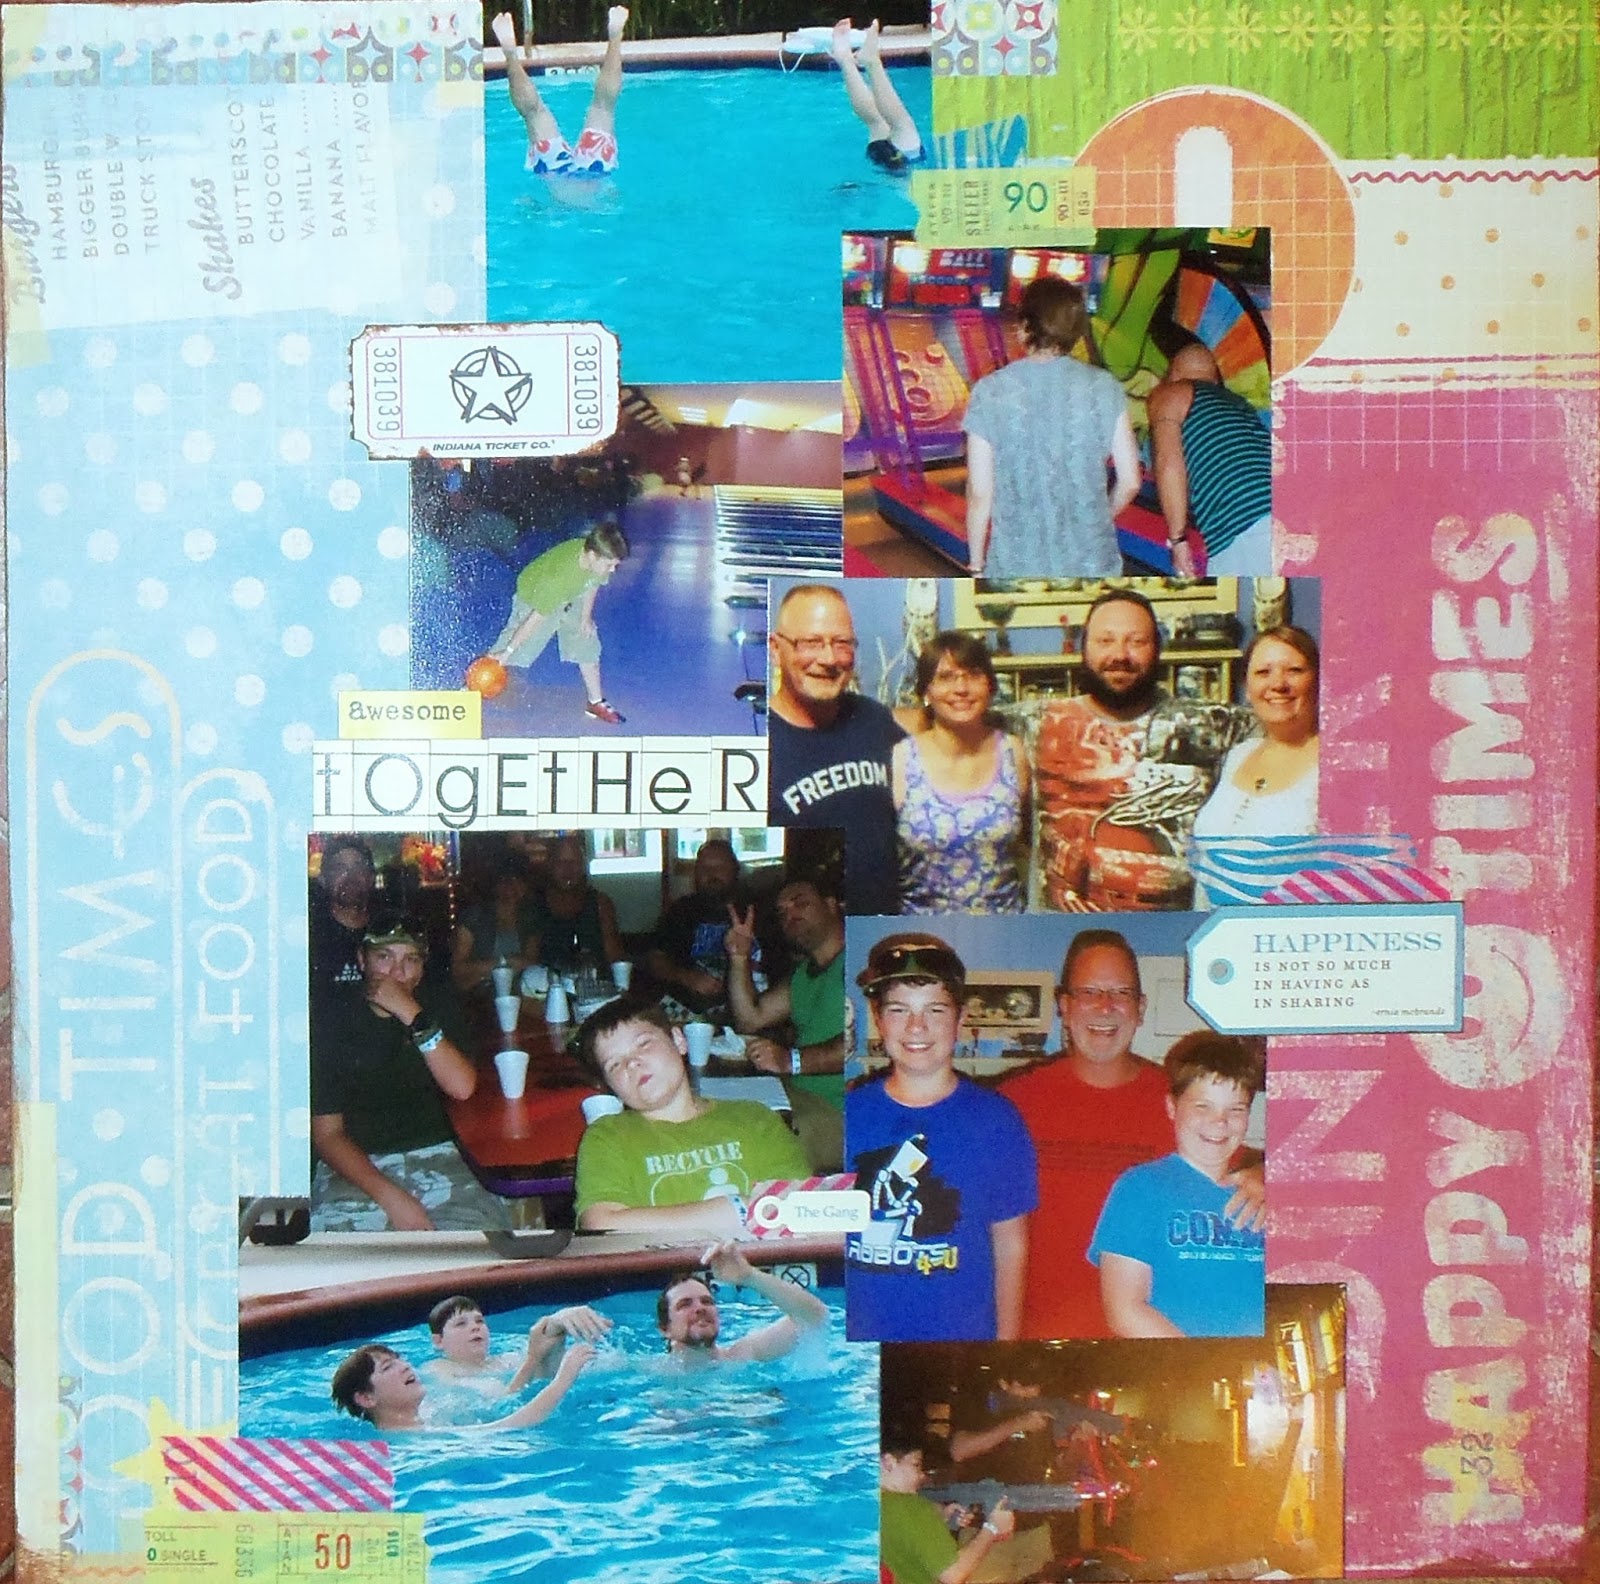
Here's the layout we'll be creating.
See how the photos appear to be arranged in a tower form- with a wide base and getting narrow as they go up?

To make it, you'll need:
one 12"x 12" piece of pattern paper (you'll notice that mine has a pretty busy print)
about eight photos
letter stickers for the title
stickers in your theme
optional: decorative tape

Start by cropping your photos. You want them to be different sizes.
Mine are all no more than 3 1/4" tall and different widths.
The randomness will add to the tower-like effect.
Start by adhering two wide photos along the bottom of the page.

Then just slowly add more photos above those- the width of the photo tower should get more narrow as you build up. Feel free to overlap some photos.
You may want to lay them our before adhering them to get them just the way you want them.

Using your letter stickers, place the title about halfway down the left side of the tower
overlapping a photo.
Now place embellishments here and there along the right and left sides of the photos.
I alternated when I placed mine- I started with one up high on the right, then a little lower on the left, and so on. I mixed stickers with decorative tape and used one ticket.

Your final step is to add journaling.
Can you see where I put mine?
That's right, I wrote along the outer edges of the paper and even some along the photo tower.
That's it! Unique and allows for lots of photos!
Thanks for stopping by and God bless.
The earth, O Lord, is full of Your mercy; teach me Your statutes.
Psalm 119:64
No comments:
Post a Comment