For this week's Mini Album Monday,
I thought I'd show you how my 2016 month-by-month album is coming along.
I originally showed this to you in January when it was just a bunch of blank pages.
I've completed the months of January and February.
I thought I'd show you how my 2016 month-by-month album is coming along.
I originally showed this to you in January when it was just a bunch of blank pages.
I've completed the months of January and February.
I started with this 9"x 9 1/4" Project Life album.
I'm using some of the Project Life clear filler pages, but I'm also adding other pages,
so it isn't completely Project Life.
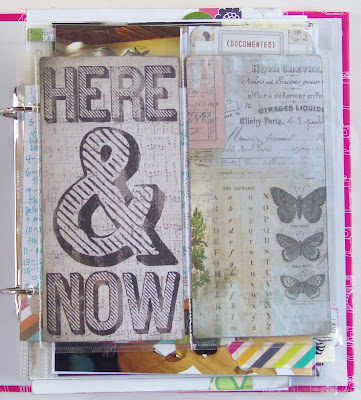
The intro page is two narrow Tim Holtz pocket cards.
I started off with one that says, "Here and now" because the album features our life right now.
I wanted both sides of the cards to be visible, so I had to sew a larger pocket page to fit these cards.
It was easier than it sounds.
The card on the far left says, "The story begins:"
I wote a little bit about what each of us are doing at this time.
The white page in the center is a small journaling card that looks like a calendar.
I placed one of these in every month's layout.
Instead of writing in the pre-printed boxes for the days,
I used list journaling to write what we did for the month.
The journaling carried over to the backside of the card.
The next page is a clear pocket page.
I cut photos to fit and added a journaling card and some embellishments.
The second page is another clear pocket page, but it has different size pockets.
My additional journaling cards and embellishments are attached to the outside of the pockets.
On the left, my photo didn't fit in the designated pockets, so I cut it to fit,
then added pattern paper to fill the rest of the space.
The page on the right is a divider page. I added one of these to each month.
The back side of the divider page only has one photo and a large ticket.
The page on the right is half of a large envelope. I added one of these to each month as well to hold various mementos.
Here's where the February photos start.
I added photos to the back of January's envelope
and listed our activities on the calendar journaling card.
On the back of this journaling card, I had enough room to add a small photo.
Throughout each month, I try to take a photo at each thing we do (although I don't always remember).
Sometimes I add random photos like this one of my dog. She got a hold of a long piece of wood from one of my husband's projects and thought she'd claim it for a chew toy.
At the end of each month, I print off that month's photos.
Then I figure out where they'll fit in the book for that month.
After all the photos are placed, I go back to add the journaling and embellishments.
I have found from previous years, that it's much easier to keep up with this project every month rather than let it build up for a month or two. . . or three. :)
Some photos end up getting cropped quite a bit while others stay in their original 4"x 6" size.
I have lots of extra clear pocket pages stored at the back of the album
that I can add to each month as I need them.
Because it's a binder book, I can also add extra pages as I like.
This journaling card that says "Just Sayin' " was added
so I that I had room to add one more picture on the back of it.
On the right is the envelope for February.
I keep things in it like our church newsletter, party invitations,
programs from events we've gone to, and that sort of thing.
So you get the gist of how this album will turn out.
Lots of pictures and memories for every month.
I thought it would be easier to show you how my Year in Review album looks now
before we get any farther into the year.
I make one of these every year. I just love going back through the old ones.
My boys aren't ever excited to look back at them, but I figure one day they will be. . . .
Thanks for stopping by and God bless.
It is good to give thanks to the Lord,
and to sing praises to Your name, O Most High
Psalm 92:1
This post is linked to USS Crafty, Simple Nature Decor, Lil' Luna, Embracing Change,
and The Dedicated House.


No comments:
Post a Comment