Friday, August 31, 2012

Flowers Made From Playing Cards

     Earlier this week, I showed you some projects that you can make from playing cards. Staying with that theme, here's a tutorial for making flowers from playing cards.
     I am all about being frugal and using what you have. Who among us doesn't have a pack of playing cards laying around?

     To make these, you'll need:
playing cards
pen
scissors
circle punch
gems/buttons for the flower centers
hot glue gun

Start by drawing a swirl on your card. I did this on the back, so the ink wouldn't be seen from the other side.

Then cut along the line. You'll need to trim the excess part of the card off from the end (it will be the corners of the card).

You'll be left with this curly Q. Starting at the loose end, run the card through your thumb and index finger so it's not so stiff for this next part.

Starting with the center of the swirl, wrap it in a circle around the tip of your finger. The card may be stiff, if so, repeat the above step.

Keep going until it's rolled all around itself  like this. Set it aside.

Use your circle punch on another card. This circle will become the base for our flower.

Apply some hot glue to the center of the circle.

Then place your flower on the circle back. You may need to re roll it if it came too loose when you sat it down.

This is what it will look like.

Feel free to add some bling or a button to the center.

These would look cute atop a wrapped gift.
They would also look cute sitting in a decorative little bowl on the table behind your sofa.
 
     I hope you all have a fantastic Labor Day weekend! Enjoy your extra day off. Thanks for stopping by and God bless.


If they obey and serve Him, they shall spend their
days in prosperity, and their years in pleasures.
Job 36:11


This post is linked to Happy Hour Projects, Be Different Act Normal, Five Days Five Ways and


Thursday, August 30, 2012

Thrifty Thursday #32

     Hey My Friends, I'm late posting today, but I'm here. School started this week and I'm home-schooling my boys (though K12, which is online public school). Between school, grocery shopping, making dinner, and going to my son's two hour football practice, this is my first chance I've had to sit down and post.

     As I headed out to make a quick stop at the thrift stores the other day, I spotted a yard sale. I found the cutest plate for fifty cents. I was so excited to hang it in my kitchen. But as I had it in my pile to take photos, I carelessly dropped it to the ground and it shattered. My son giggled when I said, "Fifty cents down the drain." I wasn't trying to be funny, though. I actually meant it.

My other yard sale purchases were these two doilies. Though I probably won't leave them in the embroidery hoops. I got them for a quarter a piece which is quite a bargain for two doilies and two embroidery hoops!


My favorite thrift store often has pretty old plates. I love the print on this one and even though there's a little chip on the lower side and we can't eat off it, I can hang it on my kitchen wall.
I seriously cannot pass up old sheet music- especially when it's only fifty cents!

It's finds like these that make me feel like dancing in the aisles of the thrift store! ( I'm just kidding- the thrift store doesn't have aisles!)
Old paper products are like the Holy Grail for me. These notepads are 8.5" x 14". That means one of these pieces of papers will go from the top to the bottom of a 12"x12" scrapbook page! 
One is notebook paper, while the other is my favorite. . . ledger paper.

I was in a hurry, so I only got to stop at two thrift stores. There was one more that I wanted to go to, but I knew that my hubby and I would be in that part of town later that evening for date night, so I decided to wait until then.
It's not every guy who agrees to make a thrift store run at the beginning of a date! I do believe he's a keeper:)


This is the reason I wanted to go to this particular store. I had seen this music stand buried behind some stuff the last time I was there. My older son, the drummer, claimed our only music stand, so my younger son, the guitarist, lays his sheet music on the floor when he practices. 
This stand is in great shape and is very heavy duty. This bodes well since my younger son is so hard on his stuff. 

While I was waiting for the thrift store guy to un-bury the music stand, I was shuffling through the dishes. I have a nice collection of the saucer size plates, but I don't have any dinner plates. Imagine my surprise when I found this beauty! Got it for a dollar. My goal is to have a set of mismatched dinner plates. I think there's such charm in that:) When I stayed at the B&B recently, we ate off of their mismatched china plates and I found it delightful.

     Happy treasure hunting to you all. Thanks for stopping by and God bless.

Your word I have treasured in my heart
that I might not sin against You.
Psalm 119:11

     This post is linked to Embracing Change, Apron Thrift Girl,  and My Repurposed Life.


Wednesday, August 29, 2012

Layout of the Week #26- Using Playing Cards to Scrapbook

     This week you need to get your game on because we're going to incorporate playing cards in our Layout of the Week.
     I love using things out of the ordinary when crafting. Playing cards aren't usually thought of for scrap booking, but they make a cute and very inexpensive embellishment. I have picked up several packs of cards for next to nothing at yard sales. You may even have an unused pack laying around your house.

Here's the layout we'll be creating.

 For this project, you'll need:
one piece of 12"x12" pattern paper
one strip of pattern paper measuring 12"x3.5"
one 12" length of coordinating ribbon
6 playing cards
letter stickers for the title
stapler
adhesive
paper trimmer

We're going to begin by creating the strip of paper with layered playing cards. Just lay them down the strip turning them this way and that. There is no science to this.

I used six cards- two of them I flipped over and put the backside facing up.

Once they're all attached, you need to trim off the excess that is hanging over the edge of the paper. You can either trim them with scissors or use your paper trimmer like this.

Adhere the strip to the right edge of the 12"x12" pattern paper.

Overlap the edge of the playing cards with your ribbon.
I adhered mine by stapling the ribbon at the top and bottom.


  Now place your two 4"x6" photos like this.

Place your title at the bottom of the page.

Write your journaling in strips, then adhere them in between the bottom photo and the title.
And you're done!
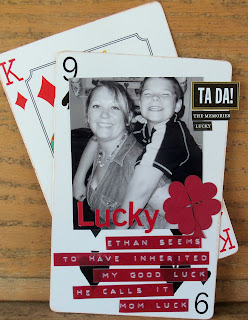
I used my layout to document how my family loves to play games, but you could use this for a "Lucky" themed layout- like how you're lucky to have your spouse, your children, or your best friend. Or you could use family photos and the title "Full House."
Here is a layout where I used two large playing cards (7"x4.5") to create a layout.

For this photo display, I tied together four large cards and used it to document my family's favorites right now. This went together very quickly.
If you don't have cards this big, you could just use card stock or chip board trimmed to size.
Print a photo of each of your family members, back it with a bit of pattern paper, and use letter stickers for their names. Then just have them write down their five favorite things, trim their words from the paper and adhere them. Quick, cute, and easy!

Here's how it looks from behind- just four large cards tied together.

Here is a close up photos of my hubby and my side.

Here is a close up photo of the boys' side.

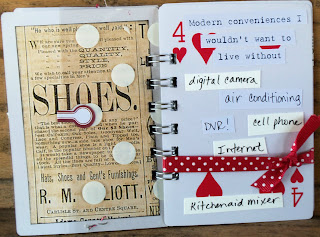
     If you're not played out on playing card ideas, this final project shows a mini album made from playing cards. I made this for a make-and-take using only five regular size cards.

I bound it with the Bind-It-All.

The second page is actually one card that I cut about 1/3 off.

Then I used the other portion or the 2/3 card for the third page. 

The clock and star is printed on a transparency that I placed in between two pages.

I used some vintage style pattern paper to cover the unsightly back on the cards.

The journaling consists of prompts that I had to answer. That always makes for easy journaling.

Here's the back cover. Thanks for looking!

     Well, I think I've tipped my hand- and more with all these photos! Thanks for stopping by and God bless.


Do you not know that those who run in a race all run, but one
receives the prize? Run in such a way that you may obtain it.
1 Cor. 9:24


This post is linked to At the Picket Fence and

shabby creek cottage
Liz Marie Blog

Tuesday, August 28, 2012

Recipe of the Week #32- Jalapeno Poppers in a Blanket


Jalapeno Poppers in a Blanket
1 egg
1 tbsp. water
All-purpose flour
1pkg. (17.3 ounces) Pepperidge Farm® Puff Pastry Sheets, thawed according to package directions
1 pkg. (8 ounces) light cream cheese, softened
3/4 cup finely shredded Cheddar and Monterey Jack cheese blend
 4 cloves roasted garlic, mashed
3 strips bacon, cooked and crumbled
12 medium jalapeño peppers, cut in half lengthwise and seeded

Heat the oven to 400°F. Beat the egg and water in a small bowl with a fork.
Sprinkle the work surface with the flour. Unfold 1 pastry sheet on the floured surface. Roll the pastry sheet into a 9"x12" rectangle. Cut the rectangle into 12 (3-inch) squares. Repeat with the remaining pastry sheet, making 24 squares in all.
Stir the cream cheese, shredded cheese, garlic and bacon in a medium bowl. Spoon about 2 teaspoons cheese mixture into each pepper half.
Place 1 filled pepper half diagonally, cheese-side down, onto each pastry square. Fold the pastry up over the pepper and press firmly to seal. Brush the filled pastries with the egg mixture. Sprinkle with additional shredded cheese, if desired. Place the pastries onto 2 baking sheets.
Bake for 20 minutes or until the pastries are golden brown. Let the pastries cool on the baking sheets on wire racks for 10 minutes.

Note: instead of roasted garlic cloves, I used garlic powder.

I made these for my dad, my brother-in-law and my hubby who are all big fans of jalapenos. They loved these! I used jalapenos from the garden. My hubby was sweet and cut and seeded the peppers so I wouldn't get the juice on my fingers (which always end up in my eyes if I've been handling peppers!).

I got this recipe from Pepperidge Farm.

Thanks for stopping by and God bless.


For the kingdom of God is not a matter of eating and drinking,
but of righteousness, peace, and joy in the Holy Spirit.
Rom. 14:17

This post is linked to Today's Creative Blog.


Monday, August 27, 2012

Vintage Photo Mobile

     Hi Guys, I am so excited about today's project! I've had the idea on my mind for awhile, so I finally sat down and made it.

     It's a vintage photo mobile!


     I got these photos at a couple of different estate sales. I hate to see that they weren't kept by the families.

     When I told my son where I got them, I mentioned how much I treasure old stuff. He responded with, "Almost too much." He does not share this fondness with me. :)

     Look at some of these pictures. . .


 Aren't they amazing?

    We don't have much for heirlooms in our family, so I think it's such a shame when other people don't appreciate theirs.

     My hubby hung the mobile over my piano- I think that's the perfect place for it.

     This photo mobile idea would look great with baby photos, too. How cute would one of these be in a nursery? Or for a wedding? Or for a birthday or anniversary party?

     If you'd like to make one, determine how many photos you want to use. I used twenty-three with four quotes and one piece of pattern paper (I had one odd size photo and didn't want a plain mat on the back).

     Mat all the photos on black card stock with photos on both sides of the mat. This means you will have two pictures back to back. I attached mine with photo corners. This way the photos are able to be removed in the future, and it adds to the vintage look.

     Using short pieces of jute, tie photos into four columns. I used separate pieces of jute to attach each photo to the next one. I used the small hole punch side of my Cropadile to make the holes through which to tie the jute.

     I placed my quotes in two of the columns.

     Once you have four columns of photos tied together, space them out evenly and tie them to an embroidery hoop (I used a 10" hoop). I then covered my hoop with jute. This was time consuming, but was worth it. I just used about a foot of jute at a time wrapping it tightly around the hoop applying hot glue every so often.

     Now you just use lace or tulle (I stacked both together) and place three 18" strands spaced evenly around the hoop. Then tie them together at the top making a loop to hang the mobile.

     Ta-da! Worth the effort, huh? If you make one, I'd love for you to e-mail me some photos!

     Thanks for stopping by and God bless.

Serve the Lord with gladness;
come before His presence with singing.
Psalm 100:2


    This post is linked to I Heart Naptime, Brassy Apple, Craft-O-Maniac, Today's Creative Blog, Skip to My Lou, Too Much Time On My Hands, Funky Junk Interiors, 52 Mantles, and Between Naps on the Porch
As seen on CraftGossip.com