Showing posts with label Veteran's Day. Show all posts

Wednesday, November 11, 2015

Layout of the Week #122

I'd like to start off by saying Happy Veteran's Day to all who served.

I have a patriotic layout designed in honor of today.

My hubby and I were both in the Army when we met, 
so I used a photo of both of us in uniform.
You could do this layout and feature a member (s) of your family who served.


Here's the layout we'll be creating.

My title says, "Thanks to the Army. . ."
The journaling reads: Two young soldiers met in Heidelberg, Germany. They fell in love and got married in Veijle, Denmark and were able to travel all over Europe together. All thanks to the Army.


To make it, you'll need:
one piece of 12"x 12" cardstock
one piece of pattern paper measuring 8 1/2"x 11" (I used a piece of legal paper)
eight pattern paper circles measuring between 1 1/4"- 2"
eight hearts small enough to fit in your circles
letter stickers for the title
1-2 photos
adhesive


To start, adhere the pattern paper measuring 8 1/2"x 11" onto the cardstock. 
It should be closer to the left edge than the right.
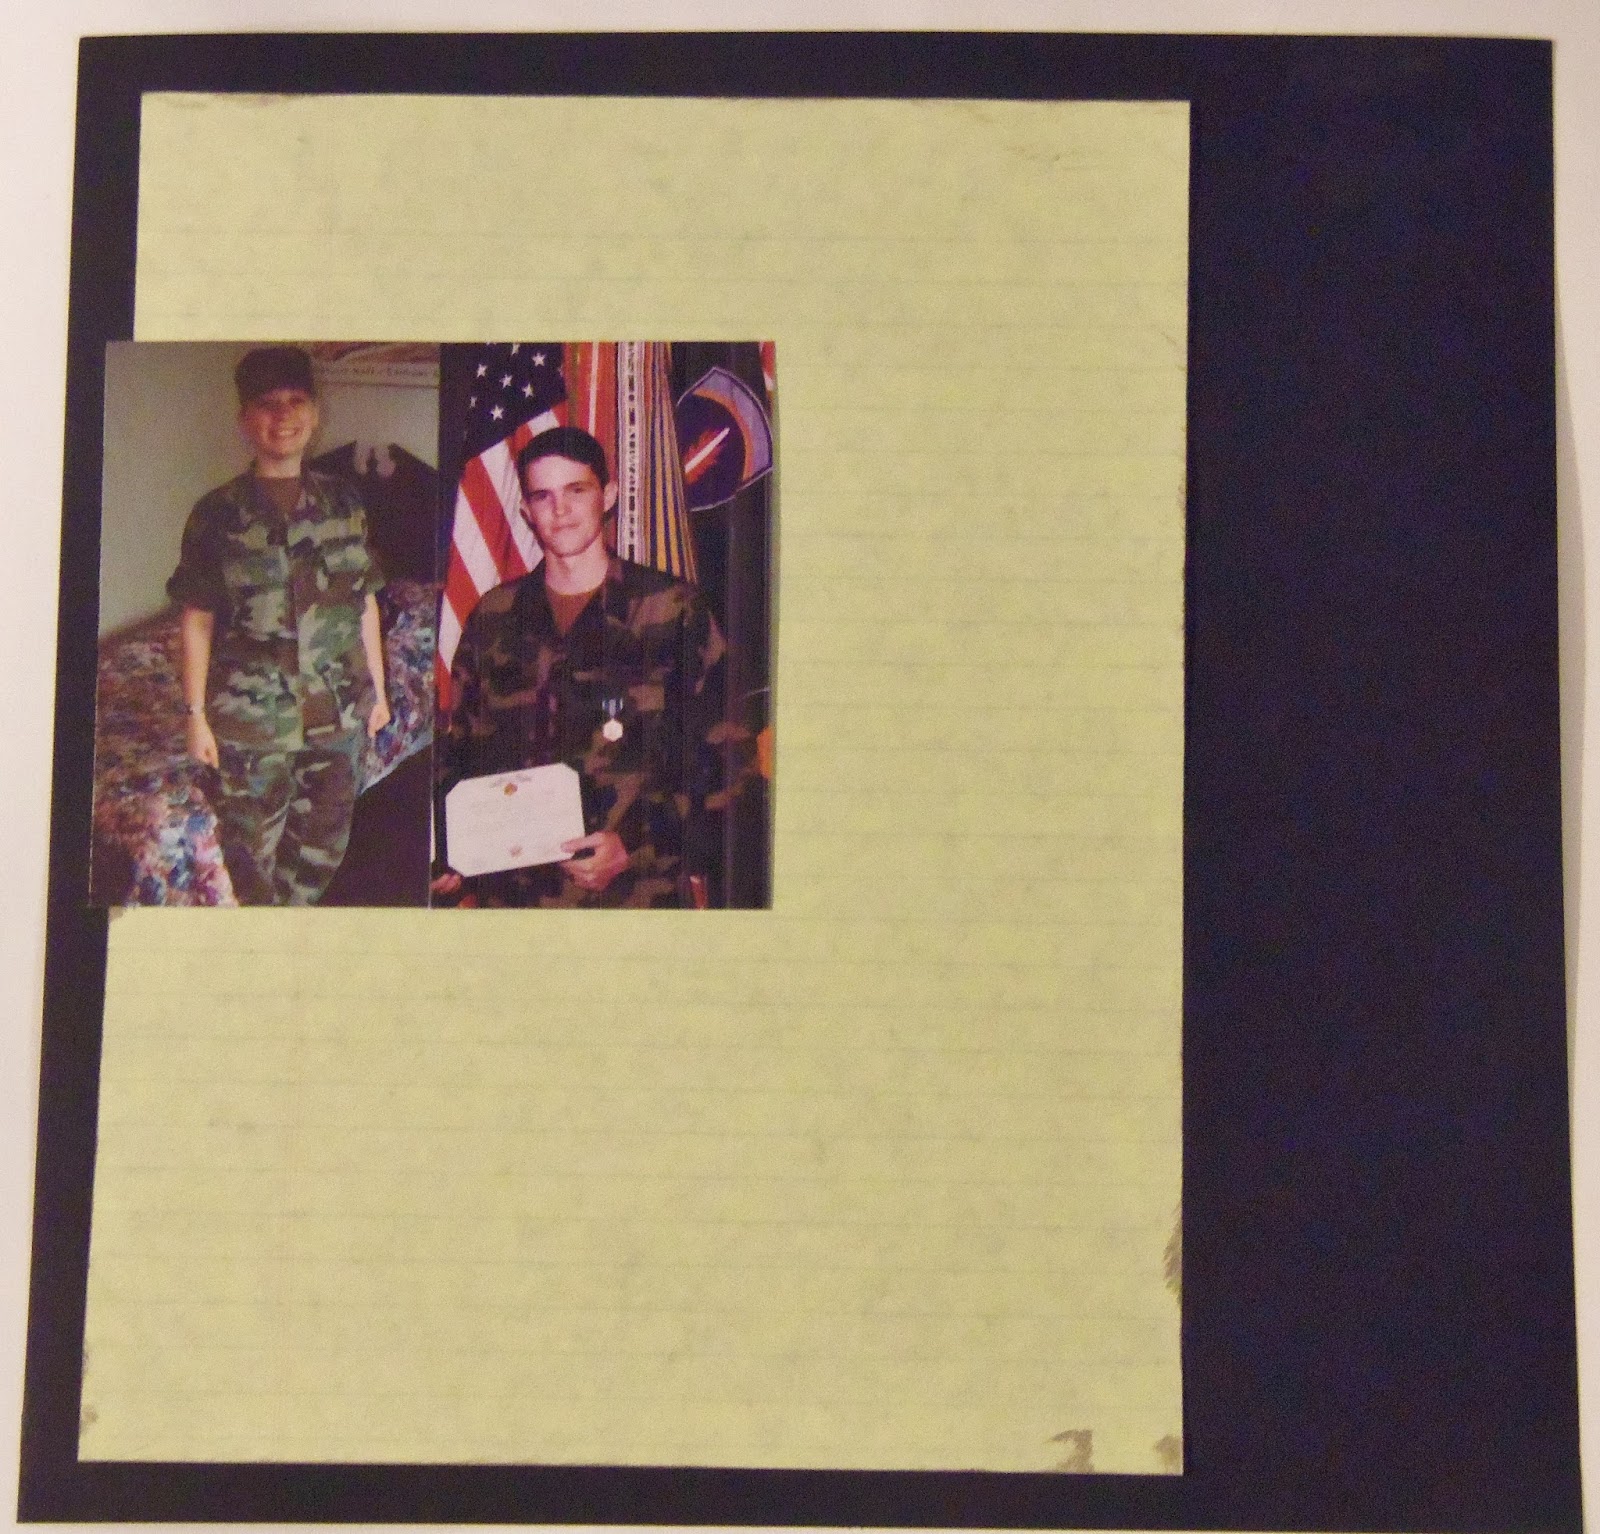

Place 1-2 photos on the left side of the layout.
I used two vertical photos, but one larger horizontal photo would work as well.


Adhere one heart to the center of each circle.
Then add the circles in three rows as shown.

I used larger scalloped circles, then placed a smaller camouflage circle inside them, Finally, I added a heart to the center of each one.


Add your title down the right edge of the cardstock along the pattern paper.
Write your journaling below the bottom row of circles along the right edge of the pattern paper.


I made a video of this process if you'd like to see.

We're done!
Short and sweet, as always!

Thanks for stopping by and God bless.

Love the stranger.
Deut. 10:19

This post is linked to It's Overflowing, Tip Junkie, and My Girlish Whims.

Monday, November 11, 2013

Honor Your Veterans With This Banner

Happy Veteran's Day to all who served.
I appreciate every moment you dedicated to our country.
I have several family members who have served, so I came up with a way to honor them on this day.

A veteran's banner.
I used the word "Honor" and displayed photos of loved ones who were in the military.


If you like this and want to make one, here's what you need to do.
Cut out five pieces of pattern paper measuring 2 3/4"x 4".
Cut out five pieces of coordinating cardstock measuring 3"x 4 1/4"


Adhere the pattern paper to the cardstock mats.


Apply the letters to the pattern paper.
If you have a Cricut, you can cut out your letters. If you don't, you can use large stickers or foam stamps and paint like I did.

You don't have to use the word "Honor."
You could go with "Serve" or "Service" or whatever you like.

Punch holes in the top corners of the letter cards. String them onto a piece of twine leaving space in between each letter.


Hang photos in between the letters.
I used 1" clothespins.
You could also punch holes in the photos and hang them like the letter cards.


Tie red and blue ribbons at each end of the banner.


Such a nice way to honor our veterans, isn't it?

Thanks for stopping by and God bless.

The Lord is your keeper
Psalm 121:5

This post is linked to Craft-O-Maniac, I Heart Naptime, and The Dedicated House

Friday, November 8, 2013

Veteran's Day Patriotic Candle DIY

Veteran's Day is up and coming, and I've been feeling a little patriotic, so I thought it would be fun to do a red, white, and blue project.


Hence these patriotic candles.
I thought they'd be nice to set out when we eat dinner on Monday night.
My hubby and I will tell our kids about all our family members who have served our country.


If you'd like to make some, here's what you'll need:
one piece of 12"x 12" patriotic scrapbook paper
three short pillar candles (mine are about 2 3/4" tall)
Mod Podge
foam brush
paper trimmer
ruler


First measure the height of the candle. Then trim a strip of paper to that height.


Next, wrap the paper around the candle and make a mark where you want to cut it.
Allow a little bit of room for it to overlap.
After cutting it to the correct length, use the foam brush to paint the back of the paper with Mod Podge. Moving quickly before the glue dries, adhere the paper to the candle.
I started at one end, then carefully pressed the paper to the candle as I spun it around.
Roll it around in your hands a few times to make sure the paper adheres.
Repeat with the rest of your candles.


Easy-peasy!
If you'd like another Veteran's Day project idea, stop back by on Monday.

Thanks for stopping by and God bless.

When the righteous rejoice, there is great glory.
Proverbs 28:12

This post is linked to Funky Junk, Cheerios and Lattes, Today's Creative Blog and My Repurposed Life.