Showing posts with label banner/bunting. Show all posts

Friday, May 20, 2016

Vintage Postcard Garland DIY

I just love paper paraphernalia- especially if it's vintage.
In my secondhand shopping, I've come across several good postcard finds.
I hate to just let these beauties sit in a stack.
So I decided to display them. . .
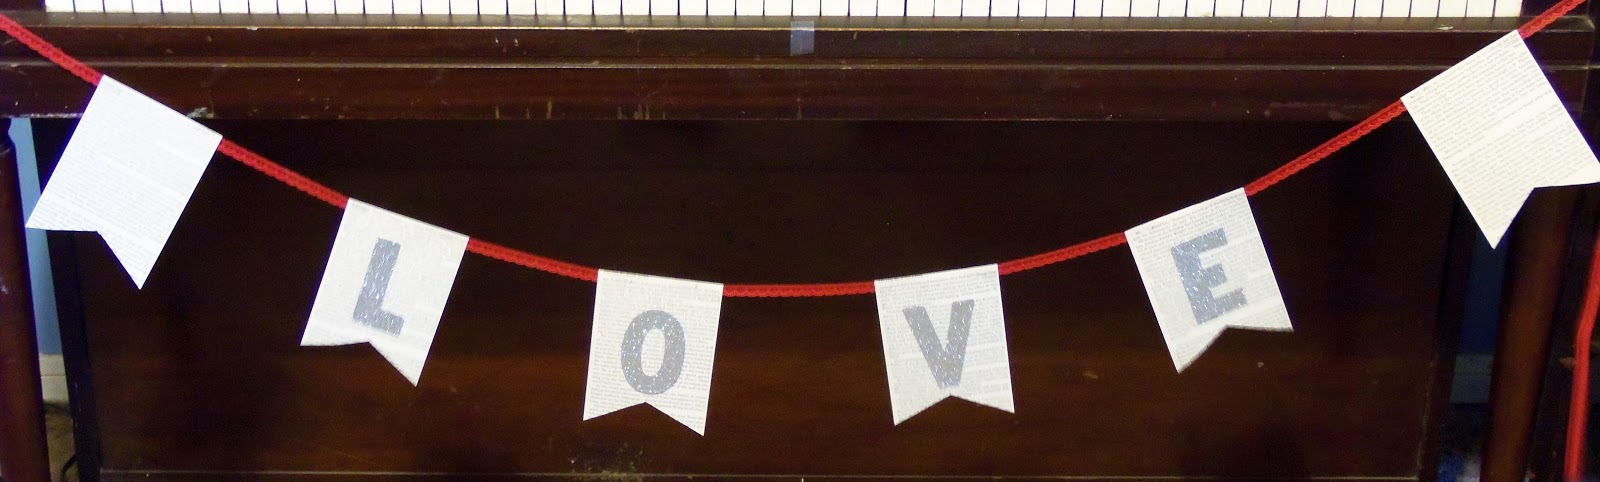

as a garland.


I chose ten postcards to display.
Half have the pictures showing and half have the message showing.


Then I attached them to twine using mini clothespins and mini bull clips.

So pretty and vintage, don't you think?

Thanks for stopping by and God bless.

Little children, let us stop just saying we love people; 
let us really love them, and show it by our actions. 
1 John 3:18

This post is linked to Craft-O-Maniac, A Morning Cup of Joe, That DIY Party,
and Tatertots and Jello.

Monday, April 11, 2016

Burlap Banner

I love making banners.
Sometimes I make them with pretty paper,
but my favorite ones have been made from burlap.


I made this one for my friend's baby shower.
The shower had a moustache theme and the color was turquoise.


I started by deciding what size triangle I wanted the letter panels to be.
I cut a triangle out of cardstock and used it as a pattern.
Using a Sharpie marker, I traced around the template for a total of six burlap triangles.


Then I cut out along the inside of my lines (that way the lines wouldn't be visible).
I used foam stamps and black paint for my letters.
On two triangles, I used a heart stamp.
To keep it with the moustache theme, I added moustache stickers to the hearts.
(I liked that they were stickers- that way my friend can peel them off
and use the banner in the nursery if she decides to.)


Then I glued the burlap triangles to a long piece of twine leaving just a little space in between them.
My final step was to add pieces of turquoise ribbon in those spaces.

Easy and cute.
You could make a personalized banner like this for any celebration.

Thanks for stopping by and God bless.

Be still and know that I am God
Psalm 46:10

 This post is linked to USS CraftyGingersnap Crafts, I Gotta Create, and Wow Me Wednesday.  

Friday, February 19, 2016

Vintage Pattern Projects

My neighbor recently gave me a whole slew of vintage patterns (see here and here).
With so many, I had to do something with them.
Here are a few projects I came up with. . .


I covered a vase.


I used two different patterns- one for the front and one for the back.
I just used the fronts of the patterns.


Then I used a piece of the pattern paper to fill the inside of the vase.
I just love how this turned out!


I used one to cover a notebook.
I placed the front of the pattern on the front of the notebook
 and the back of the pattern on the back of the notebook.

For the notebook itself, I used half a file folder and cut it in half again.
The pages are just pieces of graph paper cut to size.
I bound it with my Bind-it-All tool.


The third project I made is a vintage sewing garland.


I cut the fronts off of six patterns. 
Because the paper was fragile, I backed them with white cardstock and sewed around the edges.


Then I added some paper doilies and vintage sewing notions in between the patterns.
I attached them all to twine with mini clothespins.

Stay tuned because I have some more vintage pattern projects up my sleeve!

Thanks for stopping by and God bless.

Oh, give thanks to the Lord, 
for He is good!
For His mercy endures forever.
1 Chron. 16:34

Monday, February 1, 2016

Vintage Valentine Banner DIY

Banners are so easy to make.
Here's one I made for Valentine's Day using vintage Valentines,
book pages, old playing cards, and dollar store doilies.


The secret to making a garland is making it nice and full.
You can do it in steps. 
Watch how easy it is. . .


The first thing you need is a word.
I made my letter panels out of old book pages and large letter stickers.
I trimmed my pages into rectangles, then stacked them and cut a notch out of the bottoms.
Then I added the letters.
I folded the top over a piece of lace and stapled each piece on.


Then I used doilies in between the book page pieces.
I alternated round white doilies with red heart shaped doilies.
I used small clothespins to attach these to the lace.


Next, I added some playing cards overlapping the doilies.
(I used all hearts since this is for Valentine's Day.)
The cards had a pretty red and white vintage pattern on the backsides,
so I alternated using both sides of the cards.


Sometime ago, I picked up some vintage Valentines at an estate sale.
I placed these on the red heart doilies.
I attached them to the clothespins that were already holding the doilies.


Finally I added a string of red pom pom trim.
I think it gave it a nice finishing touch.

You can follow these steps to make any kind of garland.
Just replace the Valentines with photos for a birthday garland
or Christmas cards for a holiday banner
or even vintage postcards for a summer bunting.

Thanks for stopping by and God bless.

If you love Me, keep My commandments.
John 14:15

This post is linked to Skip to My LouSimple Nature Décor, Lil' Luna,
Funky Junk, and Tip Junkie

Friday, September 25, 2015

Don't Leaf These Projects Behind. . .

I can't believe September is almost over!
We're now officially in fall, so let's take a look at some leaf-y projects.
They're all so simple to make. . .

This project just needs leaves, raffia, and mason jars.
So simple!

I was really excited about this leaf mobile.
So unique, don't you think?
You can go here to see more about it.

This grateful banner was made with shipping tags and dollar store leaves.
Go here to see how.


Wanna know what makes vintage books cooler?
Leaves, of course!
Come here and see.


Garlands are so stinkin' easy to make.
And if you buy your supplies at the dollar store, they're so cheap, too.
Here is another leaf garland.

Makes you want to run out to the dollar store and find some leaves, doesn't it?
Or you could use real ones.
Unfortunately, I live in a part of Texas where it's still summer,
so I'm stuck with artificial leaves for now:)

I hope this leaves you wanting to craft!

Thanks so much for stopping by and God bless.

O my God, I trust in You
Psalm 25:2

Monday, April 27, 2015

Personalized Burlap Banner DIY

I recently got the opportunity to make a burlap banner for a baby shower.


The baby's name is Hedessah.
Obviously we couldn't find a pre-made banner for her:)


I used this photo as inspiration to make my banner.


I started by making a triangle template.
I took a square 6"x 6" piece cardstock and made a fold  right in the center at one end.
Then I cut from that mark to the opposite two corners creating a triangle.
Once I had this, I used it to draw triangles with a Sharpie marker on a large piece of burlap.
I cut just inside the lines.


I made a total of 10 triangles- one for each letter of the name and two for hearts.
Then I used foam stamps and acrylic paint to paint the letters and hearts.


Once the paint dried, I used my glue gun to attach the burlap triangles to a long strand of twine.
I left a little bit of space in between each triangle.
 I added 3-4 fabric strips in between each triangle.


It turned out better than I thought it would.
As a matter of fact, I am thinking of making another one for a graduation party that
I'm helping to prepare for!

If you like this look, but would rather skip the step of cutting out your own pennants,
you can actually buy pre-cut burlap triangles at Hobby Lobby.
 Then all you have to do is stamp the letters and glue the pieces to twine.

Thanks for stopping by and God bless.

Now may the Lord of peace Himself give you peace always in every way. 
The Lord be with you all.
1 Thes. 3:16

This post is linked to Plucky's Second Thought, Tip Junkie, and Between Naps on the Porch.

Friday, March 27, 2015

Doily Garland DIY

I love doilies and garlands,
so I blended the two today and this is what I got. . . 


a doily banner.


 I got these colorful doilies at Michaels in the $1.50 bin.
I love the bright and happy colors.


To make it, all I did was fold the doilies in half -


 and tie them together with small pieces of twine.


Too cute. Too easy.
Give this a whirl if you need a little color in your life. :)

I'm going to have to try this with vintage doilies.

Thanks so much for stopping by and God bless.

You are my God, and I will praise You; 
You are my God, I will exalt You.
Psalm 118:28

Monday, March 2, 2015

Vintage Map Bunting

Today's project blends two of my favorite things:
 buntings and vintage maps.
 
 It's a vintage map garland.


I started with several pieces of map trimmed to 5"x 8 1/2".


Then I cut out a wide notch on the bottom of one 
and used it as a guide to cut out the rest.


My final step was attaching the map pieces to twine using my hot glue gun.


Very simple and very cute


I found my vintage atlas at a thrift store.
 If you're looking, you can find them at yard sales, Ebay, and maybe even in your grandma's closet:)

Thanks for stopping by and God bless.

Let nothing be done through selfish ambition or conceit,
 but in lowliness of mind let each esteem others better than himself.
Phil. 2:3


Friday, January 30, 2015

Heart Garland Made with Vintage Maps

I love making garlands.
They're usually so easy to put together.
Today I am sharing one that I made using pages from a vintage atlas.

I followed the tutorial that I found here to turn the strips of atlas into this heart garland.


Here's a close up of the individual hearts.
They're all attached at the tops and bottoms.


Cute, huh?
This is one of those projects that you can do while watching TV with the kids.

I hope you all have an awesome weekend!

Thanks so much for stopping by and God bless.

If we live in the Spirit, let us also walk in the Spirit.
Gal. 5:25

This post is linked to My Salvaged Treasures, My Repurposed Life, Funky Junk,
Simple Nature Decor, Life with Lorelai, and Embracing Change.

Friday, November 7, 2014

Festive and Frugal Fall Projects

I have a list of autumn themed projects that I plan to get to in the next few weeks.
I've been gathering leaves, old books, candles. . .
Meanwhile, I'd like to revisit three of my favorite past fall projects. . .
I made this wreath from an old rake that I found at the thrift store.
I love cute wreaths:)

This leaf mobile was made with a package of artificial leaves from the dollar store,
an embroidery hoop from the thrift store,
and some invisible thread.
You can go here to see more.


This Grateful Banner was unbelievably easy to make.
I used my stapler to attach these shipping tags that I got at a yard sale,
and leaves from the dollar store.
If you'd like to make one of your own, you can go here to see how.
I hope you're all enjoying your fall weather.
When it starts getting cool, I find myself wanting to make soup.
Tonight I'm making a big pot of chili.:)
Thanks so much for stopping by and God bless.
So each of us shall give account of himself to God.
Romans 14:12

Friday, September 26, 2014

Junk Banner

Earlier this year, while on my annual girls' trip,
we drove through Brenham, TX which is full of antique stores.
We stopped at a couple, and at one of them, I bought these awesome old letters for a sign.
I happened to pick up the letters j, u, n, k.
Since I love junk, I thought making a banner would be fitting.

 
I backed the letters with some vintage looking scrapbook paper.
Then my hubby drilled some holes through the corners.
I tied them to a piece of twine using strips of muslin.
 
Pretty cool, huh? Especially draped over an old door:)
 
Thanks for stopping by and God bless.
 
Do not sorrow, for the joy of the Lord is your strength.
Neh. 8:10
 
 This post is linked to My Repurposed Life, Funky Junk, and My Salvaged Treasures.