Showing posts with label using thrifted items. Show all posts

Monday, August 8, 2016

Repurposed Bracelets: Belts to Cuffs

I've had this project in mind for awhile.
I've been collecting leather belts to turn them into bracelet cuffs.

It's actually been on my to-do list for about three months.
Do you ever have something that you want to do, 
but you're just afraid to start it because you don't know if you can do it? 
That was this project for me.

Then I finally told myself, "Just cut the belt. What's the worst that can happen?"
 I'd just mess up a yard sale belt.

 Crazily enough, that first cut was super easy.:)


Once I got started, I couldn't stop.


I cut off between 6 1/2" and 7" for each cuff.


Then I punched two small holes on each end.
I used my Crop-A-Dile to make the holes, but there are special leather tools made for doing this too.
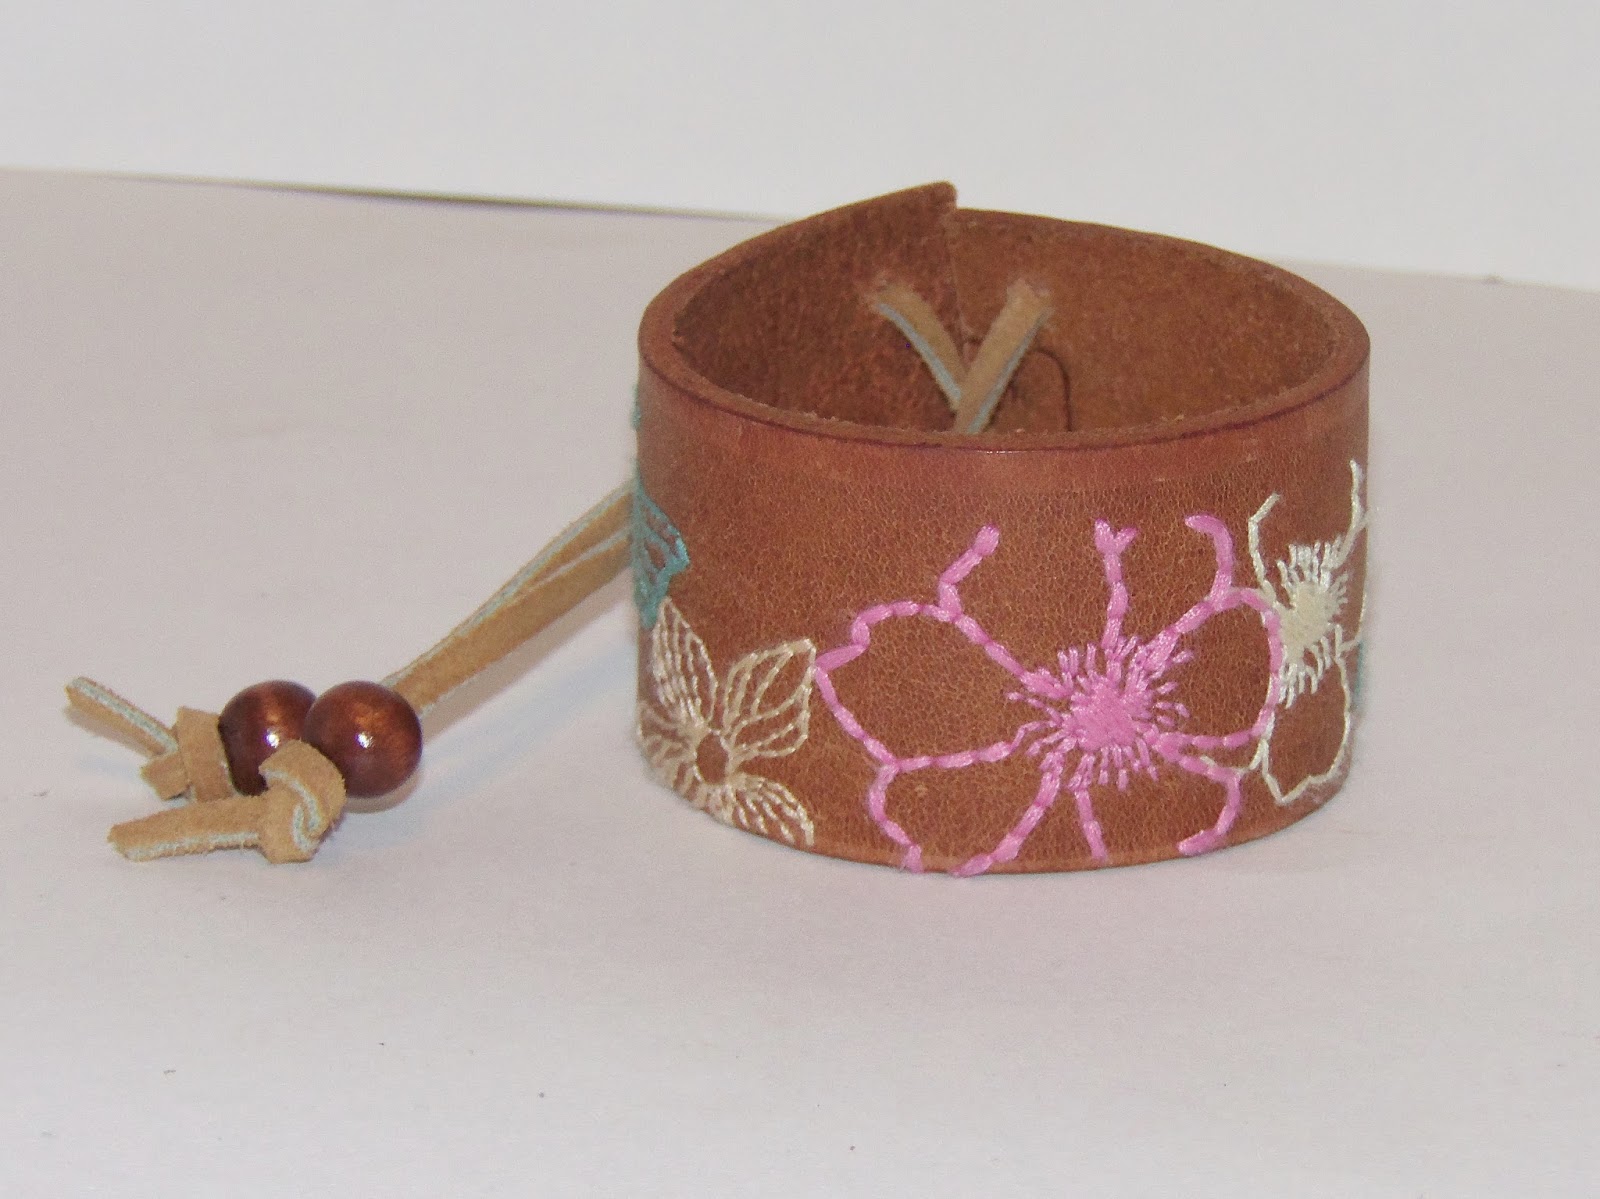

 Finally I threaded narrow leather string through the holes.
I added wooden beads at the end of each strap just above the knots.


On this cuff, I added a metal quote band.


For these, I used some fabric as ties.
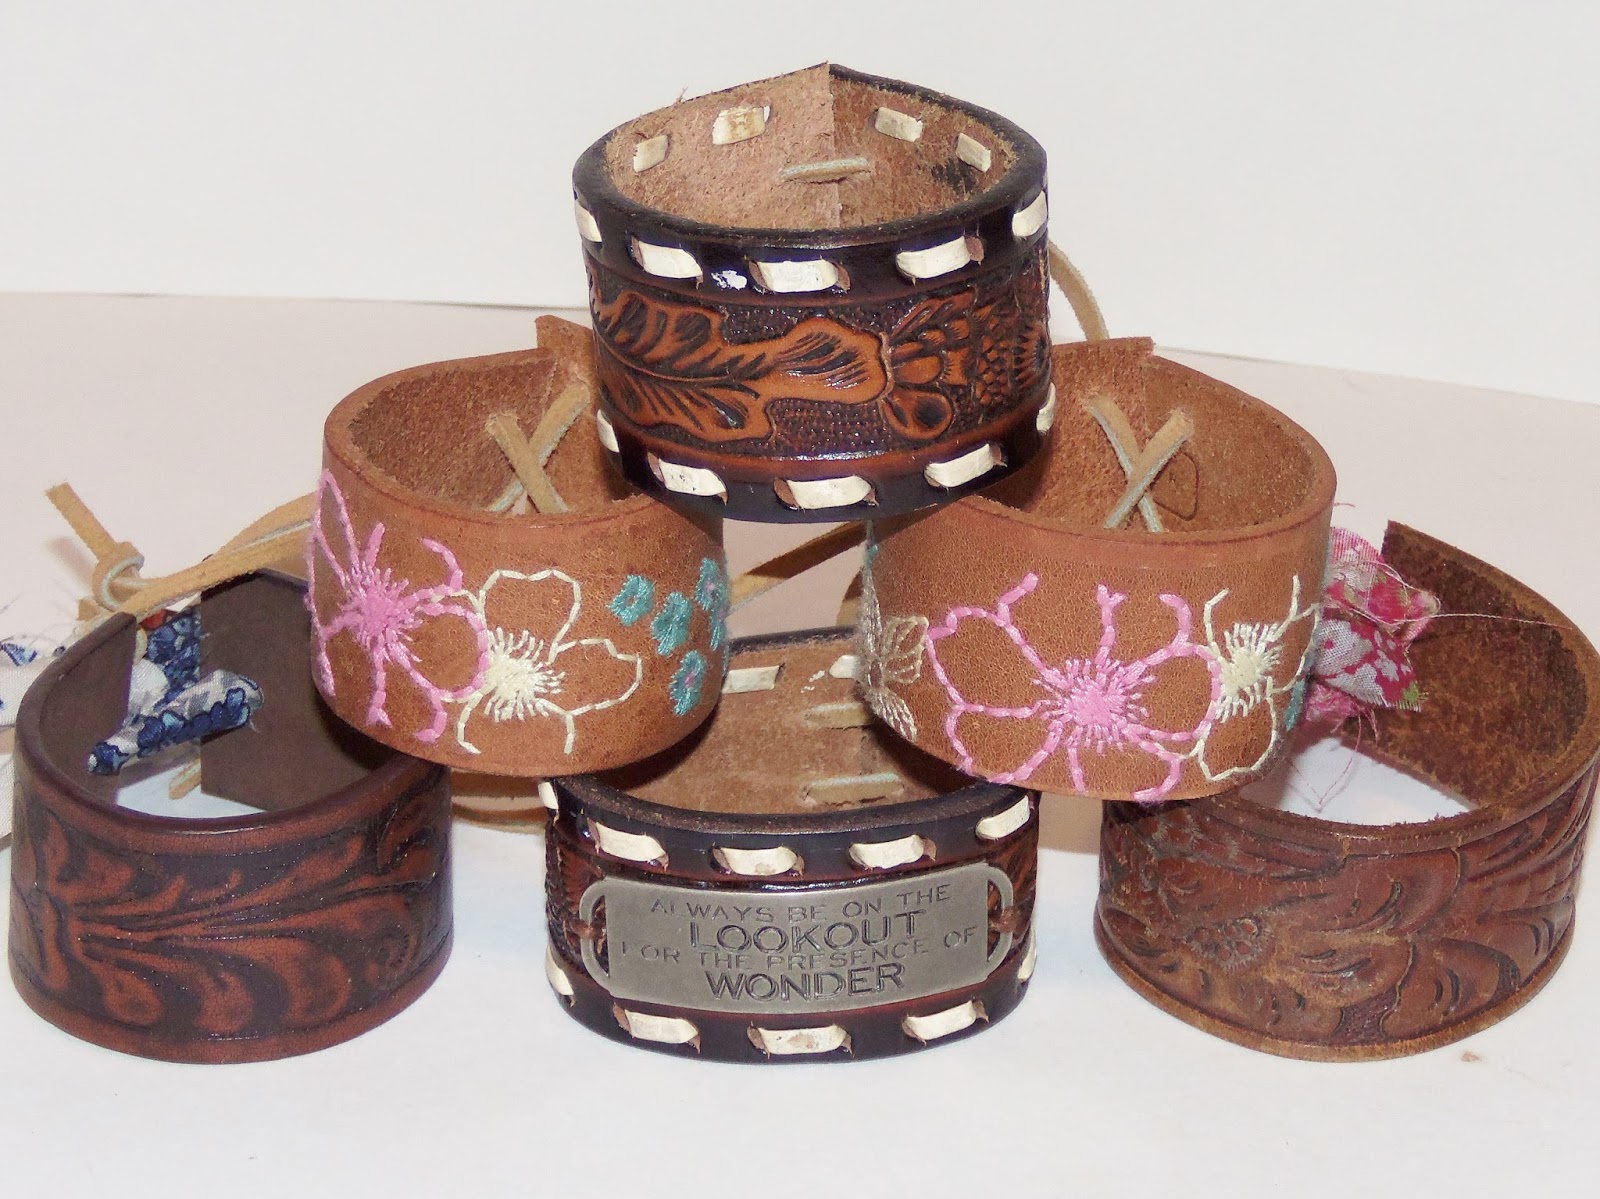
 

I got all these belts at yard sales and/or thrift stores.
I still have quite a bit of the belts left. I think I'm going to have to make some more. 
One belt even has the words rodeo queen engraved on it. Won't that make a cute bracelet?

If you are dealing with something in your life right now that you're not sure how to handle,
just take that first step. Stop dreading it. "Just cut the belt." 
You'll find that it wasn't worth the worry that you put into it.

Thanks for stopping by and God bless.

Rejoice always,
 pray without ceasing, 
in everything give thanks; 
for this is the will of God in Christ Jesus for you.
1 Thes. 5: 16-18

Friday, June 24, 2016

Flashback Friday: Patriotic DIY's

It's the last Friday of the month,and that means we're gong to flashback
 to previous DIYs all keeping in the same theme.

This month I'm featuring patriotic projects since the Fourth is right around the corner.

(Does anybody else feel like this month just flew by?)


I totally love how these centerpieces using Pepsi cans turned out.
Go here to read more about them. 


I used a bit of fabric, lace, and a fabric flower to put together this patriotic cap.


For this project, I adhered two small flags to the outside of a glass vase.


This patriotic banner was made using paint chips and small flags 
attached to twine using tiny clothespins.
Cute and easy!


This simple project was made covering jars with sequined wristlets
that I found at a thrift store. If you have a daughter who has outgrown some of these,
this is the perfect way to use them!

Follow the links to read more about these projects.

I hope you all have a delightful weekend!
Thanks so much for stopping by and God bless.

Rejoice in the Lord always. 
Again I will say, rejoice!
Phil. 4:4

Monday, June 13, 2016

Revamped Secondhand Frames

I had two large empty frames that I got at a thrift store a few months ago.
They've been leaning up against my desk just waiting for me to do something with them.
 
The other day, my hubby happened to bring home some chicken wire for a project he's doing, 
so I used a little bit of it to make this project.


The frames are 20"x 15".


 I trimmed chicken wire to fit the back of each frame and attached it using a staple gun.
I was thinking I'd just whip through this project, but it took me longer than I thought.
Chicken wire isn't that easy to work with. I have little cuts on my hands and forearms.:)


These kinds of frames are such a fun way to display photos, vintage postcards, or anything you want!
Have you ever made one?

Thanks for stopping by and God bless.

Blessed be the name of the Lord
from this time forth and forever more!
Psalm 113:2

Friday, May 27, 2016

Flashback Friday: DIY's Using Old Books

It's the last Friday of the month, so we're going to flashback to some previous DIY's.
This time we're looking at five projects using old books.
I love vintage books, so I'm always up for projects using them.


I love how this vase cover turned out.
It's two book covers fastened with twine.
Go here to find out how to make it.


After cutting the covers off the books for the above project, 
here's something you can make using the leftover pages. 
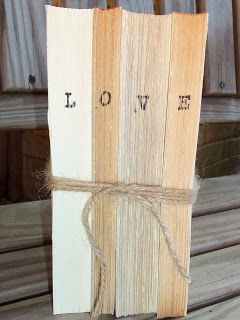
I used twine to tie four books together and stamped the word love onto the pages.


A little chalkboard paint made this book into more than just a . . . book.
You can read more about it here.


I love using covers from old books and turning them into Junk Journals.
This baby girl themed one is one of my favorites.


This is a table runner made from book covers.
How cool is that?

What do you think?
Are you feeling like running out to a thrift store to find some cool old books?
Swing by my house. I can give you a few.:)

Thanks for stopping by and God bless.

This is the message you heard since the beginning: 
We should love one another.
1 John 3:11

Friday, May 20, 2016

Vintage Postcard Garland DIY

I just love paper paraphernalia- especially if it's vintage.
In my secondhand shopping, I've come across several good postcard finds.
I hate to just let these beauties sit in a stack.
So I decided to display them. . .


as a garland.


I chose ten postcards to display.
Half have the pictures showing and half have the message showing.


Then I attached them to twine using mini clothespins and mini bull clips.

So pretty and vintage, don't you think?

Thanks for stopping by and God bless.

Little children, let us stop just saying we love people; 
let us really love them, and show it by our actions. 
1 John 3:18

This post is linked to Craft-O-Maniac, A Morning Cup of Joe, That DIY Party,
and Tatertots and Jello.

Monday, March 28, 2016

This Light Fixture Is for the Birds!

For the longest time, we had an old light fixture above the breakfast bar in our kitchen.
Then we even went for awhile with no fixture (not sure what was going on there!).
Finally, my hubby decided to do a project that I'd had in mind for that spot.


He hung a birdcage as our light fixture.


I picked up this wooden birdcage for a dollar or two at a yard sale many years ago.
My hubby drilled a hole in the top if it, then added the light kit and attached it to the ceiling.
To finish it off, he added an Edison light bulb.

I'm loving how it turned out!!!

Thanks for stopping by and God bless.

For the Lord is the great God, 
and the great King above all gods.
Psalm 95:3

Monday, February 22, 2016

Upcycled Thermos Lamp

Are you ready to see one of my favorite upcycled projects ever?


It's an old thermos turned into a lamp!

I found this big ol' 2 gallon thing at a yard sale.
I knew right away that it would make an awesome lamp.
My hubby was with me and agreed. I got it for $1.


Check out the detail on its label.


My hubby screwed a hole in the lid and put the lamp parts inside the body
following the directions on the lamp kit.
 Then we added a small silver shade.


If you like this, you should check out this light fixture made from an attic turbine.

Thanks for stopping by and God bless.

Give to the Lord the glory due His name.
1 Chron. 16:29

Friday, February 19, 2016

Vintage Pattern Projects

My neighbor recently gave me a whole slew of vintage patterns (see here and here).
With so many, I had to do something with them.
Here are a few projects I came up with. . .


I covered a vase.


I used two different patterns- one for the front and one for the back.
I just used the fronts of the patterns.


Then I used a piece of the pattern paper to fill the inside of the vase.
I just love how this turned out!


I used one to cover a notebook.
I placed the front of the pattern on the front of the notebook
 and the back of the pattern on the back of the notebook.

For the notebook itself, I used half a file folder and cut it in half again.
The pages are just pieces of graph paper cut to size.
I bound it with my Bind-it-All tool.


The third project I made is a vintage sewing garland.


I cut the fronts off of six patterns. 
Because the paper was fragile, I backed them with white cardstock and sewed around the edges.


Then I added some paper doilies and vintage sewing notions in between the patterns.
I attached them all to twine with mini clothespins.

Stay tuned because I have some more vintage pattern projects up my sleeve!

Thanks for stopping by and God bless.

Oh, give thanks to the Lord, 
for He is good!
For His mercy endures forever.
1 Chron. 16:34

Wednesday, February 17, 2016

Check This Out!

I checked my mail this morning and guess what I found in the mailbox?!?


My favorite magazine!
Isn't it so inviting?

I love thumbing through the pages and looking at all the beautiful photos.
It always makes me want to stop what I'm doing and hit the thrift stores.

If you've never read this magazine, I suggest you go get yourself an issue.
I'm not affiliated with it, but I highly recommend it:)
Here's where you can find single issues
and here's where you can subscribe.

Thanks for stopping by and God bless.

Oh, give thanks to the Lord!
Call upon His name;
Make known His deeds among the peoples!
2 Chron. 16:8

Friday, February 12, 2016

Vintage Embroidery Pillows

I usually don't pass up vintage embroidery when I'm at estate sales or thrift stores.
I can only imagine the amount of time and talent that went into making them.
I hate to think that nobody loves those pieces.

I took two different pieces that I've found and repurposed them into pillows.


The two deer pillows are from the same table runner.
The smaller heart was from a vintage hankie.
I decided to make them heart shaped pillows.

Here's the table runner that I used. See how it had a patch in the middle?
It really couldn't be used as a runner anymore, so I thought it would make lovely pillows.
It had the image embroidered on both ends, so I was able to make two pillows.


Here's the hankie I used.


I started by cutting a heart out of a stiff piece of paper.


Then I traced around the heart onto the fabric.
For the hankie, I traced two hearts for the front and back of the pillow.


For the deer prints, I used a paisley fabric to back the pillows.
That way I could make two matching pillows.

For the smaller heart, I used the trim from the hankie around the edge of the pillow.

What do you think?


Thanks for stopping by and God bless.

Seek the Lord and His strength;
seek His face evermore!
1 Chron. 16:11

 This post is linked to Funky Junk, My Salvaged Treasures, Simple Nature Decor,
 and Tatertots and Jello.

Friday, January 29, 2016

Flashback Friday: Chalkboard Project DIYs

I thought it would be fun to take a peek back at past projects,
so the last Friday of every month will be Flashback Friday
where I'll feature five projects with the same theme.

This month is chalkboard projects.
Who doesn't love chalkboard paint?


I turned this thrift store tray into a chalkboard.
Go here to read more about it.


This is a chalkboard necklace.
Cute, huh?


I painted a chalkboard panel onto a vintage suitcase.
Check it out here.


This cheese dome was another thrifted find.
I thought a chalkboard base would give it a little character.


I love making buntings, so I was tickled to turn chalkboard paper into a banner.

Makes you want to break out some chalk, doesn't it?

I hope you have a fantastic weekend! Thanks for stopping by and God bless.

A new commandment that I give to you,
that you love one another;
as I have loved you, that you also love one another.
John 13:34

 This post is linked to Too Much Time, A Morning Cup of Joe, My Salvaged Treasures,
 Funky Junk, and I Heart Naptime.