Showing posts with label patriotic. Show all posts

Friday, June 24, 2016

Flashback Friday: Patriotic DIY's

It's the last Friday of the month,and that means we're gong to flashback
 to previous DIYs all keeping in the same theme.

This month I'm featuring patriotic projects since the Fourth is right around the corner.

(Does anybody else feel like this month just flew by?)


I totally love how these centerpieces using Pepsi cans turned out.
Go here to read more about them. 


I used a bit of fabric, lace, and a fabric flower to put together this patriotic cap.


For this project, I adhered two small flags to the outside of a glass vase.


This patriotic banner was made using paint chips and small flags 
attached to twine using tiny clothespins.
Cute and easy!


This simple project was made covering jars with sequined wristlets
that I found at a thrift store. If you have a daughter who has outgrown some of these,
this is the perfect way to use them!

Follow the links to read more about these projects.

I hope you all have a delightful weekend!
Thanks so much for stopping by and God bless.

Rejoice in the Lord always. 
Again I will say, rejoice!
Phil. 4:4

Wednesday, November 11, 2015

Layout of the Week #122

I'd like to start off by saying Happy Veteran's Day to all who served.

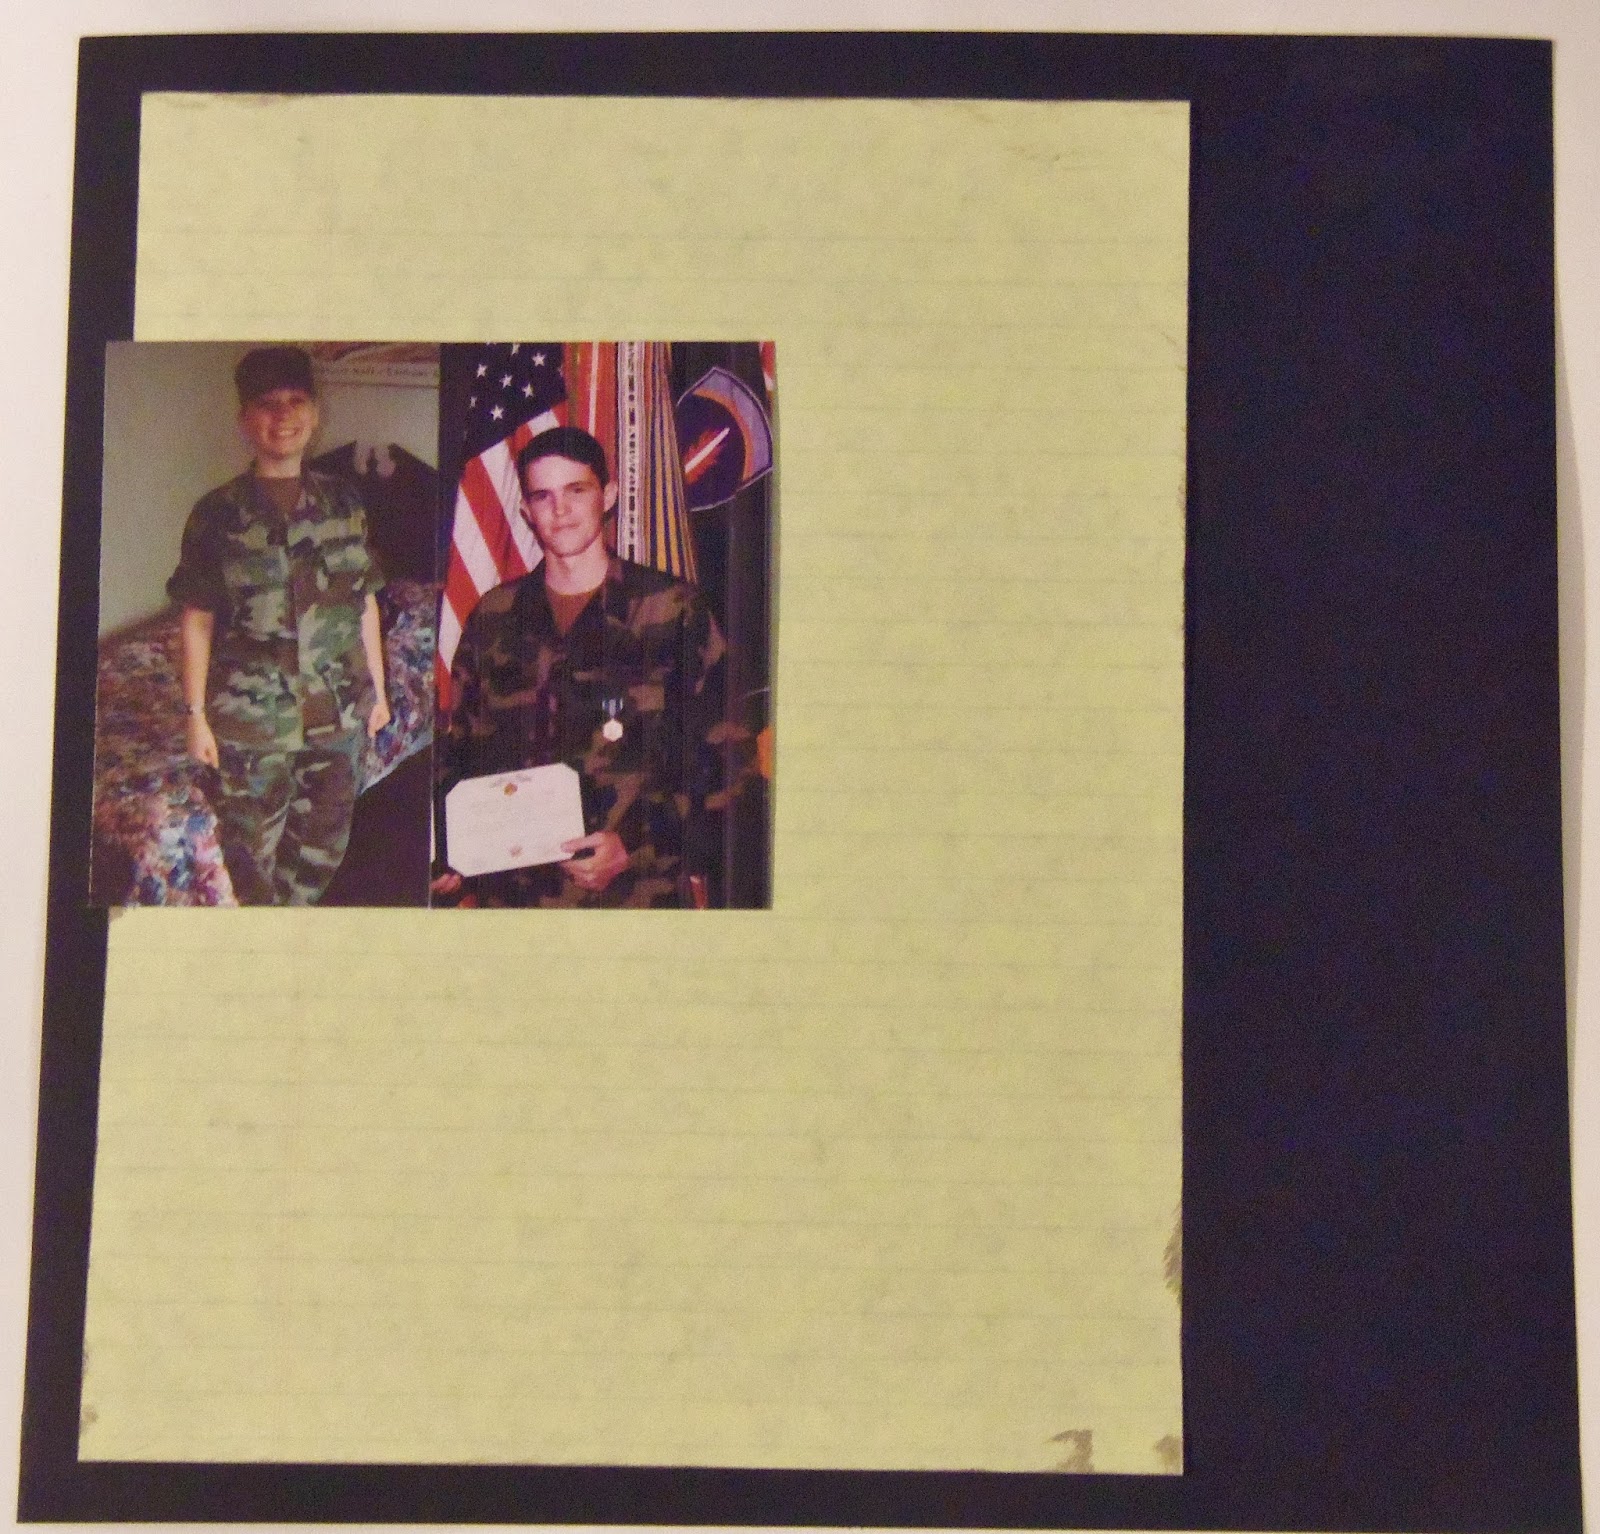
I have a patriotic layout designed in honor of today.

My hubby and I were both in the Army when we met, 
so I used a photo of both of us in uniform.
You could do this layout and feature a member (s) of your family who served.


Here's the layout we'll be creating.

My title says, "Thanks to the Army. . ."
The journaling reads: Two young soldiers met in Heidelberg, Germany. They fell in love and got married in Veijle, Denmark and were able to travel all over Europe together. All thanks to the Army.


To make it, you'll need:
one piece of 12"x 12" cardstock
one piece of pattern paper measuring 8 1/2"x 11" (I used a piece of legal paper)
eight pattern paper circles measuring between 1 1/4"- 2"
eight hearts small enough to fit in your circles
letter stickers for the title
1-2 photos
adhesive


To start, adhere the pattern paper measuring 8 1/2"x 11" onto the cardstock. 
It should be closer to the left edge than the right.


Place 1-2 photos on the left side of the layout.
I used two vertical photos, but one larger horizontal photo would work as well.


Adhere one heart to the center of each circle.
Then add the circles in three rows as shown.

I used larger scalloped circles, then placed a smaller camouflage circle inside them, Finally, I added a heart to the center of each one.


Add your title down the right edge of the cardstock along the pattern paper.
Write your journaling below the bottom row of circles along the right edge of the pattern paper.


I made a video of this process if you'd like to see.

We're done!
Short and sweet, as always!

Thanks for stopping by and God bless.

Love the stranger.
Deut. 10:19

This post is linked to It's Overflowing, Tip Junkie, and My Girlish Whims.

Monday, November 9, 2015

Easy Patriotic Vase DIY

There are several times a year that we can use patriotic decor.
Since Veteran's Day is this Wednesday,
I thought I'd share a simple DIY for a patriotic vase. . .

I started with two small flags that measure 4"x 6" and a nice glass candle holder 
that I found in the candle section at Walmart. I believe it cost around $5.


I covered the back of each flag with Mod Podge, then pressed them firmly to the glass.
(I think spray adhesive may work a little better 
which is what I will use the next time I do a project like this.)


It would work to hold forks and spoons at a picnic
or flowers in a centerpiece.


Thanks for stopping by and God bless.

Commit your way to the Lord,
 trust also in Him, 
and He shall bring it to pass.
Psalm 37:5

This post is linked to Plucky's Second ThoughtSimple Nature Decor, and Natasha In Oz.

Friday, July 3, 2015

My Patriotic Cap

On Wednesday I showed you some cute patriotic items.
One of them was a darling hat that I wanted to order, but it wouldn't have gotten here in time.
So I decided to try to make one myself.


I picked up a plain ball cap at Wal-mart, some fabric and a flower from Hobby Lobby, 
and put them all together.

I attached everything with my hot glue gun.


Now I have something cute to wear on the Fourth!


Here's the inspiration hat.
If you'd like a hat like this, but don't want to make your own, here's the link back to this one.

I hope you all have a very happy Fourth of July!!
Take lots of pictures:)

Thanks for stopping by and God bless.

Mercy, peace, and love be multiplied to you.
Jude 1:2

This post is linked to My Repurposed Life, Natasha In Oz, and I Heart Naptime.

Wednesday, July 1, 2015

Lovelies That I Love

Even with all the ups and downs our country has, it still is the best place on Earth to live.
(I've lived abroad, so I feel that I can truthfully say that.)
On that note, it's a great time to show your love for our country.
Here are few things that can help you show your spirit. . .


How great is this burlap flag wreath?
You'd be able to hang it on your door several times a year. . . Memorial Day, the Fourth, 
Labor Day, and Veteran's Day. 
It would pay for itself in the first year!


I just looovvvveee this flag ring.
 I don't know quite what grabs me- whether it's the wide band, the pretty silver, the flag. . . . 
I would totally wear this. Not just on the Fourth either!


This hat is too cute. I love the red chevron burlap and blue flower on the leopard print.


I think this necklace is just beautiful! 
How amazing is the silver setting that the flag print is on?
I don't think it would be too much to pair this up with the ring and hat, do you?:)


How cute is this tote?
I think burlap pairs perfectly with the red, white, and blue.
Of course, what doesn't look good with burlap?

Well, if these items don't get you feeling a little patriotic, I don't know what will!

I'm not affiliated with any of the companies, I just like their stuff.

Thanks so much for stopping by and God bless.

If we love one another, God abides in us, 
and His love has been perfected in us. 
1 John 4:12

Monday, June 29, 2015

Patriotic Centerpieces with a Pop!

Ok. Are you ready for this?
I'm about to hit you with a whole bunch of patriotic cuteness.


What do you think about this centerpiece. . .made with empty soda cans?!?


Here's a second one with a different ribbon and different flowers.
I started by using a can opener to remove the lid from an empty can.
Then I washed each can with soap and water.
I used a long ribbon to tie three cans together.
After that all it took was adding three silk flowers and one flag to each can.


Here's the first arrangement with some red flowers added.

Simple. Cheap. Cu-ute!!!

I think the price is right on these.
I bought the sodas for a new BBQ recipe I'm trying.
The flowers and the flags came from the dollar store.
And I had the ribbon on hand.
Try whipping up a couple of these to set out at your Fourth of July festivities.

Thanks so much for stopping by and God bless.

Beloved, if God so loved us, 
we also ought to love one another.
1 John 4:11

Wednesday, June 24, 2015

Layout of the Week #112

The Fourth of July is right around the corner.
Do you have some old photos from a Fourth celebration that you haven't yet scrapbooked?
Try this layout. . . 


You can go here to see a full tutorial.
On my layout, I incorporated a small flag and several paint chips.
If you'd rather, you can replace those items with different patriotic pattern papers.

Every two weeks, I have a beginning to end layout tutorial.
Stop back by to make a quick and easy layout!

Thanks for stopping by and God bless.

Let us not love in word or in tongue, 
but in deed and in truth.
1 John 3:18

Friday, July 4, 2014

Patriotic Doily Banner

Happy Fourth of July to you all!
I hope you have lots of fun festivities planned for today.
We're headed to church for a picnic and an afternoon of old-fashioned games,
but before we head out, I have one last patriotic project to show you. . .

a patriotic doily banner


It was pretty easy to make.
If you'd like to make one, all you need is:
3 types of patriotic themed pattern papers
a circle punch (mine is 3")
ribbon (I used bias tape)
6" paper doilies
optional: tulle circles


Decide how long your banner will be. I decided to use 7 doilies.
Cut out circles for the centers for your doilies and adhere them with a glue stick.
Fold the doilies in half and staple or sew them onto your ribbon.


Optional: place one tulle circle folded in half in the middle of each doily before stapling or sewing.


The tulle circles are a little hard to see in these photos.


I just love banners of all sorts.
I actually have three different ones hanging on my mantle!

What's your opinion on banners- yay or nay?

Thanks for stopping by and God bless.

Pride goes before destruction, and a haughty spirit before a fall.
Proverbs 16:18

 This post is linked to Too Much Time On My Hands and


Monday, June 30, 2014

Patriotic Sequined Candle Holders

I've been wanting to do a red, white, and blue project with the Fourth coming up,
so I whipped up these patriotic mason jar candle holders.
Today's project literally cost me only $1.25.

I can't really say that I made this project because it took me all of about ten seconds to do this.


Recently on one of my thrift store outings, I came across some sequined wristlets for ten cents apiece.
I picked them up with this project in mind.


Then I got out three jars that I picked up for a quarter apiece on another thrift store outing and slid the wristlets over the jars- like coozies.


Voila! Three darling candle holders- or silverware holders for a Fourth of July picnic.
(Isn't my USA sign cute? I got it from my Secret Sister at church.)

I've got another patriotic project that I hope to make this week, so stop back on Friday to see:)
Thanks for stopping by and God bless.

He only is my rock and my salvation;
He is my defense;
I shall not be greatly moved.
Psalm 62:2


Monday, November 11, 2013

Honor Your Veterans With This Banner

Happy Veteran's Day to all who served.
I appreciate every moment you dedicated to our country.
I have several family members who have served, so I came up with a way to honor them on this day.

A veteran's banner.
I used the word "Honor" and displayed photos of loved ones who were in the military.


If you like this and want to make one, here's what you need to do.
Cut out five pieces of pattern paper measuring 2 3/4"x 4".
Cut out five pieces of coordinating cardstock measuring 3"x 4 1/4"


Adhere the pattern paper to the cardstock mats.


Apply the letters to the pattern paper.
If you have a Cricut, you can cut out your letters. If you don't, you can use large stickers or foam stamps and paint like I did.

You don't have to use the word "Honor."
You could go with "Serve" or "Service" or whatever you like.

Punch holes in the top corners of the letter cards. String them onto a piece of twine leaving space in between each letter.


Hang photos in between the letters.
I used 1" clothespins.
You could also punch holes in the photos and hang them like the letter cards.


Tie red and blue ribbons at each end of the banner.


Such a nice way to honor our veterans, isn't it?

Thanks for stopping by and God bless.

The Lord is your keeper
Psalm 121:5

This post is linked to Craft-O-Maniac, I Heart Naptime, and The Dedicated House

Friday, November 8, 2013

Veteran's Day Patriotic Candle DIY

Veteran's Day is up and coming, and I've been feeling a little patriotic, so I thought it would be fun to do a red, white, and blue project.


Hence these patriotic candles.
I thought they'd be nice to set out when we eat dinner on Monday night.
My hubby and I will tell our kids about all our family members who have served our country.


If you'd like to make some, here's what you'll need:
one piece of 12"x 12" patriotic scrapbook paper
three short pillar candles (mine are about 2 3/4" tall)
Mod Podge
foam brush
paper trimmer
ruler


First measure the height of the candle. Then trim a strip of paper to that height.


Next, wrap the paper around the candle and make a mark where you want to cut it.
Allow a little bit of room for it to overlap.
After cutting it to the correct length, use the foam brush to paint the back of the paper with Mod Podge. Moving quickly before the glue dries, adhere the paper to the candle.
I started at one end, then carefully pressed the paper to the candle as I spun it around.
Roll it around in your hands a few times to make sure the paper adheres.
Repeat with the rest of your candles.


Easy-peasy!
If you'd like another Veteran's Day project idea, stop back by on Monday.

Thanks for stopping by and God bless.

When the righteous rejoice, there is great glory.
Proverbs 28:12

This post is linked to Funky Junk, Cheerios and Lattes, Today's Creative Blog and My Repurposed Life.