Showing posts with label gift wrapping. Show all posts

Friday, December 11, 2015

Let's Wrap It Up! Fun Gift Wrapping Ideas

I've been so inspired by different gift wrapping that I've seen lately.
I just had to give some of those ideas a try. 


I bought a roll of masking paper in the paint section at Walmart.
It's a bit lighter than kraft paper and worked great as wrapping paper.
I just added some twine and a candy cane to this gift.

I always think tickets make cute tags.


This one is wrapped in a map (that I picked up at a thrift store).
I used a little twine and a cute green price tag (picked a box of those up at the thrift store, too).
I stamped some festive words on regular clothespins to add some charm.


This one has a wide band of holiday ribbon which I taped at the back.
Then I used a short piece of red twine to tie on a tag and a bell.
Looks cute and sounds cute.


I got a pack of snowflake decorations at the dollar store 
and placed one on this gift before tying it with Baker's twine.

Don't you just love Baker's twine?!?


Yep, that's newspaper on this one.
The ribbon really dresses it up.


Guess what these circles are. . .
Cupcake wrappers!
I used a regular size and a mini one.
I adhered them with double sided tape before tying the gift with Baker's twine.


This one was super simple.
Sheet music with a mini ornament and a ticket as a tag.


This one is one of my favorites.
I love doilies and thought one would look cute on the brown background.
I used a glue stick to adhere the doily.
Then I wrapped it with green twine.


This final idea is crazy easy.
It's a wrap for a glass bottle. Mine is a bottle of sparkling grape juice.
I cut off the sleeve of an old sweater so I ended up with a piece not quite as long as the bottle.
Then I slid the wrist to the bottom of the bottle.
I rolled a little bit of the top portion down and added a ribbon.
If you use a printed sweater, you could skip the ribbon.
Isn't that too cute?
Notice that all these ideas are not only simple, but very frugal too!
Doesn't this make you want to wrap your gifts?

Thanks for stopping by and God bless.

God is our refuge and strength, 
a very present help in trouble.
Psalm 46:1

Friday, December 27, 2013

Making and Wrapping Bulk Christmas Gifts

This is the time of year that I try to come up with gift ideas that I can make in bulk. 
I have 18 friends at church and 13 co-workers to whom I give gifts and that can get pretty expensive! To keep the costs down, I try to give handmade gifts.
 
 
Something else that adds up is the wrapping.
This year I used white paper bags, mailing labels, and decorative tape to make my own gift bags.

 
I cut off about the top 3 1/2" of the bag, then folded the top down and sealed it closed with one or two pieces of decorative tape.
Instead of regular gift tags, I used some old mailing labels.

 
Kinda cute and unique, huh?
Can't beat the price of these!
 
 
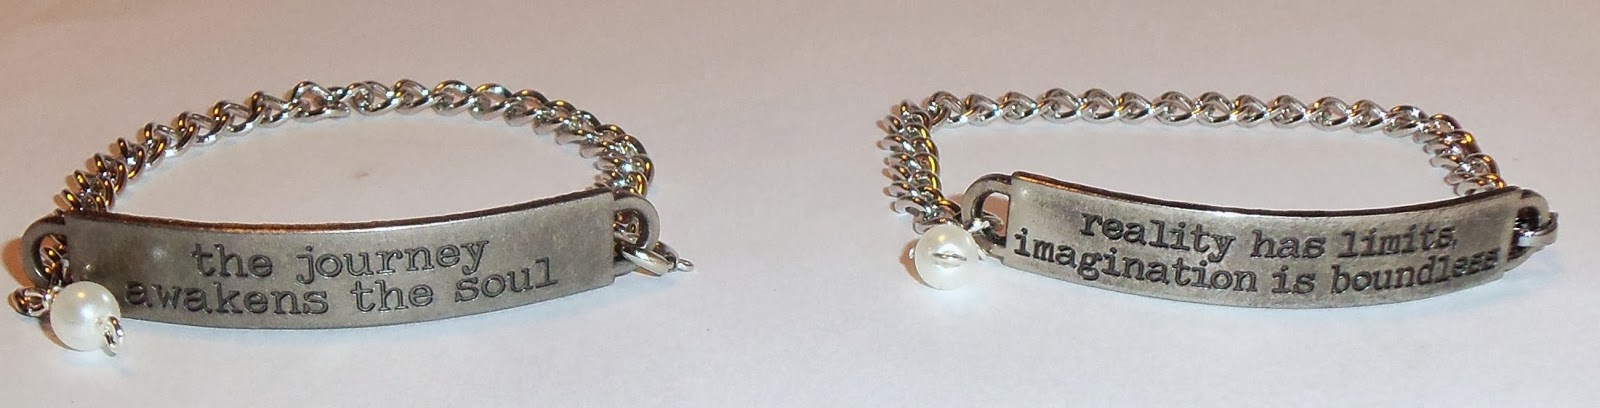
My co-workers received a bracelet with a quote.
 
My hubby curved the quote plaques for me. Then I attached a chain and clasp.

 
I bought the Tim Holtz quote charms at Hobby Lobby.
They're regularly $7.99 for a set of 12, but I used my 40% off coupon on two packs.
I also bought a roll of chain for 40% off of $11.99.
I already had the pearls and clasps.
Each bracelet cost around $1 and I have lots of chain and quote plaques left over
to make additional bracelets.
 
 
For the gifts for my church friends, I made ornaments.
I used burlap and sewed small birds.
Some have cotton wings with a word stamped on them.

 
And some have small pieces of vintage doilies for wings.

 
Over the years, I've chosen a  few different projects that could be done in bulk and given as gifts.
 
If you have any ideas for bulk Christmas gifts, please leave me a comment!
I'm always up for good ideas:)
 
Thanks for stopping by and God bless.
 
Praise the Lord! For it is good to sing praises to our God
Psalm 147:1
 

Wednesday, January 2, 2013

So, what do you do with all those Christmas cards?

     Well, I've got a couple of ideas. . .

 
The first is to bind them together in a book.

 
For this one, I simply cut two pieces of cardstock that measured the same size as the largest card. Then I adhered different pattern papers on the front to give it a quilted look. I punched a hole at the top left corner of the covers and all the cards and bound them with a ring. Then I tied a little bow to the ring.

 
For this book, I printed off a cover from here. This was the easiest booklet- after printing the cover, I just had to punch holes and bind the cards with two rings. I finished it off by tying a few strands of ribbon to the rings.

 
For this year's cards, I cut the covers off of a Christmas storybook. Then I punched holes in the cover and cards and tied them together with ribbon and twine. The last thing I did was add a title to the cover.

 
If you decide to make your own, all you have to do is decide on a cover, punch holes through the cards, bind them, and, most importantly, make sure you add the year to the cover.
 
Now, every Christmas, I can pull these out and put them on the coffee table and reflect about friends and family.

 
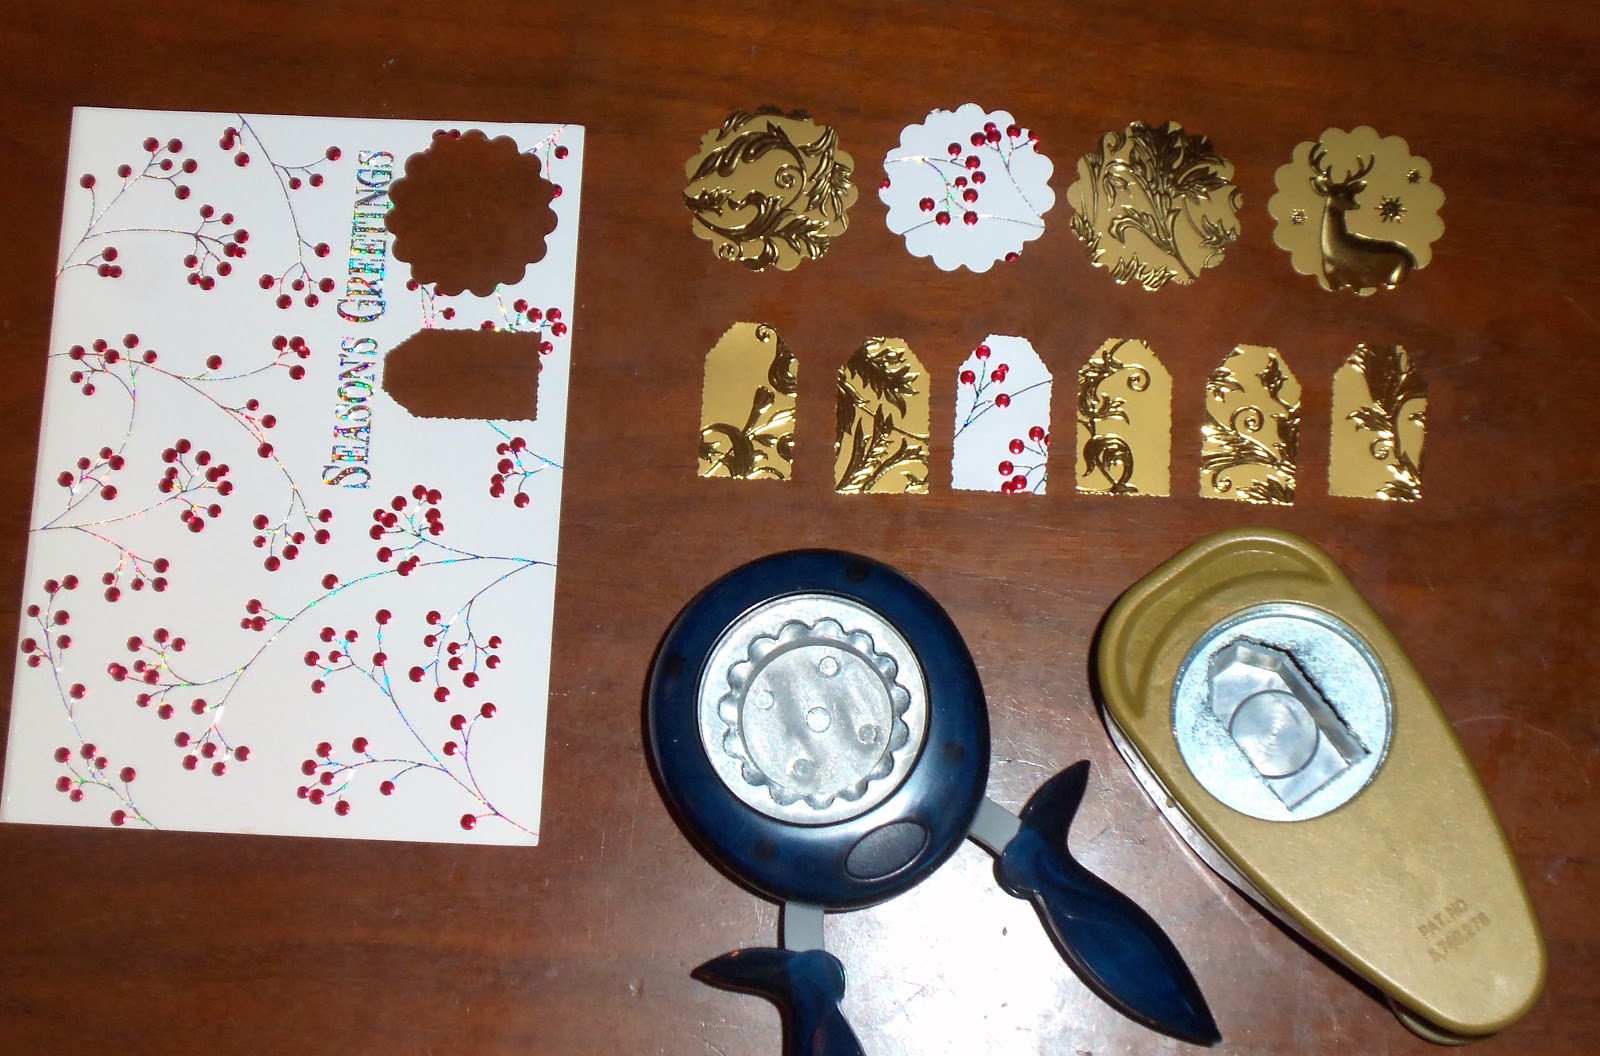
Another idea for using up those Christmas cards is to cut them up into tags to use when wrapping next year's gifts.
 

Just punch the front of the card.
I suggest you hold the punch upside down so you can see exactly what you're cutting.

 
If you don't have any punches that look like tags, use your paper trimmer and cut rectangles that measure 2" x 3" and cut off the top two corners. Voila! Now you can write on the backs.
 
 
And, of course, you can make a layout with a Christmas photo card.
 
 
To make a layout like this, you'll need:
one 12"x12" piece of Christmas pattern paper
one piece of coordinating 8 1/2" x 11" pattern paper
two pieces of coordinating 8 1/2"x 11" cardstock
journaling card (an index card would work for this)
letter stickers for the title
adhesive
paper trimmer
Christmas photo card

 
Trim the smaller pattern paper to 7.5" x 9.5". Mat it on one piece of cardstock leaving a 1/8" border.

 
Adhere it to the 12"x12" pattern paper about 1" from the right edge.

 
With the remaining cardstock, trim 4 strips that measure 1/4" x 11". These will not stretch entirely around the pattern paper. Instead adhere two so they meet at the upper left corner and two so they meet at the lower right corner.

 
Now with the other color cardstock, trim 4 strips measuring 1/4" x 10 1/2". Adhere two strips so they meet at the upper left corner and two strips so they meet at the lower right corner.

 
Now mat your photo card on cardstock leaving a 1/4" border and adhere it to the center of the smaller pattern paper.

 
Place your journaling card overlapping the lower left corner of the photo. Place your title across the top of the journaling card.
TA-DA! A layout finished so quickly using a Christmas photo card.
 
How cute would this be using all the photo cards you get in a year?
 
You could also use your own photo cards and make an album showcasing year after year of photo cards. How fun would that be to look through? It would make a great gift for grandparents!
 
 Do you have any other ideas for using Christmas cards?
 
Thanks for stopping by and God bless.


Commit to the Lord whatever you do, and he will establish your plans.
Proverbs 16:3


     This post is linked to Embracing Change, Shabby Creek Cottage, and My Girlish Whims.


Monday, June 18, 2012

Easy Card Idea

     Here's an idea for a card if you need to make a whole lot at one time.
     I had to help make gift card holders for the dads at our church for Father's Day, so I wanted something that would be quick, cheap, and easy (in case you don't read regularly, that's how most of my projects are. I'm always looking for frugal ways to use stuff. I recently told my husband that if we had more money, I may not be quite as creative. He responded with a smile and said, "You're welcome!") .

     All you need is some paper bags- lunch bag size. Print off a poem that will fit on half of the sack.
      Then choose some "manly" paper for the background. For this card, I used an old comic book.
      The flap of the sack needs to be on the inside to act as a pocket to hold the gift card. Then you can print off your sentiment and adhere it to the front of the flap. A little more background paper really finishes it off.
      I used an old map for this set of cards. I love maps and will try and fit them into almost any project. Being such an avid fan of maps, one would think I would be better geographically than I am.:)
      See how the gift cards just fit right in the flap.
      For these cards, I had an old "How-to fix things" encyclopedia from the fifties. I love how the old font and photos give a vintage feel.


     I whipped up 21 of these puppies while watching Despicable Me with my boys. Quick and easy!
While I was at it, I made an extra one for my dad. It just didn't feel right making a card for other dads, but not for my own dad:)

     This would be great to do for Mother's day- using sheet music, old patterns, or old book pages. They would also be great for Teacher Appreciation going with a school theme. Why stop there? They'd be great for Christmas, birthdays, graduations. . . any time that you're going to give a gift card.

     If you like using paper sacks, you could look at this post for incorporating paper sacks in scrapbooking.

     Thank you for stopping by and God bless.

And you will seek Me and find Me when you search Me with all your heart.
Jeremiah 29:13

     This post is linked to Brassy Apple, Between Naps on the PorchMaking the World Cuter, and Craft-O-Maniac.
Tip Junkie handmade projects

Friday, May 11, 2012

Gift Wrapping Ideas

          Since we started the week off with gift ideas, I thought it would be fitting to end the week with gift wrapping ideas.

For this gift, I wrapped the jewelry box with a piece of sheet music and used a ticket as the tag (I wrote "To" and "From" on the back of the ticket). With a little bit of tulle, it looks pretty cute!

I used an old map and some twine to wrap this gift. This is how I wrap almost all gifts lately. I love the look of maps and would be so excited to receive a present wrapped in one!
(Also, I get maps for a dime a piece which is way less than the price of wrapping paper!)


I sent these teacher gifts to school wrapped in a pages torn from an old school book. Once again, I used tickets as tags.  
      The maps, sheet music, and old books were all purchased at the thrift store. So not only are they unique wrappings, but extremely frugal as well. Other items that you could use as gift wrap are paper sacks, pages out of an old dictionary, and even old patterns (just double or triple the layers).
     I would love to hear any other unique gift wrapping ideas if you'd like to share.
     Thanks for stopping by and God bless!


toomuchtime


Tuesday, September 28, 2010

Gift wrapping idea

The boys were invited to a couple of birthday parties this month, and even though I have 2 boys, I didn't have any boy-themed wrapping paper. So I grabbed an old map (which I picked up at the thrift store for $.10) and used it for wrapping paper. Then I finished it off with some twine and an aged manilla tag. Voila!
I would be tickled pink to get a gift like this- and I'd probably very carefully take the map off so I could use it for something else:)